The cooling system in a vehicle plays a pivotal role in maintaining optimal engine temperature, thereby ensuring efficient performance and longevity. When air becomes trapped within this system, it can lead to a myriad of complications, including overheating, reduced coolant efficiency, and potential engine damage. Air pockets can obstruct the flow of coolant, resulting in hot spots within the engine that may cause severe thermal stress. Therefore, bleeding air from the cooling system is not merely a maintenance task; it is an essential procedure that safeguards the integrity of your vehicle’s engine.
Moreover, the presence of air in the cooling system can compromise the effectiveness of the coolant itself. Coolant is designed to absorb heat and dissipate it through the radiator; however, when air is present, it disrupts this process. This inefficiency can lead to increased engine temperatures and, ultimately, catastrophic failure if left unaddressed. Regularly bleeding air from the cooling system is crucial for ensuring that the coolant circulates freely and maintains its intended function.
If you’re looking to maintain your vehicle’s cooling system effectively, it’s essential to know how to bleed air from it to prevent overheating. For a comprehensive guide on this process, you can refer to a related article that provides step-by-step instructions and tips. Check it out here: How to Bleed Air from a Car Cooling System.
Identifying Signs of Air Trapped in the Cooling System
Recognizing the symptoms of air trapped in the cooling system is vital for timely intervention. One of the most common indicators is an erratic temperature gauge reading. If the gauge fluctuates unexpectedly or consistently shows higher temperatures than normal, it may signal that air pockets are obstructing coolant flow. Additionally, you may notice unusual noises emanating from the engine bay, such as gurgling or bubbling sounds, which can indicate that coolant is struggling to circulate properly due to trapped air.
Another telltale sign is the presence of steam or coolant leaks around hoses or connections. If you observe coolant pooling beneath your vehicle or steam rising from under the hood, it could be a result of overheating caused by inadequate coolant circulation. Furthermore, if your vehicle’s heater is blowing cold air despite the engine being warm, this could also suggest that air has infiltrated the heater core, preventing proper heating. Addressing these symptoms promptly can prevent further complications and ensure your vehicle operates efficiently.
Preparing Your Vehicle and Tools for the Bleeding Process

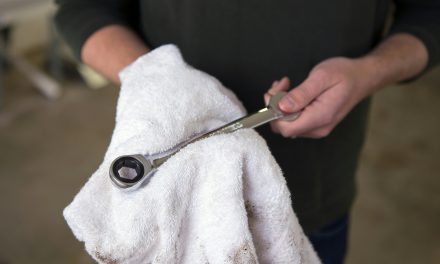
Before embarking on the process of bleeding air from your cooling system, it is essential to prepare both your vehicle and the necessary tools. Begin by ensuring that your vehicle is parked on a level surface and that the engine is cool to avoid burns or injuries during the procedure. Gather essential tools such as a radiator cap removal tool, a funnel, a clean cloth, and safety goggles to protect your eyes from any potential coolant splashes.
Additionally, having a suitable coolant mixture on hand is crucial for topping up after bleeding. It is advisable to use a manufacturer-recommended coolant type to ensure compatibility with your vehicle’s cooling system. Familiarize yourself with your vehicle’s owner manual to locate specific instructions regarding the cooling system and any unique requirements for your model. Proper preparation will streamline the bleeding process and minimize the risk of complications.
Locating the Bleed Valve or Screw on Your Cooling System

Identifying the bleed valve or screw within your cooling system is a critical step in effectively removing trapped air. Typically, this valve is located at high points within the cooling system, such as near the thermostat housing or on top of the radiator. In some vehicles, it may be integrated into the radiator itself or positioned along the upper radiator hose. Consult your vehicle’s service manual for precise locations and diagrams that can assist in locating this component.
Once you have identified the bleed valve or screw, inspect it for any signs of corrosion or damage that could impede its functionality. Ensure that you have the appropriate tools ready to open and close this valve securely. A well-maintained bleed valve will facilitate efficient air removal and contribute to optimal cooling system performance.
If you’re looking to maintain your vehicle’s cooling system, understanding how to bleed air from it is essential for optimal performance. Properly bleeding the system can prevent overheating and ensure that your engine runs smoothly. For more insights on related maintenance issues, you might find this article on water in the basement after heavy rain helpful, as it discusses the importance of addressing fluid issues in various systems.
Step-by-Step Guide to Bleeding Air Using the Radiator Cap Method
The radiator cap method is one of the most straightforward techniques for bleeding air from your cooling system. Begin by ensuring that your engine is cool and remove the radiator cap carefully to avoid any pressurized coolant spray. With the cap off, start your engine and allow it to idle. As the engine warms up, observe the coolant level in the radiator; it should begin to rise as air escapes.
While monitoring the coolant level, periodically rev the engine slightly to increase circulation within the cooling system. This action helps dislodge any trapped air bubbles that may be present. If you notice coolant spilling over from the radiator neck, this indicates that air is being expelled effectively. Once you observe a steady stream of coolant without bubbles, replace the radiator cap securely while ensuring that no air remains trapped.
How to Use the Bleed Screw to Remove Air Effectively
Using the bleed screw method can be particularly effective for vehicles equipped with this feature. Begin by locating the bleed screw as previously discussed and ensure that your engine is cool before proceeding. With a wrench or screwdriver, carefully loosen the bleed screw until you hear a hissing sound—this indicates that trapped air is escaping.
As air continues to escape, you may notice coolant beginning to seep from around the bleed screw. Allow this process to continue until a steady stream of coolant flows without any bubbles present. Once you have confirmed that all trapped air has been released, tighten the bleed screw securely to prevent any leaks. This method ensures that air pockets are effectively removed from critical areas within your cooling system.
Utilizing the Heater Core to Help Expel Air Bubbles
The heater core can serve as an additional tool in expelling trapped air from your cooling system. To utilize this component effectively, start by ensuring that your vehicle’s heater is set to maximum heat and fan speed. This setting allows coolant to flow through the heater core more effectively, helping to dislodge any air pockets present.
With the heater activated, monitor both the temperature gauge and coolant levels in the radiator or reservoir. As you drive or idle with the heater running, any trapped air should gradually work its way out through the heater core and back into the radiator. This method not only aids in bleeding air but also ensures that your vehicle’s heating system operates efficiently.
Running the Engine to Circulate Coolant and Release Trapped Air
Once you have completed initial bleeding procedures using either method, running your engine can further assist in circulating coolant and releasing any remaining trapped air. Start by ensuring that your radiator cap is securely fastened before starting your engine. Allow it to idle for several minutes while monitoring temperature gauges closely.
As your engine runs, periodically check for any fluctuations in temperature or unusual noises that may indicate persistent air pockets. If necessary, repeat previous bleeding methods while keeping an eye on coolant levels in both the radiator and reservoir tank. This step ensures that all areas of your cooling system are adequately purged of air.
Checking Coolant Levels and Topping Up After Bleeding
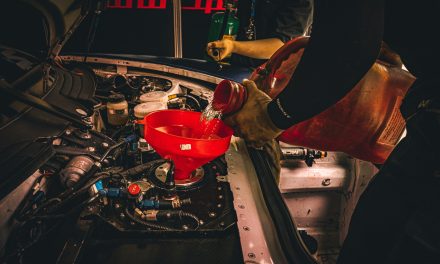
After successfully bleeding air from your cooling system, it is crucial to check coolant levels thoroughly. Inspect both the radiator and overflow reservoir for adequate fluid levels; if necessary, top up with manufacturer-recommended coolant until reaching optimal levels. This step ensures that your cooling system remains fully operational and capable of dissipating heat effectively.
Additionally, inspect for any leaks around hoses or connections after completing this process. If you notice any signs of leakage or persistent overheating issues despite bleeding efforts, further investigation may be warranted to identify underlying problems within your cooling system.
Tips for Preventing Air from Entering the Cooling System in the Future
Preventing air from infiltrating your cooling system requires proactive measures during routine maintenance and repairs. One effective strategy involves regularly inspecting hoses and connections for wear or damage that could lead to leaks—addressing these issues promptly can minimize air entry points.
Furthermore, always ensure proper coolant levels are maintained during routine checks; low coolant levels can create vacuum conditions that draw in air when refilling. When performing maintenance tasks such as replacing hoses or water pumps, take care to follow manufacturer guidelines regarding bleeding procedures to ensure optimal performance.
When to Seek Professional Help for Persistent Cooling System Air Issues
While many vehicle owners can successfully bleed their cooling systems independently, certain situations warrant professional assistance. If you encounter persistent overheating issues despite following recommended bleeding procedures or if you notice significant coolant loss without visible leaks, it may indicate underlying problems such as a faulty head gasket or water pump failure.
Additionally, if you are uncomfortable performing these procedures yourself or lack access to necessary tools and equipment, seeking help from a qualified mechanic can provide peace of mind and ensure thorough diagnosis and repair of any cooling system issues.
In summary, understanding how to effectively bleed air from your vehicle’s cooling system is essential for maintaining optimal engine performance and preventing overheating issues. By recognizing signs of trapped air, preparing adequately for bleeding procedures, and utilizing various methods such as radiator cap removal and bleed screws, vehicle owners can ensure their cooling systems operate efficiently. Regular maintenance practices will help prevent future complications while knowing when to seek professional assistance can save time and resources in addressing persistent issues.
FAQs
What is the purpose of bleeding air from a car cooling system?
Bleeding air from a car cooling system is essential to remove trapped air pockets that can cause overheating, reduce cooling efficiency, and lead to potential engine damage. Air in the cooling system can disrupt the flow of coolant, preventing it from effectively regulating engine temperature.
How do I know if my car’s cooling system needs to be bled?
Signs that your car’s cooling system may need to be bled include fluctuating temperature gauges, overheating engine, coolant leaks, or the presence of air bubbles in the coolant reservoir. Additionally, if you hear gurgling noises from the radiator or heater core, it may indicate trapped air.
What tools do I need to bleed air from the cooling system?
To bleed air from a car cooling system, you typically need a few basic tools: a radiator cap wrench or pliers, a funnel, and possibly a hose for easier coolant filling. Some vehicles may also require a specialized vacuum tool for more efficient bleeding.
Can I bleed the cooling system myself, or should I take it to a mechanic?
Many car owners can bleed the cooling system themselves with the right tools and instructions. However, if you are unsure or uncomfortable performing the task, or if your vehicle has a complex cooling system, it may be best to consult a mechanic for assistance.
What are the steps to properly bleed air from a car cooling system?
To properly bleed air from a car cooling system, follow these steps: 1) Ensure the engine is cool and remove the radiator cap. 2) Fill the radiator with coolant and replace the cap. 3) Start the engine and let it idle until it reaches operating temperature. 4) Turn the heater on to the maximum setting. 5) Check for air bubbles in the coolant reservoir and add coolant as necessary. 6) Once the bubbles stop, turn off the engine and allow it to cool before checking the coolant level again.