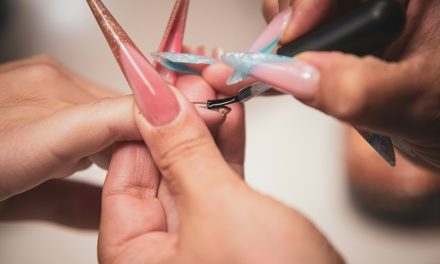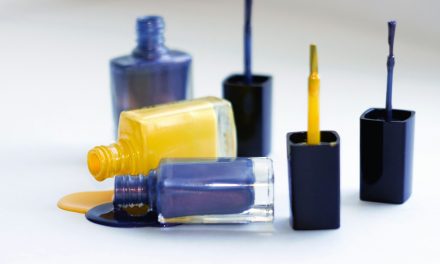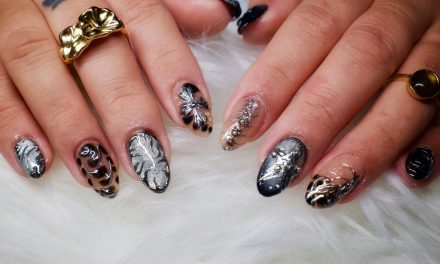
Before embarking on the journey of a flawless gel manicure, it is imperative to assemble all essential tools and products. A well-prepared workstation not only enhances efficiency but also ensures that the process is seamless and enjoyable. The primary tools required include a nail file, cuticle pusher, nail clippers, buffer, lint-free wipes, and a UV/LED lamp. Additionally, high-quality gel polish in your desired color, a base coat, and a top coat are crucial for achieving a professional finish.
Moreover, it is advisable to have a nail prep solution on hand, which aids in dehydratation and prepares the nail surface for optimal adhesion. Cotton balls or pads are also necessary for removing any existing polish or oils from the nails. Having a small bowl of warm water can be beneficial for soaking the nails, while a pair of scissors may be needed for trimming hangnails or excess cuticles. By gathering these tools beforehand, you can streamline the process and focus on creating beautiful nails.
When preparing natural nails for gel polish, it’s essential to follow a proper regimen to ensure the best results and longevity of the manicure. For a comprehensive guide on this topic, you can refer to the article that details the necessary steps and tips for nail preparation. Additionally, if you’re interested in exploring how to store food items effectively, you might find this article on rice storage helpful: How Long Does Rice Last in the Pantry: White vs. Brown Rice.
Remove Any Existing Nail Polish Completely
The first step in achieving a pristine gel manicure is to ensure that any existing nail polish is thoroughly removed. This process is crucial as residual polish can interfere with the adhesion of the gel products. Begin by saturating a cotton ball or pad with an acetone-based nail polish remover, which is highly effective in dissolving various types of polish. Press the saturated cotton onto the nail for several seconds to allow the remover to penetrate and break down the polish.
Once the polish has softened, gently swipe the cotton ball towards the tip of the nail to remove it completely. Repeat this process until all nails are free from any color or residue. It is essential to pay attention to the edges and corners of the nails, as remnants can lead to uneven application of gel polish. After removing the polish, wash your hands thoroughly to eliminate any traces of acetone, which can be drying to the skin.
Trim and Shape Your Nails to Desired Length

With clean nails ready for transformation, the next step involves trimming and shaping them to your desired length and style. Using a pair of nail clippers, carefully trim each nail to your preferred length, ensuring that you maintain a consistent shape across all fingers. It is advisable to avoid cutting too close to the nail bed to prevent discomfort or injury.
Once trimmed, utilize a nail file to shape the edges of each nail. Common shapes include square, oval, almond, and stiletto; choose one that complements your personal style and hand shape. Filing should be done in one direction rather than a back-and-forth motion to minimize splitting or damage to the nail. After achieving your desired shape, take a moment to inspect each nail for uniformity and smoothness.
Soak Nails to Soften Cuticles

To facilitate easier cuticle management, soaking your nails is an essential step that should not be overlooked. Fill a small bowl with warm water and optionally add a few drops of cuticle oil or gentle soap to enhance the softening effect. Submerge your fingers in the warm water for approximately 5-10 minutes; this will help loosen any hardened cuticle tissue and prepare them for gentle manipulation.
After soaking, gently pat your hands dry with a clean towel. The warmth from the water will have made your cuticles more pliable, allowing for easier pushing back and trimming. This step not only promotes healthier cuticles but also contributes to an overall polished appearance once the gel manicure is complete.
Preparing natural nails for gel polish is essential for achieving a long-lasting and beautiful manicure. To ensure that your nails are in the best condition, it’s important to follow a few key steps, such as cleaning, buffing, and moisturizing. For those looking to enhance their overall beauty routine, you might find it helpful to read about organizing your space effectively. Check out this article on how to organize a messy house fast and effectively, which can create a more serene environment for your nail care sessions.
Gently Push Back and Trim Cuticles
With softened cuticles, it is time to gently push them back using a cuticle pusher. This tool can be made of metal or plastic; whichever you choose, ensure it has a smooth edge to avoid damaging the nail bed. Position the pusher at the base of the cuticle and apply gentle pressure to push it back towards the nail matrix. This action exposes more of the nail plate and creates a clean canvas for gel application.
After pushing back the cuticles, inspect them for any excess skin or hangnails that may need trimming. Using sanitized cuticle scissors or nippers, carefully remove any unwanted skin without cutting too deeply into the cuticle area. This meticulous attention to detail will enhance the overall appearance of your manicure and prevent potential lifting of the gel polish.
Buff the Nail Surface for Smoothness
To achieve optimal adhesion of gel polish, buffing the nail surface is an essential step that should not be neglected. Using a fine-grit buffer, gently buff each nail in a back-and-forth motion until the surface appears smooth and slightly matte. This process removes any shine from the natural nail and creates micro-abrasions that enhance bonding with gel products.
Be cautious not to over-buff, as excessive filing can weaken the nails and lead to breakage. A light touch is sufficient; focus on ensuring that each nail has an even texture without visible ridges or imperfections. Once buffing is complete, wipe each nail with a lint-free wipe soaked in alcohol or nail prep solution to remove any dust particles generated during this process.
Clean Nails to Remove Dust and Oils
Following buffing, it is crucial to clean each nail thoroughly to eliminate any dust or oils that may hinder gel adhesion. Use lint-free wipes soaked in alcohol or a specialized nail cleanser to wipe down each nail surface meticulously. This step ensures that no residue remains that could compromise the integrity of your gel manicure.
Cleaning not only prepares the nails for product application but also enhances their overall appearance by providing a pristine canvas for color application. Pay special attention to the edges and underside of each nail, as these areas can often harbor oils or debris that may affect adhesion.
Dehydrate Nails Using Nail Prep Solution
Dehydrating the nails is an important step that helps ensure long-lasting results with gel polish application. A nail prep solution typically contains ingredients designed to remove moisture from the nail surface while also promoting adhesion. Apply a small amount of this solution onto each nail using a lint-free wipe or brush applicator.
Allow the solution to dry completely before proceeding with further steps; this usually takes just a few moments. Proper dehydration minimizes the risk of lifting or chipping once the gel polish is applied, ultimately contributing to a more durable manicure that can withstand daily wear and tear.
Apply a Thin Base Coat for Better Adhesion
The application of a thin base coat is critical in establishing a strong foundation for your gel manicure. Using a brush applicator, apply a thin layer of base coat evenly across each nail, ensuring full coverage from cuticle to tip while avoiding contact with the skin or cuticles. A thin layer allows for better curing under UV/LED light and promotes optimal adhesion of subsequent gel layers.
It is essential not to overload the brush with product; instead, dip it lightly into the base coat bottle before applying. This technique prevents pooling at the edges and ensures an even finish. Once applied, inspect each nail for consistency before moving on to curing.
Cure the Base Coat Under UV/LED Lamp
Curing is an integral part of gel application that solidifies each layer under UV or LED light. Place your hands under the lamp according to manufacturer instructions; typically, curing times range from 30 seconds to 2 minutes depending on whether you are using UV or LED technology. During this time, ensure that all fingers are positioned correctly within the lamp’s range for even curing.
Once cured, gently remove your hands from under the lamp and check each nail for proper hardening; they should feel firm and no longer tacky. If any areas appear uncured or soft, return them under the lamp for additional time as needed.
Inspect Nails Before Applying Gel Polish for Flawless Results
Before proceeding with gel polish application, it is vital to conduct a thorough inspection of each nail for any imperfections or inconsistencies that may affect the final outcome. Look for areas where base coat may have pooled or where there are visible bubbles; these issues can lead to an uneven finish once color is applied.
If any imperfections are detected, consider lightly buffing those areas again before cleaning them with alcohol or prep solution once more. This final inspection ensures that you are starting with an impeccable foundation upon which to apply your chosen gel color.
In summary, achieving a flawless gel manicure requires meticulous attention to detail at every stage of preparation and application. From gathering necessary tools and removing existing polish to inspecting nails before applying color, each step plays a crucial role in ensuring long-lasting results. By following these guidelines diligently, you can create beautiful nails that not only look professional but also withstand daily wear with grace and elegance.
FAQ Section:
1. **How long does a gel manicure last?**
Gel manicures typically last between two to three weeks without chipping when applied correctly.
2. **Can I remove gel polish at home?**
Yes, you can remove gel polish at home using acetone-based remover; however, it’s recommended to soak nails in acetone wrapped in foil for effective removal.
3. **What should I do if my gel nails start lifting?**
If lifting occurs, avoid pulling at them as this can damage your natural nails; instead, consider visiting a professional for removal or repair.
4. **Is it safe to use UV lamps frequently?**
While UV exposure can pose risks over time, using LED lamps reduces exposure significantly; always apply sunscreen on hands before curing if concerned about UV exposure.
5. **Can I apply gel polish over acrylic nails?**
Yes, gel polish can be applied over acrylics; ensure proper preparation by cleaning and dehydrating before application.
6. **What are some common mistakes during gel application?**
Common mistakes include applying too thick layers of product, failing to cure properly, or neglecting cuticle care which can lead to lifting.
7. **How often should I take breaks between gel manicures?**
It’s advisable to take breaks every few months to allow your natural nails time to recover from potential damage caused by frequent applications.
8. **What are some signs of allergic reactions to gel products?**
Symptoms may include redness, swelling around nails, itching, or blistering; discontinue use immediately if these occur and consult a dermatologist.
9. **Can I use regular nail polish over gel?**
While possible, it’s not recommended as regular polish does not adhere well over cured gel; if desired, use gel top coats designed for compatibility.
10. **What should I do if I experience pain during application?**
If you feel pain during any part of the process, stop immediately; this could indicate improper technique or underlying issues with your nails.
In conclusion, following these detailed steps will help you achieve stunning results with your gel manicure while minimizing potential issues associated with improper application techniques. By investing time in preparation and adhering closely to best practices throughout each phase of application, you can enjoy beautiful nails that reflect both style and professionalism.
FAQs
What are the first steps to prepare natural nails for gel polish?
To prepare natural nails for gel polish, start by removing any existing nail polish and cleaning your nails thoroughly. Use a gentle nail polish remover and wash your hands with soap and water to eliminate any residue. Next, trim and shape your nails to your desired length and style using nail clippers and a file.
How do I properly buff my nails before applying gel polish?
Buffing your nails is essential for ensuring proper adhesion of the gel polish. Use a fine-grit buffer to gently buff the surface of each nail, focusing on removing any shine. Be careful not to over-buff, as this can weaken the nails. After buffing, wipe the nails with a lint-free wipe and a nail cleanser to remove any dust.
Should I push back my cuticles before applying gel polish?
Yes, pushing back your cuticles is an important step in preparing your nails for gel polish. Use a cuticle pusher or an orange stick to gently push back the cuticles without damaging the nail bed. This helps create a clean surface for the gel polish application and prevents lifting.
Is it necessary to use a base coat before applying gel polish?
Yes, using a base coat is crucial when applying gel polish. The base coat acts as a primer, helping the gel polish adhere better to the natural nail and providing a barrier that protects the nail from staining. Make sure to apply a thin layer of base coat and cure it under a UV or LED lamp as per the manufacturer’s instructions.
How can I ensure my nails are clean and free of oils before applying gel polish?
To ensure your nails are clean and free of oils, use a nail cleanser or rubbing alcohol on a lint-free wipe to wipe down each nail after buffing and pushing back the cuticles. This step removes any natural oils, dust, or debris, creating a clean surface for the gel polish application.