A leaky showerhead can be a frustrating nuisance, leading to wasted water and increased utility bills. Understanding the underlying cause of the leak is crucial for effective resolution. Common culprits include worn-out washers, corroded O-rings, or mineral buildup that can impede proper sealing. In many cases, the leak may originate from the connection between the showerhead and the arm, or it could be due to internal components failing over time.
To accurately diagnose the issue, observe the showerhead while it is in use. Is water dripping continuously, or is it a slow, intermittent leak? A steady drip often indicates a problem with the washer or O-ring, while a more sporadic leak may suggest issues with the threading or mineral deposits. Identifying these symptoms will guide you in determining the appropriate course of action for repair.
Gathering the Necessary Tools and Materials
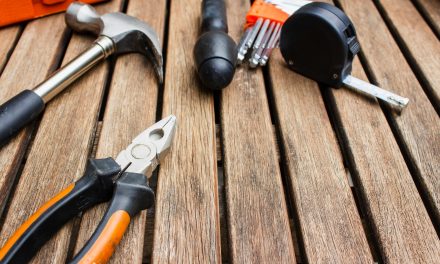
Before embarking on the repair process, it is essential to gather all necessary tools and materials to ensure a smooth and efficient operation. The primary tools required include an adjustable wrench, a pair of pliers, and a flathead screwdriver. Additionally, having a cloth or towel on hand can help manage any water that may escape during disassembly.
In terms of materials, you will need replacement washers and O-rings that are compatible with your specific showerhead model. Plumber’s tape is also crucial for ensuring a watertight seal upon reassembly. If mineral deposits are suspected to be a contributing factor to the leak, consider acquiring a descaling solution or vinegar for cleaning purposes. Having these items ready will streamline the repair process and minimize downtime.
Turning Off the Water Supply Safely

Before initiating any repair work on your showerhead, it is imperative to turn off the water supply to prevent unwanted flooding and ensure safety during the process. Locate the main water shut-off valve for your home, typically found in the basement or near the water meter. Turning this valve clockwise will halt the flow of water throughout your plumbing system.
If your shower has an individual shut-off valve, which is often located near the shower or tub, you can opt to use that instead. After shutting off the water supply, it is advisable to turn on the shower to relieve any remaining pressure in the pipes. This step will help prevent any unexpected sprays of water when you begin disassembling the showerhead.
Removing the Showerhead Carefully

With the water supply turned off, you can now proceed to remove the showerhead. Begin by using an adjustable wrench or pliers to grip the base of the showerhead where it connects to the arm. It is essential to apply gentle pressure to avoid damaging the fixture. If necessary, wrap a cloth around the showerhead to protect its finish from scratches.
Once you have a firm grip, turn the showerhead counterclockwise until it loosens and can be removed completely. Be cautious during this step, as residual water may still be present in the pipes. Place the removed showerhead in a safe location where it will not be damaged while you conduct repairs.
Cleaning the Showerhead and Removing Mineral Deposits
After successfully removing the showerhead, it is time to clean it thoroughly. Mineral deposits from hard water can accumulate over time, obstructing water flow and contributing to leaks. To effectively remove these deposits, submerge the showerhead in a solution of equal parts vinegar and water for approximately 30 minutes.
For stubborn deposits, use an old toothbrush or a soft-bristle brush to scrub away any remaining buildup gently. Pay special attention to any nozzles or spray holes that may be clogged. Rinsing the showerhead under warm water will help eliminate any residual cleaning solution and ensure that it is ready for reinstallation.
Inspecting the Washer and O-Ring for Damage
With the showerhead cleaned and ready for inspection, turn your attention to its internal components—the washer and O-ring. These parts are critical for creating a watertight seal when reattached. Carefully remove them from their respective grooves using a flathead screwdriver or your fingers.
Examine both components for signs of wear or damage. A washer that appears cracked, brittle, or flattened will likely need replacement. Similarly, an O-ring that shows signs of deterioration or has lost its elasticity will not provide an adequate seal. Identifying these issues early on will prevent future leaks and ensure optimal performance.
Replacing or Adjusting the Washer and O-Ring
If you have determined that either the washer or O-ring requires replacement, now is the time to install new components. Begin by selecting washers and O-rings that match the specifications of your existing parts. It is advisable to take the old components with you when purchasing replacements to ensure compatibility.
To install new parts, simply place them into their respective grooves within the showerhead assembly. Ensure that they fit snugly and are seated properly to create an effective seal when reattached. If adjustments are needed for existing components, such as repositioning a washer that has shifted out of place, do so carefully to avoid further damage.
Applying Plumber’s Tape to the Threads
Before reattaching your showerhead, applying plumber’s tape to the threads of the shower arm is essential for preventing leaks. This tape creates a barrier that enhances sealing capabilities and minimizes friction during installation. Begin wrapping plumber’s tape around the threads in a clockwise direction, ensuring that you cover all exposed areas without overlapping excessively.
Typically, two to three layers of tape are sufficient for achieving an effective seal. Be cautious not to apply too much tape, as this can hinder proper attachment of the showerhead. Once you have applied plumber’s tape adequately, you are ready to reattach your cleaned and inspected showerhead.
Reattaching the Showerhead Securely
With all preparations complete, it is time to reattach your showerhead securely. Align it with the threaded arm and gently twist it clockwise until it begins to tighten. Use your adjustable wrench or pliers to secure it further; however, take care not to overtighten, as this can lead to damage or cracking.
Once firmly attached, wipe away any excess plumber’s tape that may have been exposed during installation. This step ensures a clean appearance and prevents debris from accumulating around the connection point.
Testing for Leaks and Proper Water Flow
After reassembly is complete, it is crucial to test for leaks and ensure proper water flow before considering your repair finished. Begin by turning on the main water supply or individual shut-off valve slowly while observing for any signs of leakage around the newly attached showerhead.
Allow water to flow through for several minutes while monitoring both pressure and consistency of flow. If any leaks are detected during this process, turn off the water supply immediately and reassess your installation steps—checking for proper sealing of washers and O-rings as well as ensuring that plumber’s tape was applied correctly.
Preventative Maintenance Tips to Avoid Future Leaks
To prolong the life of your showerhead and prevent future leaks, consider implementing regular maintenance practices. Periodically inspect your showerhead for signs of mineral buildup or wear on washers and O-rings—addressing these issues promptly can save time and resources in the long run.
Additionally, consider installing a water softener if hard water is prevalent in your area; this can significantly reduce mineral deposits that contribute to leaks over time. Regular cleaning with vinegar can also help maintain optimal performance by preventing buildup before it becomes problematic.
In summary, addressing a leaky showerhead involves identifying its cause, gathering necessary tools, safely turning off water supply, removing and cleaning components, inspecting for damage, replacing parts as needed, applying plumber’s tape correctly, reattaching securely, testing for leaks, and implementing preventative measures for future maintenance. By following these steps diligently, homeowners can effectively manage leaks while ensuring their plumbing systems remain functional and efficient over time.
FAQs
What are common causes of a leaky showerhead?
Common causes of a leaky showerhead include worn-out washers or O-rings, mineral buildup from hard water, loose connections, or a damaged showerhead itself. Over time, these components can degrade, leading to leaks.
Can I fix a leaky showerhead without professional help?
Yes, many homeowners can fix a leaky showerhead without professional help by following simple DIY steps. This often involves tightening connections, replacing washers, or cleaning mineral deposits, which can be done with basic tools and materials.
What tools do I need to fix a leaky showerhead?
To fix a leaky showerhead, you typically need a wrench or pliers, a screwdriver, and possibly replacement washers or O-rings. Additionally, a cloth or tape may be useful to protect the finish of the showerhead and prevent damage during repairs.
How can I clean mineral buildup from my showerhead?
To clean mineral buildup, you can soak the showerhead in a solution of equal parts vinegar and water for several hours. After soaking, scrub the showerhead with an old toothbrush to remove any remaining deposits, then rinse thoroughly before reattaching it.
Is it necessary to replace the entire showerhead if it leaks?
No, it is not always necessary to replace the entire showerhead if it leaks. Many leaks can be fixed by replacing small components like washers or O-rings, or by cleaning the showerhead. Replacement should only be considered if the showerhead is severely damaged or beyond repair.