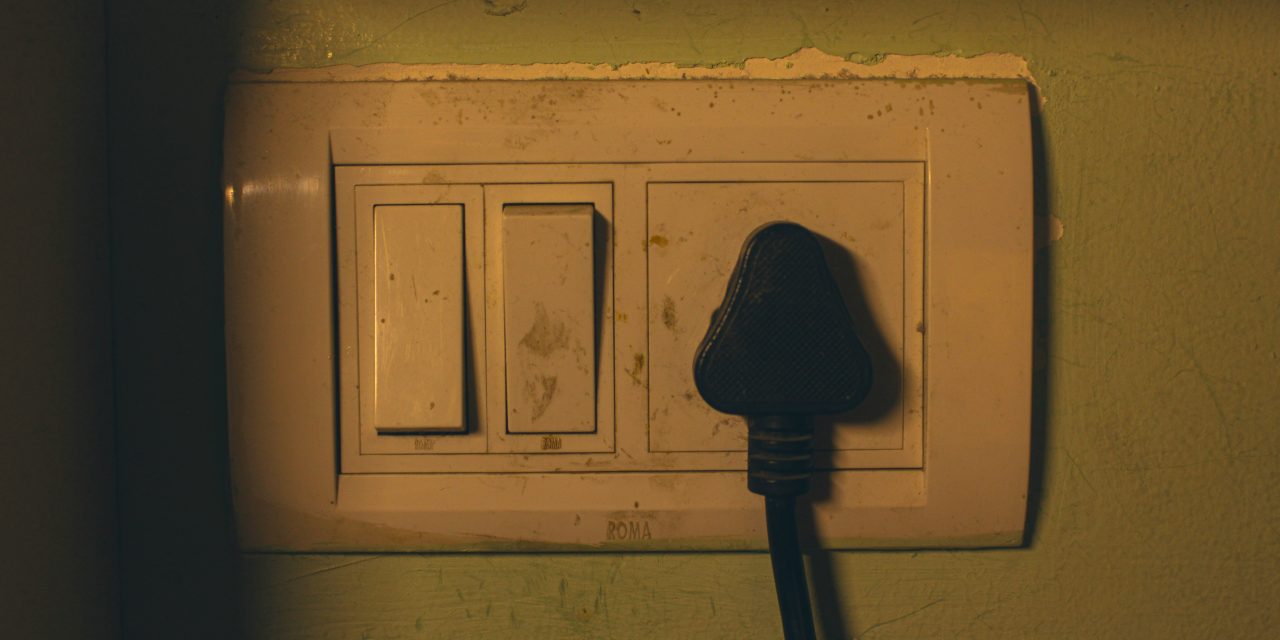
Light switches are fundamental components of electrical systems, serving as the primary interface between users and their lighting fixtures. At their core, light switches operate on a simple principle: they either complete or interrupt an electrical circuit. When the switch is in the “on” position, it allows electricity to flow through the circuit, illuminating the connected light fixture. Conversely, when the switch is “off,” it breaks the circuit, halting the flow of electricity and extinguishing the light.
The most common type of light switch is the single-pole switch, which controls a single light fixture from one location. More complex configurations include three-way switches, which allow control of a single light from two different locations, and dimmer switches, which enable users to adjust brightness levels. Understanding these basic functionalities is crucial for diagnosing issues that may arise with light switches, as it provides insight into how they interact with the overall electrical system.
Common Signs Your Light Switch Is Not Working
Identifying a malfunctioning light switch can often be straightforward if one knows what signs to look for. One of the most apparent indicators is the failure of the connected light fixture to illuminate when the switch is activated. This could be due to various reasons, including a burnt-out bulb or an internal fault within the switch itself. Additionally, if the switch feels unusually warm to the touch or emits a burning smell, these are critical warning signs that should not be ignored.
Another common symptom of a faulty light switch is a flickering light. This can occur intermittently and may indicate loose wiring connections or internal wear within the switch mechanism. In some cases, a switch may produce a buzzing sound when activated, suggesting that there is an electrical issue that requires immediate attention. Recognizing these signs early can prevent further complications and ensure safety within your electrical system.
Safety First: Turning Off Power Before Inspection

Before attempting any inspection or repair on a light switch, safety must be prioritized. The first step in ensuring personal safety is to turn off the power supply to the circuit associated with the light switch. This can typically be accomplished by locating the corresponding circuit breaker in the electrical panel and switching it to the “off” position. It is advisable to use a label or marker to identify which breaker controls which circuit for future reference.
Once the power is turned off, it is prudent to verify that there is no electrical current flowing through the switch. This can be done using a non-contact voltage tester, which will indicate whether voltage is present without requiring direct contact with live wires. Taking these precautions not only protects individuals from electric shock but also prevents potential damage to electrical components during inspection.
Checking the Light Bulb and Fixture

Before delving deeper into potential issues with the light switch itself, it is essential to check the light bulb and fixture for any faults. Start by inspecting the bulb; if it appears burnt out or damaged, replacing it may resolve the issue immediately. Ensure that you are using a compatible bulb type for your fixture, as using an incorrect wattage can lead to further complications.
Next, examine the light fixture for any visible signs of damage or corrosion. Loose connections within the fixture can also prevent proper operation. If necessary, remove the fixture cover and inspect the wiring connections for any signs of wear or disconnection. Addressing these issues can often restore functionality without needing to replace the switch itself.
Inspecting the Circuit Breaker and Fuse Box
If checking the bulb and fixture does not yield results, attention should turn to the circuit breaker and fuse box. A tripped breaker or blown fuse can disrupt power supply to specific circuits, including those controlling light switches. Inspecting these components involves looking for any breakers that are in the “off” position or fuses that appear burnt out.
To reset a tripped breaker, simply flip it back to the “on” position. If a fuse has blown, it will need to be replaced with one of the same amperage rating to ensure safety and functionality. Regular maintenance of circuit breakers and fuses can prevent future issues and ensure that your electrical system operates smoothly.
Testing the Light Switch for Electrical Continuity
Once preliminary checks have been completed, testing the light switch for electrical continuity becomes essential in diagnosing potential faults. This process involves using a multimeter set to measure resistance (ohms). With power turned off, remove the switch cover plate and unscrew the switch from its electrical box.
Attach one probe of the multimeter to one terminal of the switch and the other probe to the opposite terminal. When toggling the switch between “on” and “off,” continuity should be present only in the “on” position. If continuity is detected in both positions or none at all, this indicates that the switch may be faulty and requires replacement.
Identifying Loose or Damaged Wiring Connections
Loose or damaged wiring connections can significantly impact a light switch’s functionality. After removing the switch from its housing, inspect all wiring connections for signs of wear or disconnection. Look for frayed wires, burnt insulation, or corrosion at connection points, as these issues can lead to intermittent power supply or complete failure.
If loose connections are identified, they should be tightened securely using appropriate tools. For damaged wiring, it may be necessary to cut away affected sections and splice in new wire using wire connectors rated for electrical use. Ensuring that all connections are secure and intact is crucial for maintaining a safe and functional electrical system.
Recognizing Faulty or Worn-Out Switch Components
Over time, mechanical components within a light switch can wear out due to repeated use. Signs of wear may include difficulty toggling the switch or an audible click that sounds different than usual when activated. If internal components such as springs or contacts are damaged, replacing the entire switch may be necessary.
When selecting a replacement switch, consider factors such as amperage rating and compatibility with existing wiring configurations. It is advisable to choose high-quality switches from reputable manufacturers to ensure longevity and reliability in performance.
When to Use a Voltage Tester or Multimeter
A voltage tester or multimeter is an invaluable tool when diagnosing electrical issues related to light switches. These devices allow users to measure voltage levels and continuity within circuits safely. A voltage tester can quickly determine whether power is reaching a specific point in the circuit without requiring direct contact with live wires.
In contrast, a multimeter provides more comprehensive diagnostic capabilities by measuring voltage, current (amperage), and resistance (ohms). Utilizing these tools effectively can help pinpoint issues within both switches and associated wiring systems, facilitating more efficient repairs.
Temporary Solutions: Using a Replacement Switch
In situations where immediate repair is not feasible, utilizing a temporary replacement switch can provide a quick solution until permanent repairs can be made. Replacement switches are readily available at hardware stores and come in various styles and configurations.
To install a temporary replacement switch, ensure that power is turned off before removing the faulty switch from its housing. Connect wires to the new switch according to manufacturer instructions, ensuring secure connections before reassembling everything. While this solution may not address underlying issues permanently, it allows for continued use of lighting fixtures until more thorough repairs can be conducted.
When to Call a Professional Electrician
While many light switch issues can be resolved through DIY methods, certain situations warrant professional intervention. If there are persistent problems despite troubleshooting efforts or if there are signs of extensive electrical damage such as burning smells or sparking wires, it is crucial to contact a licensed electrician immediately.
Professional electricians possess specialized training and experience in handling complex electrical systems safely and efficiently. They can conduct thorough inspections, identify underlying issues that may not be visible during casual observation, and implement effective solutions that adhere to local building codes and safety regulations.
In summary, understanding how light switches operate is essential for diagnosing potential issues effectively. Recognizing common signs of malfunction allows homeowners to take proactive measures before problems escalate. Prioritizing safety during inspections ensures personal protection while troubleshooting various components such as bulbs, fixtures, circuit breakers, and wiring connections. Utilizing tools like voltage testers and multimeters aids in identifying faults accurately while temporary solutions provide immediate relief until professional assistance can be sought when necessary.
FAQs
What are common reasons for a light switch not working?
Common reasons for a light switch not working include a blown fuse, a tripped circuit breaker, faulty wiring, a defective switch, or a burned-out light bulb. It’s essential to check each of these components to identify the issue.
How can I tell if the light bulb is the problem?
To determine if the light bulb is the issue, first, replace the bulb with a new one or a working bulb from another fixture. If the light turns on, the original bulb was likely burned out. Additionally, inspect the bulb for any visible damage or blackening at the base.
What should I do if the circuit breaker is tripped?
If the circuit breaker is tripped, locate your electrical panel and reset the breaker by flipping it to the ‘off’ position and then back to ‘on.’ If it trips again immediately, there may be a more serious electrical issue that requires professional assistance.
How can I check if the switch itself is faulty?
To check if the switch is faulty, turn off the power to the switch at the circuit breaker, then remove the switch cover plate and unscrew the switch from the electrical box. Use a multimeter to test for continuity. If there is no continuity when the switch is toggled, it is likely defective and needs replacement.
When should I call a professional electrician?
You should call a professional electrician if you are uncomfortable working with electrical components, if you suspect faulty wiring, or if the problem persists after checking the light bulb, circuit breaker, and switch. Safety is paramount, and a licensed electrician can ensure the issue is resolved correctly.