Creating the perfect French manicure at home requires a well-organized workspace and a selection of essential tools and supplies. Begin by assembling the following items: nail polish remover, cotton balls or pads, a nail file, a buffer, cuticle oil, a base coat, white nail polish, sheer pink or nude polish, a top coat, and optional guides or tape for precision. Additionally, having a small brush or an old toothbrush can be beneficial for cleaning up any excess polish.
Ensure that your workspace is well-lit and free from distractions. A clean, flat surface will allow you to focus on the intricate details of your manicure. Having all your supplies within reach will streamline the process and minimize interruptions. This preparation phase is crucial as it sets the tone for a successful and enjoyable nail painting experience.
If you’re looking to elevate your at-home manicure skills, you might find it helpful to explore techniques for maintaining a clean and tidy workspace. A related article on how to clean baseboards and remove stubborn dirt buildup can provide useful tips for ensuring your nail area is spotless, which is essential for achieving that perfect French tip look. You can read more about it here: how to clean baseboards and remove stubborn dirt buildup.
Prepare Your Nails: Clean and Shape
Before applying any polish, it is imperative to prepare your nails adequately. Start by removing any existing nail polish using a quality nail polish remover. This step ensures that your nails are free from residue that could interfere with the adhesion of new polish. Once your nails are clean, proceed to shape them according to your preference. Whether you opt for a square, oval, or almond shape, use a nail file to achieve uniformity.
After shaping, gently buff the surface of each nail to create a smooth canvas for polish application. Buffing not only enhances the appearance of your nails but also helps the polish adhere better. Following this, apply cuticle oil to nourish the skin around your nails and promote healthy growth. This meticulous preparation will ensure that your French manicure looks polished and professional.
Apply a Base Coat for Protection

The application of a base coat is a critical step in achieving a flawless French manicure. A base coat serves multiple purposes: it protects your natural nails from staining, enhances the longevity of your manicure, and provides a smooth surface for color application. Choose a high-quality base coat that suits your nail type; some formulations are designed specifically for strengthening weak nails, while others focus on providing hydration.
Apply a thin layer of base coat evenly across each nail, ensuring complete coverage from cuticle to tip. Allow the base coat to dry thoroughly before proceeding to the next step. This drying time is essential as it prevents smudging and ensures that the subsequent layers adhere properly. A well-applied base coat can significantly extend the life of your manicure, making it an indispensable part of the process.
Choose the Right White Nail Polish

Selecting the right white nail polish is crucial for achieving that classic French tip look. Not all white polishes are created equal; some may appear streaky or sheer, while others provide full opacity in just one coat. Look for a high-quality formula that offers a smooth application and dries quickly. Brands that specialize in professional-grade nail products often have superior options that deliver excellent results.
When testing white polishes, consider factors such as finish (matte vs. glossy), consistency (thick vs. thin), and drying time. A good white polish should glide on effortlessly without clumping or pooling at the edges. If possible, read reviews or seek recommendations from beauty professionals to find the best product for your needs. The right choice will make all the difference in achieving that crisp, clean look characteristic of a French manicure.
If you’re looking to elevate your nail game, mastering the art of French tip nails at home can be a fun and rewarding experience. For a step-by-step guide that will help you achieve that perfect look, you might find this article on how to do French tip nails at home particularly useful. Additionally, while you’re at it, it’s also important to ensure that your home is in good shape, as hidden plumbing leaks can sometimes cause unexpected damage. You can read more about this in the article on how to tell if your home has a hidden plumbing leak.
Use Guides or Tape for a Crisp French Tip
To achieve perfectly defined French tips, utilizing guides or tape can be incredibly helpful. Nail guides are adhesive strips specifically designed to create straight lines and prevent polish from bleeding onto unwanted areas. If you prefer a DIY approach, you can use regular painter’s tape or even scotch tape to outline the tips of your nails.
Begin by applying the guides or tape approximately one-third of the way down each nail, ensuring they are positioned evenly across all fingers. Press down firmly to prevent any polish from seeping underneath. This technique allows for precision and creates a professional-looking finish without the need for advanced nail art skills. Once you have applied the guides, you are ready to paint the white tips with confidence.
If you’re looking to elevate your at-home manicure skills, you might find it helpful to explore a related article that discusses the essentials of achieving the perfect French tip nails. This guide not only provides step-by-step instructions but also offers tips on selecting the right tools and polish for a salon-quality finish. For more insights on enhancing your home beauty routine, check out this informative piece on how to tackle low water pressure in the shower, which can also impact your overall grooming experience. You can read it here: how to tackle low water pressure in the shower.
Paint the White Tips with Steady Strokes
With your guides securely in place, it’s time to paint the white tips of your nails. Using a high-quality white nail polish, dip your brush into the polish and remove any excess by wiping it against the rim of the bottle. Start at one side of the nail tip and apply the polish in steady strokes towards the center, then repeat on the other side to create an even line.
Aim for smooth application without overloading the brush with polish; this will help prevent drips and uneven edges. If necessary, apply a second coat once the first layer has dried to achieve full opacity and brightness. Take your time during this step; precision is key to achieving that iconic French tip look. Once you are satisfied with the application, allow the white tips to dry completely before removing any guides or tape.
Allow the White Tips to Dry Completely
Patience is essential when it comes to allowing your white tips to dry completely. Rushing this step can lead to smudging or uneven edges, which can compromise the overall appearance of your manicure. Depending on the formula of your chosen white polish, drying times may vary; however, it is generally advisable to wait at least 10-15 minutes before proceeding.
To expedite drying time, consider using a quick-dry top coat or placing your hands in front of a fan for improved airflow. Avoid touching anything during this drying period to prevent accidental marks or smudges on your freshly painted tips. Once you are confident that the white polish has dried thoroughly, you can move on to applying the sheer pink or nude polish.
Apply a Sheer Pink or Nude Polish Over the Nail
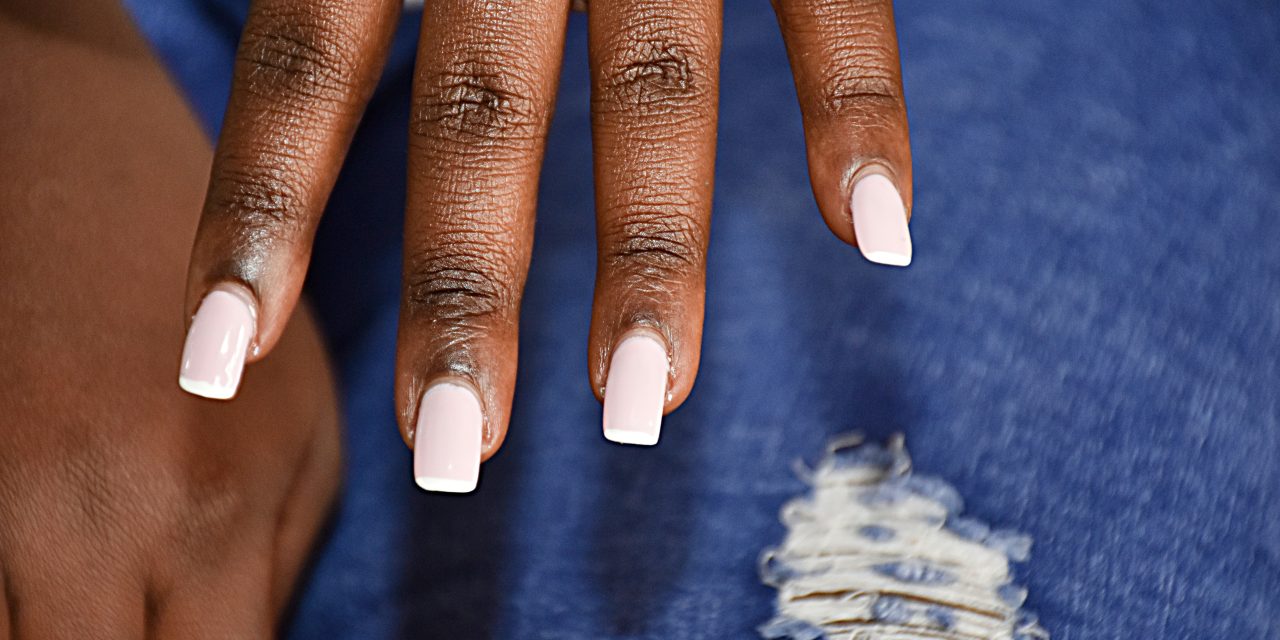
The next step in achieving a classic French manicure is applying a sheer pink or nude polish over the entire nail surface. This layer not only enhances the overall look but also helps blend the white tips seamlessly into your natural nail color. Choose a sheer polish that complements your skin tone; warm undertones may benefit from peachy shades, while cooler tones may prefer pinks with blue undertones.
Using smooth strokes, apply one or two coats of sheer polish over each nail, ensuring even coverage from cuticle to tip. Allow each layer to dry completely before adding another coat if desired. This step adds depth and dimension to your manicure while maintaining that elegant simplicity characteristic of French tips.
Finish with a High-Gloss Top Coat
To seal in your beautiful French manicure and add an extra layer of shine, apply a high-gloss top coat as the final step. A quality top coat not only enhances shine but also provides protection against chipping and wear, extending the life of your manicure significantly. Look for top coats that are specifically formulated for long-lasting wear and quick drying.
Apply a generous layer of top coat over each nail, ensuring complete coverage over both the sheer polish and white tips. Be careful not to flood your cuticles with product; instead, aim for clean lines along the edges of each nail. Allow ample time for the top coat to dry completely before resuming normal activities—this will help prevent any dents or smudges from forming.
Clean Up Any Mistakes with a Brush and Nail Polish Remover
Even with careful application, mistakes can happen during any manicure process. To achieve that polished look synonymous with French tips, it’s essential to clean up any excess polish around your cuticles or on your skin. Dip a small brush into nail polish remover and gently trace along the edges of each nail where excess polish may have accumulated.
Alternatively, you can use cotton swabs dipped in remover for more precise touch-ups around smaller areas. Take your time during this cleanup phase; ensuring clean lines will elevate your overall manicure significantly. Once you have corrected any imperfections, allow everything to dry completely before showing off your stunning French tips.
Maintain Your French Tips for Long-Lasting Perfection
To keep your French manicure looking fresh and flawless for as long as possible, proper maintenance is key. Regularly apply cuticle oil to nourish and hydrate both your nails and surrounding skin; this will help prevent dryness and cracking over time. Additionally, avoid exposing your hands to harsh chemicals or excessive moisture whenever possible.
If you notice any chips or wear on your tips, consider applying another layer of top coat every few days to maintain shine and protection. When it comes time for removal, use an acetone-free remover to minimize damage to your natural nails while ensuring easy removal of all layers of polish.
In summary, creating an impeccable French manicure at home involves careful preparation and attention to detail throughout each step of the process—from gathering supplies and preparing nails to applying polish layers and maintaining results afterward. By following these guidelines diligently, you can achieve salon-quality results right in the comfort of your own home!
FAQs
What materials do I need to do French tip nails at home?
To do French tip nails at home, you will need a base coat, white nail polish for the tips, a top coat, and a clear or nude nail polish for the base. Additionally, you may want to use nail tape or a small brush for precision, as well as a nail file and cuticle pusher for preparation.
How do I prepare my nails before applying French tips?
Start by removing any old nail polish and cleaning your nails. Then, file your nails to your desired shape and length. Push back your cuticles gently and buff the surface of your nails to create a smooth canvas. Finish by applying a base coat to protect your nails and help the polish adhere better.
What is the best technique for painting the tips of my nails?
For painting the tips, you can use nail tape to create a straight line or freehand the tips with a steady hand. If using tape, apply it to the nail leaving the tip exposed, then paint the tip with white polish. If freehanding, use a small brush or the polish brush to carefully paint the tip in a smooth motion, ensuring even coverage.
How long should I let each layer of polish dry?
It is recommended to let each layer of polish dry for at least 5-10 minutes before applying the next layer. This helps prevent smudging and ensures a smooth finish. After applying the final top coat, allow your nails to dry completely for at least 30 minutes to an hour before using your hands normally.
How can I make my French tip nails last longer?
To make your French tip nails last longer, apply a good quality top coat every few days to protect the polish and add shine. Avoid exposing your nails to harsh chemicals or excessive water, and wear gloves when doing household chores. Additionally, keep your nails moisturized to prevent chipping.