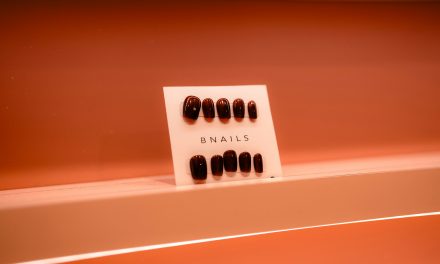
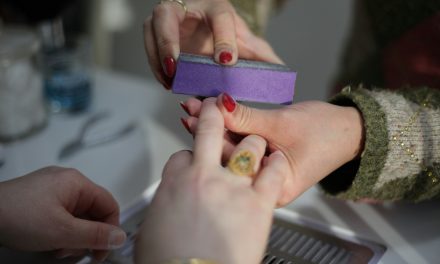
Before embarking on the journey of applying acrylic nails, it is imperative to assemble all necessary supplies to ensure a smooth and efficient process. The essential items include acrylic nail tips, nail glue, acrylic liquid (monomer), acrylic powder (polymer), a dappen dish for mixing, a nail file, a buffer, cuticle pushers, scissors, and a brush specifically designed for acrylic application. Additionally, having a lint-free wipe and a nail dehydrator can enhance the overall outcome by ensuring cleanliness and optimal adhesion.
Furthermore, it is advisable to have a well-ventilated workspace to mitigate the inhalation of fumes from the acrylic products. Personal protective equipment such as gloves and a mask can also be beneficial in safeguarding against potential allergic reactions or irritations. By gathering these supplies beforehand, you can streamline the application process and minimize interruptions.
If you’re looking to enhance your beauty routine by applying acrylic nails, it’s essential to start with the right techniques and tools. For beginners, understanding the basics can make a significant difference in achieving a professional look. To complement your newfound skills in nail art, you might also be interested in creating a vibrant indoor environment. Check out this article on the top 10 easy care indoor house plants to brighten your home, which can provide a refreshing backdrop to your nail art endeavors. You can read it here: top 10 easy care indoor house plants to brighten your home.
Prepare Your Natural Nails
The preparation of natural nails is a crucial step that lays the foundation for a successful acrylic application. Begin by thoroughly cleaning your hands and nails to remove any dirt, oil, or residue that could hinder adhesion. Use a gentle nail cleanser or alcohol wipe to ensure that the nail surface is pristine. Following this, trim your natural nails to a manageable length, as this will provide a stable base for the acrylic tips.
Next, gently push back the cuticles using a cuticle pusher to create a clean area for the acrylic application. This step not only enhances the aesthetic appeal but also prevents lifting at the cuticle line. Afterward, lightly buff the surface of your natural nails with a fine-grit file to create a rough texture that promotes better adhesion of the acrylic material. This meticulous preparation is vital for achieving long-lasting results and preventing premature lifting or breakage.
Choose the Right Acrylic Nail Tips

Selecting the appropriate acrylic nail tips is essential for achieving the desired length and shape of your nails. Acrylic tips come in various sizes, shapes, and styles, including square, oval, stiletto, and coffin shapes. It is crucial to choose tips that complement your natural nail shape and personal style preferences. To determine the correct size, hold the tips against your natural nails; they should fit snugly without extending beyond the sides of your natural nail bed.
Additionally, consider the thickness of the tips; thinner tips may provide a more natural appearance but may be less durable than thicker options. It is also advisable to select high-quality tips made from durable materials to ensure longevity and resistance to chipping or breaking. By carefully choosing the right acrylic nail tips, you can achieve an aesthetically pleasing and functional result.
Apply Nail Glue and Attach Tips

Once you have selected the appropriate acrylic nail tips, it is time to apply nail glue and attach them securely to your natural nails. Begin by applying a small amount of nail glue to the well of each tip. Be cautious not to use excessive glue, as this can lead to overflow and messiness during application. Position the tip at a 45-degree angle against your natural nail and gently press down until it adheres firmly.
Hold the tip in place for approximately 10-15 seconds to allow the glue to set properly. It is essential to ensure that there are no air bubbles trapped between the tip and your natural nail, as this can lead to lifting or separation over time. Repeat this process for each nail, ensuring uniformity in placement and alignment. Proper attachment of the tips is critical for achieving a seamless look and ensuring durability throughout wear.
If you’re looking to enhance your nail game, learning how to apply acrylic nails can be a fun and rewarding experience for beginners. To get started, it’s essential to familiarize yourself with the tools and techniques involved in the process. For more tips on mastering this skill, you might find this related article helpful, as it offers insights that can complement your nail application journey. With practice and patience, you’ll soon be able to achieve beautiful acrylic nails that showcase your personal style.
Trim and Shape the Nail Tips
After successfully attaching the acrylic nail tips, it is time to trim and shape them according to your desired length and style. Using sharp scissors or a nail clipper, carefully trim each tip to your preferred length. It is advisable to start with longer lengths and gradually trim down until you achieve your desired look; this approach minimizes mistakes and allows for adjustments.
Once trimmed, utilize a nail file to shape the edges of each tip. Whether you prefer square, oval, or stiletto shapes, take your time to ensure symmetry across all nails. A consistent shape not only enhances visual appeal but also contributes to overall durability by distributing stress evenly across each nail. This meticulous shaping process is vital for achieving professional-looking results.
Buff the Surface for Better Adhesion
To enhance adhesion between the acrylic mixture and the nail tips, it is essential to buff the surface of each tip lightly. Using a fine-grit buffer or file, gently buff the surface of each acrylic tip until it appears slightly matte rather than shiny. This process creates micro-abrasions that allow for better bonding with the acrylic mixture.
Be cautious not to over-buff, as excessive filing can weaken the integrity of the tips. Focus on creating an even surface across all nails while maintaining their shape. This step is crucial in preventing lifting or separation of the acrylic layer once applied. A well-prepared surface will significantly contribute to the longevity of your acrylic nails.
Mix Acrylic Liquid and Powder
The next step involves mixing acrylic liquid (monomer) with acrylic powder (polymer) to create a workable acrylic mixture. Begin by pouring a small amount of monomer into a dappen dish; typically, one ounce is sufficient for a full set of nails. Then, using an appropriate ratio—usually one part liquid to two parts powder—add the acrylic powder gradually while stirring gently with your brush.
It is essential to achieve a smooth consistency without clumps or bubbles in the mixture. The ideal mixture should be neither too runny nor too thick; it should hold its shape when picked up with your brush but still be malleable enough for application. Proper mixing is crucial as it directly affects the curing time and overall quality of your acrylic nails.
Apply the Acrylic Mixture to Nails
With your acrylic mixture prepared, it’s time to apply it onto your nails. Dip your brush into the monomer solution before picking up a small bead of the acrylic mixture from your dappen dish. Gently place this bead onto the center of your nail tip and use your brush to spread it evenly across the surface while maintaining its shape.
Work quickly but carefully; you want to ensure even coverage without creating air pockets or uneven spots. Start from the cuticle area and work towards the free edge of the nail, blending as you go. Repeat this process for each nail until all tips are covered with an even layer of acrylic mixture. This step requires precision and practice; take your time to achieve a flawless finish.
Shape and Smooth the Acrylic Layer
Once you have applied the acrylic mixture to all nails, it’s time to shape and smooth out each layer for an impeccable finish. Using a fine-grit file, carefully file along the edges of each nail to refine their shape further. Pay attention to maintaining symmetry across all nails while ensuring that they are uniform in length.
After shaping, use a buffer to smooth out any uneven areas on the surface of each nail. This step not only enhances aesthetics but also prepares them for polish application later on. A well-shaped and smooth surface will reflect light beautifully and contribute to an overall polished appearance.
Allow Nails to Fully Dry and Harden
After shaping and smoothing, it is crucial to allow your acrylic nails ample time to dry and harden completely before proceeding with any additional steps. The drying process typically takes about 15-30 minutes; however, this can vary based on environmental factors such as humidity and temperature.
During this time, avoid any activities that may put pressure on your nails or expose them to water or moisture. Proper curing ensures that your acrylic nails are strong and durable enough for everyday wear without risk of chipping or breaking prematurely.
Finish with Nail Polish or Top Coat
The final step in achieving beautiful acrylic nails involves applying either nail polish or a top coat for added shine and protection. If you choose to apply color polish, ensure that it is compatible with acrylics; opt for high-quality brands that offer long-lasting wear.
Alternatively, if you prefer a more natural look, applying a clear top coat can enhance shine while providing an additional layer of protection against wear and tear. Allow sufficient drying time after applying polish or top coat before engaging in any activities that may compromise their integrity.
In conclusion, mastering the art of applying acrylic nails requires careful preparation, precision in application techniques, and attention to detail throughout each step of the process. By following these guidelines diligently, you can achieve stunning results that not only enhance your appearance but also provide durability for everyday wear.
Summary: This article outlines a comprehensive guide on how to apply acrylic nails effectively by detailing each step from gathering supplies through finishing touches with polish or top coat. Emphasizing preparation and technique ensures long-lasting results while enhancing aesthetic appeal.
FAQs
What materials do I need to apply acrylic nails?
To apply acrylic nails, you will need acrylic powder, liquid monomer, a nail brush, a nail file, a buffer, a primer, and nail tips or forms. Additionally, you may want to have a cuticle pusher, a dehydrator, and a top coat for finishing touches.
How do I prepare my natural nails before applying acrylics?
Before applying acrylic nails, start by cleaning your natural nails thoroughly. Push back your cuticles, remove any old polish, and lightly buff the surface of your nails to create a rough texture for better adhesion. It’s also important to apply a nail dehydrator to remove moisture and oils.
What is the process of applying acrylic nails?
The process involves several steps: first, apply a primer to your natural nails. Then, if using nail tips, glue them onto your natural nails. Next, dip your brush into the liquid monomer and then into the acrylic powder to form a bead. Apply the bead to the nail and shape it as desired. Repeat this process until all nails are covered, then file and shape them to your preference.
How long do acrylic nails typically last?
Acrylic nails can last anywhere from two to four weeks, depending on how well they are applied and maintained. Regular fills are recommended every two to three weeks to keep them looking fresh and to prevent lifting.
Are there any risks or side effects associated with acrylic nails?
Yes, there are some risks associated with acrylic nails, including allergic reactions to the products used, potential damage to the natural nail if not applied or removed properly, and infections if the nails are not kept clean. It’s important to follow proper application and removal techniques to minimize these risks.