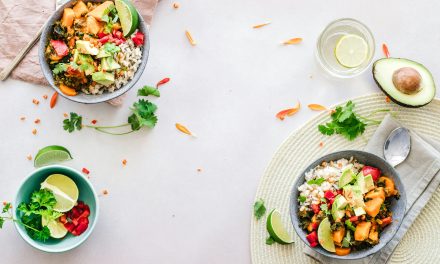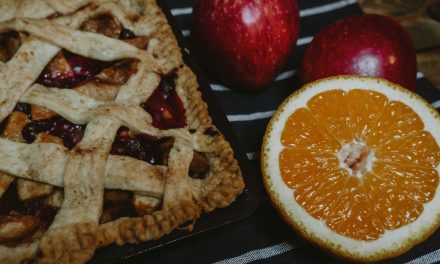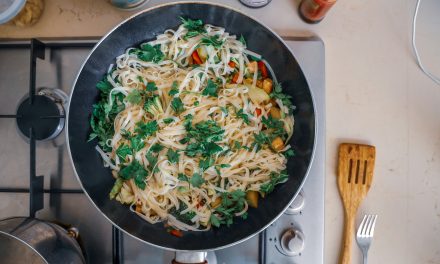
Meal prep has a reputation for being a grim Sunday marathon: twenty identical containers of dry chicken and plain rice, eaten with decreasing enthusiasm. It does not have to go that way. Done sensibly, a couple of hours of cooking can leave you with lunches that taste good on Thursday, breakfasts you can grab with one hand, and a dinner or two that practically assemble themselves.
This guide gives you eight prep ideas that hold up well over a week. Each includes a mini recipe for four servings, notes on how long it lasts, and how to reheat it so it does not turn sad. Along the way you will find advice on planning, containers, food safety, and the mistakes that make people abandon the habit by the second week. Take what suits you and ignore the rest; there is no single correct way to do this.
Key takeaways
- Prep components, not just full meals, so you can mix and match and avoid eating the same plate five days running.
- Cool cooked food quickly and refrigerate within 2 hours. Most prepped meals keep 3 to 4 days at 40°F (4°C) or colder.
- Cook poultry to 165°F (74°C), ground beef and pork to 160°F (71°C), and fish and whole cuts of pork to 145°F (63°C).
- Pack sauces, crunchy toppings, and dressings separately so food stays fresh.
- Freeze what you will not eat by day 4. Soups, chili, and cooked grains freeze particularly well.
- Start small. Prepping three or four items beats an ambitious plan you abandon.
How to Plan a Prep Session That You Will Actually Repeat
Decide what you need, not everything
Before shopping, think about which meals cause you the most trouble. For some people it is the weekday lunch; for others it is breakfast on the way out the door. Prep for those gaps first. Covering all 21 weekly meals is unnecessary and usually wasteful.
Think in components
The most useful way to prep is to cook a few building blocks: a grain, a protein, a pan of roasted vegetables, and one or two sauces. Combined in different ways, those pieces make bowls, wraps, salads, and plates that feel distinct from one another. It also lets you keep things like crisp lettuce and fresh herbs out until the last minute.
Sequence the work
A typical session takes about two hours for a few recipes. Start with whatever takes longest and needs little attention: soups, grains, or a pan of roasted vegetables. While those cook, work on things that need active hands, such as chopping, mixing, and assembling. Clean as you go so you do not end with a mountain of dishes. Putting on a podcast or playlist helps more than you might think.
Containers and equipment
You need less than you think. A set of glass containers with tight lids, a few wide-mouth jars, a couple of sheet pans, and a large pot cover most plans. Glass resists stains and odors and can usually go from refrigerator to microwave, but remove lids first unless they are labeled microwave-safe. Label containers with the date, since refrigerators have a way of hiding things.
Idea One: Chicken and Black Bean Burrito Bowls
Keeps: 4 days refrigerated. Allergens: dairy if you add cheese or sour cream.
Ingredients (serves 4)
- 1 1/2 pounds boneless, skinless chicken thighs or breasts
- 2 tablespoons oil
- 1 tablespoon chili powder
- 2 teaspoons cumin
- 1 teaspoon smoked paprika
- 1 teaspoon kosher salt
- 1 1/2 cups long-grain white or brown rice, uncooked
- 1 can (15 ounces) black beans, drained and rinsed
- 1 1/2 cups corn kernels, frozen or roasted
- 1 pint cherry tomatoes, halved
- 2 limes
- Cilantro, salsa, and avocado for serving
Method
- Cook the rice according to the package. Spread it on a tray to cool quickly, then divide it among containers.
- Toss the chicken with the oil, chili powder, cumin, paprika, and salt. Roast on a sheet pan at 425°F (220°C) for 18 to 25 minutes, depending on thickness, until it reaches 165°F (74°C).
- Rest the chicken 5 minutes, then slice or chop it.
- Warm the beans with a pinch of salt and a squeeze of lime. Divide the rice, chicken, beans, corn, and tomatoes into four containers.
- Store salsa, avocado, and cilantro separately. Slice the avocado the day you eat it.
Reheating: Microwave for 2 to 3 minutes with a damp paper towel over the top, until hot throughout. Add toppings afterward.
Variations: Use crumbled tofu or extra beans for a vegetarian bowl. Swap in quinoa for rice, or cauliflower rice if you prefer.
Idea Two: Veggie Egg Muffin Cups
Keeps: 4 days refrigerated, 2 months frozen. Allergens: eggs, dairy.
Ingredients (makes 12 cups, serves 4 with 3 each)
- 10 large eggs
- 1/4 cup milk
- 1/2 teaspoon kosher salt
- 1/4 teaspoon black pepper
- 1 cup chopped baby spinach
- 1 red bell pepper, finely diced
- 4 scallions, sliced
- 3/4 cup shredded cheddar cheese
- Oil or cooking spray for the pan
Method
- Heat the oven to 350°F (175°C). Grease a 12-cup muffin tin well, or use silicone liners.
- Whisk the eggs, milk, salt, and pepper until fully blended.
- Divide the spinach, bell pepper, scallions, and cheese among the cups.
- Pour the egg mixture evenly over the fillings, filling each cup about 3/4 full.
- Bake 20 to 24 minutes, until puffed and set in the center. Egg dishes should reach 160°F (71°C).
- Cool in the pan for 5 minutes, loosen with a knife, and move to a rack. Cool completely before storing.
Reheating: Microwave a single cup for 30 to 45 seconds, or two for about a minute, until steaming. From frozen, wrap loosely in a paper towel and heat about 1 1/2 minutes, flipping halfway through.
Variations: Add cooked, crumbled sausage or diced ham, or try mushrooms, sun-dried tomatoes, or feta. Pre-cook raw vegetables like mushrooms to cook off their water, or the cups will be soggy.
Idea Three: Overnight Oats Four Ways
Keeps: 4 days refrigerated. Allergens: dairy (unless using plant milk), tree nuts, or peanuts in some toppings; oats may be cross-contaminated with wheat.
Base recipe (per jar, make 4)
- 1/2 cup old-fashioned rolled oats
- 1/2 cup milk of your choice
- 1/4 cup plain yogurt
- 1 tablespoon chia seeds
- 1 teaspoon maple syrup or honey
- Pinch of salt
Method
- In each jar, stir the oats, milk, yogurt, chia seeds, sweetener, and salt together.
- Add flavorings (see below), cover, and refrigerate at least 6 hours.
- Stir in a splash of milk if it has thickened too much. Add toppings at serving time.
| Flavor | Mix into the jar | Top with |
|---|---|---|
| Apple pie | 1/2 cup grated apple, 1/4 teaspoon cinnamon | Chopped walnuts |
| Berry vanilla | 1/2 teaspoon vanilla extract | 1/2 cup berries |
| Peanut butter banana | 1 tablespoon peanut butter | Sliced banana added the same morning |
| Cocoa cherry | 1 tablespoon cocoa powder | Frozen cherries, thawed |
Serving: Eat cold, or microwave 60 to 90 seconds for a warm bowl. Fruit that browns easily, such as bananas, should be added fresh.
Idea Four: Red Lentil and Vegetable Soup
Keeps: 4 days refrigerated, 3 months frozen. Allergens: none of the major eight in the base recipe; check broth labels.
Ingredients (serves 4 generously)
- 2 tablespoons olive oil
- 1 large onion, diced
- 2 carrots, diced
- 2 celery stalks, diced
- 4 cloves garlic, minced
- 1 tablespoon tomato paste
- 2 teaspoons cumin
- 1 teaspoon turmeric
- 1 1/2 cups red lentils, rinsed
- 6 cups vegetable or chicken broth
- 1 can (14.5 ounces) diced tomatoes
- 5 ounces baby spinach
- Juice of 1 lemon
- 1 1/2 teaspoons kosher salt
Method
- Warm the oil in a large pot over medium heat. Cook the onion, carrots, and celery for 8 minutes until softened.
- Add the garlic, tomato paste, cumin, and turmeric. Stir 1 minute.
- Add the lentils, broth, and tomatoes. Bring to a boil, then simmer 20 to 25 minutes until the lentils have broken down.
- Stir in the spinach until wilted, then the lemon juice and salt. Taste and adjust.
Storage: Cool in shallow containers, refrigerate within 2 hours, and freeze in portions with some headspace, since liquids expand. Thaw overnight in the refrigerator. Reheat on the stove or in the microwave until it reaches 165°F (74°C), stirring in a splash of water if it has thickened. Red lentils absorb liquid as they sit.
Variations: Stir in cooked sausage or shredded chicken, or serve with a spoonful of yogurt and a piece of toast.
Idea Five: Turkey Meatballs With Roasted Vegetables
Keeps: 4 days refrigerated, 3 months frozen. Allergens: eggs, wheat (breadcrumbs), dairy (Parmesan).
Ingredients (serves 4)
- 1 1/2 pounds ground turkey
- 1/2 cup panko breadcrumbs
- 1 large egg
- 1/3 cup grated Parmesan
- 3 cloves garlic, grated
- 2 tablespoons chopped parsley
- 1 teaspoon dried oregano
- 1 teaspoon kosher salt
- 1/2 teaspoon black pepper
- 1 pound zucchini and 1 pound broccoli, cut into bite-size pieces
- 2 tablespoons olive oil
- 2 cups marinara sauce, warmed
Method
- Heat the oven to 400°F (200°C) and line two sheet pans with parchment.
- Mix the turkey, panko, egg, Parmesan, garlic, parsley, oregano, salt, and pepper gently with your hands until just combined. Overworking makes meatballs tough.
- Roll into 20 to 24 balls, about 1 1/2 inches wide, and place on one pan.
- Toss the vegetables with the oil and a pinch of salt on the second pan.
- Bake both pans 20 to 22 minutes, until the meatballs reach 165°F (74°C) and the vegetables are tender with browned edges. Ground poultry needs the higher temperature.
- Divide among containers and keep the marinara in a separate small container, or toss the meatballs in sauce right before eating.
Reheating: Microwave 2 minutes, covered, until steaming. In a covered skillet with a splash of water works too. Freeze uncooked meatballs on a tray, transfer to a bag, and bake from frozen at 400°F (200°C) for about 25 minutes until they reach 165°F (74°C).
Variations: Use ground chicken or lean beef; cook beef meatballs to 160°F (71°C). For gluten-free meatballs, use certified gluten-free crumbs or cooked rice.
Idea Six: Chickpea Mason Jar Salads
Keeps: 4 days refrigerated. Allergens: dairy (feta); check the mustard.
Ingredients (makes 4 jars, 1-quart wide-mouth)
- For the dressing: 1/3 cup olive oil, 3 tablespoons red wine vinegar, 1 teaspoon Dijon mustard, 1 small garlic clove, 1/2 teaspoon salt, pinch of pepper
- 1 can (15 ounces) chickpeas, drained and rinsed
- 1 English cucumber, diced
- 1 pint cherry tomatoes, halved
- 1/2 red onion, thinly sliced
- 4 ounces feta, crumbled
- 6 cups chopped romaine or kale
- 1/2 cup toasted sunflower seeds (optional)
Method
- Whisk or shake the dressing ingredients and pour 2 1/2 tablespoons into the bottom of each jar.
- Layer in this order: chickpeas, onion, cucumber, tomatoes, feta, then greens packed loosely on top.
- Seal and refrigerate. The dressing at the bottom keeps the greens dry.
- At lunchtime, shake the jar and pour into a bowl or eat from the jar. Add seeds just before eating so they stay crunchy.
Variations: Add leftover shredded chicken, cooked quinoa, or sliced hard-boiled eggs near the bottom. Hard-boiled eggs in the shell last up to a week in the refrigerator, but a peeled egg is best eaten within a few days.
Idea Seven: Greek-Style Orzo Pasta Salad
Keeps: 4 days refrigerated. Allergens: wheat, dairy.
Ingredients (serves 4)
- 1 1/2 cups dry orzo
- 1/3 cup olive oil
- 1/4 cup red wine vinegar
- 1 teaspoon dried oregano
- 1 teaspoon kosher salt
- 1 can (15 ounces) chickpeas, drained
- 1 cup diced cucumber
- 1 cup halved cherry tomatoes
- 1/2 cup pitted Kalamata olives, halved
- 1/2 cup crumbled feta
- 1/4 cup chopped parsley or mint
Method
- Cook the orzo in well-salted boiling water until tender, about 8 to 9 minutes. Drain and rinse briefly under cool water to stop the cooking.
- Whisk the oil, vinegar, oregano, and salt in a large bowl. Add the warm orzo and stir so it absorbs the dressing.
- Cool to room temperature, then fold in the chickpeas, vegetables, olives, feta, and herbs.
- Divide among containers and refrigerate.
Serving: It tastes best at cool room temperature, so take it out of the refrigerator 15 minutes before eating. Add a squeeze of lemon and a drizzle of oil if it has gotten dry.
Idea Eight: Teriyaki Chicken and Vegetable Stir-Fry Boxes
Keeps: 4 days refrigerated. Allergens: soy, wheat (soy sauce), sesame.
Ingredients (serves 4)
- 1 1/2 pounds boneless, skinless chicken thighs, cut into bite-size pieces
- 2 tablespoons neutral oil
- 1 red bell pepper, sliced
- 2 cups broccoli florets
- 1 cup sliced carrots
- 1 cup snap peas
- For the sauce: 1/3 cup soy sauce, 3 tablespoons honey, 2 tablespoons rice vinegar, 1 tablespoon grated ginger, 2 cloves garlic, 1 tablespoon cornstarch, 1/2 cup water
- 2 cups cooked rice or noodles to divide
- Sesame seeds and scallions for finishing
Method
- Whisk the sauce ingredients together until the cornstarch dissolves.
- Heat 1 tablespoon oil in a large skillet over medium-high heat. Cook the chicken 6 to 8 minutes until browned and 165°F (74°C) inside. Remove.
- Add the remaining oil and the carrots and broccoli. Cook 4 minutes, add the pepper and snap peas, and cook 2 more minutes.
- Return the chicken, pour in the sauce, and stir 1 to 2 minutes until thickened and glossy.
- Divide the rice and stir-fry among four containers. Garnish after reheating.
Reheating: Microwave 2 to 3 minutes, stirring once. Add a teaspoon of water if the sauce has tightened.
Variations: Use tofu pressed dry and cubed, or shrimp added at the end for the last 2 minutes. Tamari makes it gluten-free, provided it is labeled so.
A Sample Prep Week
If you want a simple starting point, try this schedule. It uses the dishes above and avoids repeating a meal more than twice.
| Meal | Mon-Tue | Wed-Thu | Fri |
|---|---|---|---|
| Breakfast | Egg muffin cups | Overnight oats | Overnight oats |
| Lunch | Burrito bowl | Mason jar salad | Orzo salad |
| Dinner | Lentil soup | Meatballs and vegetables | Teriyaki stir-fry box |
The dishes that keep longest, such as soup and meatballs, can be frozen the day you make them and thawed later in the week. Items that fade fastest, like the jar salads and fish, should be eaten first. Move whatever you will not get to by day 4 to the freezer.
Common Mistakes That Derail Meal Prep
Prepping too much, too soon
Eager beginners often cook for the whole week on day one. By Thursday, the food is tired, and so are you. Start with three or four days of lunches and add more only if it feels easy.
Cooking everything the same way
Five days of identical flavors is a recipe for takeout. Vary your sauces and toppings: a lime-cilantro drizzle on Monday, a yogurt-herb sauce on Wednesday, and a spoonful of chili crisp on Friday make the same chicken feel different.
Packing everything together
Wet and crisp do not belong in the same compartment. Keep dressings, salsas, crunchy toppings, and cut avocado separate. A handful of small lidded containers solves most sogginess problems.
Overcooking the protein
Food gets cooked again when you reheat it, so pull chicken, fish, and eggs at the safe minimum temperature rather than far past it. Chicken at 165°F (74°C) will be moist enough to survive a trip through the microwave; chicken at 190°F (88°C) will not.
Ignoring cooling
A big, hot pot placed straight in the refrigerator stays warm in the center for hours, which gives bacteria time to multiply. Divide food into shallow containers so it chills quickly, and do not leave anything on the counter longer than 2 hours.
Forgetting how food actually ages
Some foods hold up well and some do not. Sturdy grains, roasted vegetables, soups, and braised dishes do beautifully. Delicate greens, fried foods, and cut fruit like apples and bananas fade fast. Plan the fragile items for early in the week.
Skipping seasoning at the end
Cold and reheated food tastes less vivid than freshly cooked food. Taste before serving and add salt, acid, or herbs. A little lemon juice does a lot.
Storage and Food Safety
The two-hour rule
The USDA says perishable food should not sit out for more than 2 hours, or more than 1 hour if the temperature is above 90°F (32°C). The range between 40°F and 140°F (4°C to 60°C) is where bacteria grow fastest, so move food through it quickly in both directions.
Refrigerator guidelines
| Food | Refrigerator (40°F / 4°C or below) | Freezer (0°F / -18°C) |
|---|---|---|
| Cooked chicken, turkey, meatballs | 3 to 4 days | 2 to 4 months |
| Soups and stews | 3 to 4 days | 2 to 3 months |
| Cooked rice and pasta | 3 to 4 days | 1 to 2 months |
| Egg muffin cups | 3 to 4 days | Up to 2 months |
| Cooked fish and seafood | 3 to 4 days (best within 2) | Up to 2 months |
| Cut vegetables, raw | 3 to 5 days, varies | Best blanched first |
The freezer keeps food safe indefinitely, but quality drops over time, so the freezer figures here are about taste, not safety.
Rice needs special care
Cooked rice can carry spores of a bacterium that survive cooking and multiply at room temperature. Cool rice quickly, refrigerate within an hour or so, and do not leave it sitting out. Reheat until steaming hot.
Thawing and reheating safely
Thaw frozen meals in the refrigerator overnight, in a sealed bag under cold running water, or in the microwave if you plan to eat right away. Never thaw on the counter. Reheat everything to 165°F (74°C) and only reheat once; do not repeatedly cool and warm the same container.
Label everything
A strip of masking tape and a marker takes ten seconds and tells you exactly when a meal was made. When in doubt about a leftover, throw it out. A few dollars of food is cheaper than a bad night.
Making Prepped Food Taste Fresh
Keep a stash of finishing touches
A few ingredients rescue reheated food: lemons and limes, fresh herbs, flaky salt, hot sauce, toasted nuts or seeds, and a good vinegar. A lime wedge on Wednesday’s burrito bowl makes it taste like Monday’s.
Undercook the vegetables slightly
Vegetables that are roasted or steamed to perfect tenderness will go soft when reheated. Pull them a minute or two early so they finish in the microwave.
Reheat gently
Use medium power and stir halfway. Dishes with sauce keep their texture better with a splash of water and a loose cover. If you have access to an oven or toaster oven, crisp foods like meatballs and egg muffin cups recover better there.
Allergens and Dietary Needs
Meal prep is a good fit for people with allergies because you control every ingredient. Still, labels matter: soy sauce contains wheat and soy, many broths contain celery or soy, and oats may be processed alongside wheat. Eggs, dairy, fish, shellfish, peanuts, tree nuts, wheat, soy, and sesame are the major allergens in the United States, and most of the recipes here involve at least one. Store allergen-free portions apart, use clean utensils, and label them clearly if you share a refrigerator with people who have restrictions. Vegetarian and gluten-free eaters can adapt most ideas with the swaps listed in each recipe.
Frequently Asked Questions
How long does meal prep last in the refrigerator?
Most cooked meals keep 3 to 4 days at 40°F (4°C) or below. If you want meals for days 5 through 7, freeze the extras on day 1 or 2 and thaw them in the refrigerator when needed.
Can I freeze prepped meals?
Yes, many of them. Soups, chili, meatballs, egg muffin cups, and cooked grains freeze well. Salads, fresh herbs, and dishes with a lot of mayonnaise or cream sauces do not.
What containers are best?
Glass containers with tight lids are durable and stain-resistant, while BPA-free plastic is lighter and cheaper. Pick containers with a compartment or two if you hate soggy food. Whatever material you choose, make sure it is rated for the microwave and freezer if you will use it that way.
How do I avoid getting bored?
Prep ingredients and sauces rather than only complete meals, and rotate flavors every week. Keep two or three quick sauces on hand, and leave one night for something fresh.
Is it okay to reheat food more than once?
It is safest to reheat only the portion you plan to eat, and only once. Every time food cools and warms, it spends time in the temperature range where bacteria grow.
How can I keep salads from getting soggy?
Keep the dressing at the bottom of a jar, put sturdy ingredients next, and keep greens at the very top, away from moisture. Or pack the dressing separately in a small container.
How much time does meal prep take?
Plan on about two hours for a full session of three or four recipes, including cleanup. Once you have a rhythm, it often gets faster, and the weeknight time it saves is considerable.
Do I need to prep every meal of the week?
Not at all. Many people find that prepping just lunches or just breakfasts is plenty. Pick the meal that causes the most stress and start there.
The best prep routine is the one you are still doing a month from now. Start with a single recipe that sounds good, keep the sauces separate, and notice what you actually eat and what lingers in the back of the refrigerator. Adjust from there. A few small habits, repeated each week, are worth far more than one heroic Sunday.