Every homeowner remembers the first time something broke and there was nothing in the house to fix it with. A cabinet door sagged, a shelf needed hanging, a toilet kept running, and the only tool in the kitchen drawer was a bent butter knife and a roll of tape. A small, well-chosen set of tools changes that. It turns a Saturday emergency into a twenty-minute job and, over the years, saves far more than it costs.
You do not need a garage full of power equipment, and you do not need the most expensive version of anything. What you need is eight dependable tools that cover the jobs that come up again and again: tightening, hanging, measuring, cutting, gripping, unclogging, and seeing what you are doing. This guide explains each one, what to look for when you buy, how to use it safely, and the mistakes that beginners tend to make. It also covers a few extras worth adding once the basics are in place.
Key takeaways
- Eight tools handle the large majority of everyday repairs: a hammer, a screwdriver set, an adjustable wrench, pliers, a tape measure, a cordless drill, a utility knife, and a stud finder with a level close behind in usefulness.
- Buy mid-range tools from a known hardware store line. Cheap tools strip, bend, and break, while professional-grade ones are often more than a casual user needs.
- Comfort matters. Hold a tool in the store, because a grip that fits your hand reduces fatigue and slips.
- Eye protection, work gloves, and common sense are part of the toolkit.
- Store tools dry and organized, and learn to use each one properly before the day you need it.
- Know the edge of your skills. Gas, main electrical panels, structural work, and roofs call for licensed professionals.
How to think about building a toolkit
Start with the jobs, not the tools
Walk through your home and make a list of what you have wished you could do in the past year. Hang a mirror. Tighten a wobbly chair. Replace a cabinet hinge. Change a light fixture. Fix a clogged drain. The jobs on that list tell you which tools to buy first. A tool you use every few months is worth owning. A specialty tool you might use once is better rented or borrowed.
Quality versus price
A good rule is to spend more on tools that you hold and use constantly, such as hammers, screwdrivers, and pliers, and less on tools that sit in a drawer. Look for forged steel, a snug fit, comfortable handles, and a warranty. Many well-known hardware lines offer lifetime guarantees on hand tools, and a warranty is a helpful signal. Avoid kits that boast hundreds of pieces for a very low price. They are padded with sockets and bits you will never use and are often made of soft metal.
Where to keep everything
A plastic toolbox or a bag with a wide mouth works well for a starter kit. Keep it in a dry place, since moisture rusts steel. Wipe off tools after use, and put a light coat of oil on bare steel from time to time. Keep tools out of reach of small children, and store sharp blades with the guard on.
Tool 1: The claw hammer
What it does
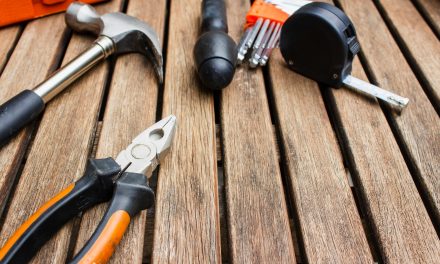
A claw hammer drives nails with the face and pulls them out with the curved claw. It is also useful for tapping things into place, lightly persuading a stubborn joint, and prying off trim in a pinch.
What to look for
A 16-ounce (about 450 gram) hammer is the best all-around choice for most adults. Lighter hammers are fine for hanging pictures, while heavier ones are better for framing but tire the arm. A smooth-faced head is more forgiving than a waffle-faced one when you do not want to leave marks. A handle of fiberglass or steel with a rubber grip absorbs shock, and a good wooden handle is comfortable and lasts a long time.
How to use it well
Hold the handle near the end, not up by the head, and let the weight of the hammer do the work. Start the nail with light taps, then take a full swing, keeping your eye on the nail head. To protect your fingers, hold a small nail with a clothespin or a pair of needle-nose pliers while you start it. To pull a nail, slip a small block of wood under the head of the hammer so you have more leverage and do not dent the surface.
Safety and mistakes
Wear safety glasses, because nails and chips of metal can fly. Never use a hammer with a loose or cracked head, and do not strike a hard surface like a hardened-steel chisel or another hammer. A common mistake is using a claw hammer on masonry or stone; the face can chip. Use a masonry hammer or a mallet and the right tools for that job.
Tool 2: A screwdriver set
What it does
Screws hold together furniture, outlets, cabinet doors, hinges, and appliances. A set that includes several sizes of Phillips and flathead screwdrivers handles most of what you will meet. Many households also encounter Torx and square-drive screws, so a set with interchangeable bits is useful.
What to look for
Buy a multi-bit driver or a set with at least #1, #2, and #3 Phillips tips and small, medium, and large flathead tips. The tips should be hardened and precisely machined, since a poorly fitted tip is the main reason screws strip. A magnetic tip holds screws in place. Pick comfortable handles with a good grip, and consider a small precision set for eyeglasses and electronics.
How to use it well
Match the size of the tip to the screw so that it fits snugly and sits fully in the slot. Press firmly into the screw as you turn, which keeps the tip from camming out and rounding off the head. If a screw is stuck, a drop of penetrating oil or a firm tap on the end of the screwdriver may help. For a stripped head, a wide rubber band pressed between the tip and the screw can add grip.
Safety and mistakes
Never use a screwdriver as a pry bar or chisel, and do not hold a piece of work in your hand while driving a screw into it; the tip can slip and cut you. Use insulated screwdrivers only as a supplement, not as a substitute for turning off the power when working near electricity.
Tool 3: An adjustable wrench
What it does
An adjustable wrench turns nuts and bolts of different sizes, which makes it ideal for plumbing connections, bike repairs, and furniture assembly. A pair of them, used together, lets you hold one fitting while you turn another.
What to look for
An eight-inch or ten-inch wrench is a good start. Check that the jaw moves smoothly with a thumbwheel and locks firmly with little play. Forged steel is stronger than cast metal. Many wrenches have size markings in both inches and millimeters, which is useful. Over time, you may want to add a set of combination wrenches and a socket set for precise work on bolts.
How to use it well
Tighten the jaws so that they hug the nut, and place the wrench so that you pull toward the fixed jaw, because the fixed jaw carries the load. Pulling the wrench toward you is safer and gives better control than pushing. For a stuck fitting, spray some penetrating oil, wait, and then try again. When tightening plumbing connections, snug them and add about a quarter turn. Overtightening can crack fittings, strip threads, and crush seals.
Safety and mistakes
Do not slip a pipe over the handle to extend it, as this can slip suddenly or break the tool and your knuckles. Do not use an adjustable wrench as a hammer. A frequent mistake is using one on a rounded nut, which will round it off further; use locking pliers or a six-point socket instead.
Tool 4: Pliers, in a few shapes
What they do
Pliers grip, bend, pull, and cut. Three kinds cover the basics: slip-joint pliers for general gripping, needle-nose pliers for small or hard-to-reach work, and locking pliers, which clamp onto an object and stay put.
What to look for
Choose pliers with hardened jaws, smooth pivots, and cushioned handles. A set of needle-nose pliers that includes a small wire cutter is very useful. A pair of 10-inch locking pliers is handy for rounded bolts, pipes, and pinching things shut. Channel-lock style pliers, with adjustable jaws, are a favorite for plumbing tasks such as removing a drain trap nut by hand-tight turns.
How to use them well
Choose the right jaw size and apply steady pressure. Keep the work close to the pivot for more force. To strip wire, use a dedicated wire stripper, which cuts only the insulation, and not the pliers, which can nick the copper. When removing a stubborn nut, grip squarely so that the jaws do not slip and round it off.
Safety and mistakes
Never rely on the plastic handles of pliers for electrical protection unless the pliers are specifically rated and marked as insulated, and even then, turn off the power. Do not use pliers on hardened bolts or as a replacement for a wrench on a nut you want to keep in good shape.
Tool 5: A tape measure
What it does
Almost every project starts with a measurement. A tape measure helps you cut a board, hang a picture, buy a rug, and check whether a new refrigerator will fit through the door. A mistake in measuring is the most common reason for a wasted piece of lumber or a return trip to the store.
What to look for
A 25-foot (7.5 meter) tape with a wide blade, about one inch, stays rigid when extended, which lets you measure across a room without help. A locking button, a clear printed scale with fractions, and a sturdy metal hook that slides slightly are all good features. Many tapes also mark the 16-inch stud spacing in red, which is a helpful guide.
How to use it well
The hook at the end slides by exactly its own thickness, to compensate for inside and outside measurements. Do not bend it. Measure twice, write the number down immediately, and mark with a pencil. For inside measurements, such as the width of a window opening, lay the case against one side and add the printed case length to your reading. When measuring something very precise, burn an inch by starting at the 1-inch mark and subtracting the inch at the end. This avoids errors from a worn hook.
Safety and mistakes
A tape blade retracts fast and can cut skin, so control the return with your thumb. Keep it away from electrical lines when measuring outside, because a metal tape can conduct electricity. Do not drop the case from a height or kink the blade, since a kink weakens the tape and makes it difficult to read.
Tool 6: A cordless drill and driver
What it does
A cordless drill drives screws faster than any hand tool and drills holes in wood, metal, and plastic. Once you own one, you will wonder how you ever put together flat-pack furniture without it. With the right bits, it also mixes paint, sands small areas, and drives lag screws.
What to look for
For household use, an 18- or 20-volt lithium-ion drill with a half-inch chuck and an adjustable clutch is a good choice. A second battery means you can work while one charges. Compact drills are lighter and easier on the wrists. Buy a starter set of bits that includes drill bits for wood and metal, plus driver bits for Phillips, flathead, and square screws. Masonry bits are a separate item if you ever need to drill into brick or concrete.
How to use it well
Set the clutch to a low number for small screws and raise it for larger ones, which prevents stripping and driving screws too deep. Drill a small pilot hole before driving a screw near the edge of a board to prevent splitting. When drilling, keep the drill perpendicular, use moderate speed, and back out occasionally to clear debris. Place a piece of masking tape over the spot on a tile or glossy surface so the bit does not skate.
| Task | Bit type | Speed setting |
|---|---|---|
| Driving screws | Matching driver bit | Low speed, clutch set |
| Drilling wood | Twist or brad-point bit | High speed |
| Drilling metal | Cobalt or high-speed steel bit | Low speed with a drop of oil |
| Drilling tile or brick | Carbide-tipped masonry bit | Low speed, no hammer on tile |
Safety and mistakes
Wear eye protection and tie back long hair and loose sleeves, because a spinning chuck can snag them. Clamp small pieces so they cannot spin. Before drilling into a wall, make sure that you are not about to hit a wire or pipe; use a stud finder with a live-wire detection feature, and do not drill near outlets or switches without caution. Disconnect the battery when you change bits. Charge lithium-ion batteries on a hard surface away from flammable material, and never charge a damaged battery. Dispose of old batteries at a recycling drop-off point rather than in household trash.
Tool 7: A utility knife
What it does
A sharp utility knife opens boxes, trims carpet and drywall, scores tile backer, cuts caulk lines, and scrapes off old paint. It is among the most used tools in any toolkit.
What to look for
Choose a retractable knife with a sturdy metal body and a way to change blades without a screwdriver. Keep spare blades in the handle or a case. Fixed-blade folding knives are also fine, provided they lock open securely.
How to use it well
A sharp blade is safer than a dull one, since a dull blade requires more force and slips. Replace the blade as soon as it tears instead of cuts. Cut away from your body and your other hand, using a straightedge and several light passes instead of one heavy one. Place a scrap board under the work to protect the surface beneath. To cut caulk, slice along the edge of the bead and peel it free.
Safety and mistakes
Retract the blade whenever you put the knife down. Dispose of used blades in a sealed container, like a coffee can or a dedicated blade bank, and never toss them loose into the trash. Never carry an open blade in your pocket. Keep knives out of reach of children and pets.
Tool 8: A stud finder and a level
What they do
Hanging heavy items on the wall requires finding the studs, the vertical framing members behind the drywall. A stud finder detects density changes, and a level tells you whether a shelf or picture is straight. Together, they prevent crooked shelves and ripped-out anchors.
What to look for
An electronic stud finder with a clear display and AC wire warning is a good choice. A 24-inch torpedo level or a standard box beam level works well, and many people also like the bubble level app on a phone, which is fine for quick jobs. A good level has a vial that is easy to read and does not drift.
How to use them well
Slide the stud finder slowly across the wall and mark both edges of the stud, then mark the center. Studs in most modern homes are about 16 inches apart on center, though this varies, particularly in older homes. Confirm by tapping or by drilling a tiny test hole. For items such as TVs and bookcases, anchor into studs. For lighter items, use wall anchors rated for the load, and read the weight rating on the package rather than guessing. Use the level by resting it against the item, centering the bubble between the lines, and marking the spot before you drill.
Safety and mistakes
Treat any wall as if it may contain wiring or pipes, particularly near outlets, switches, and bathrooms. A stud finder is a guide, not a guarantee. Do not rely on a single reading, and cut a small inspection hole if you are unsure. Heavy furniture such as dressers and bookcases should be secured to the wall to prevent tipping, which is a danger to children and is recommended by the CPSC.
The quick reference
| Tool | Handles | Spend more or less? |
|---|---|---|
| Claw hammer | Nails, light prying | Spend a bit more for comfort |
| Screwdriver set | Screws of all sorts | Spend more; good tips matter |
| Adjustable wrench | Nuts, bolts, plumbing fittings | Mid-range |
| Pliers | Gripping, bending, cutting | Mid-range |
| Tape measure | Every project | Mid-range, wide blade |
| Cordless drill | Holes and screws | Mid-range with two batteries |
| Utility knife | Cutting, scoring, trimming | Inexpensive; buy spare blades |
| Stud finder and level | Hanging and aligning | Mid-range |
Worthwhile additions once the basics are covered
A plunger and a drain snake
A flange plunger works on toilets and a cup plunger on sinks and tubs. A hand-crank drain snake clears hair and soap from a bathroom drain without chemicals. Chemical drain cleaners are caustic, can damage pipes, and are dangerous if they splash or mix with other products, so most plumbers recommend avoiding them. Never use a plunger after a chemical cleaner has been poured in.
A flashlight or headlamp
You will always work in dark places: under the sink, in the attic, behind the washing machine. A bright LED headlamp frees both hands, and a spare set of batteries belongs in the same drawer.
A circuit tester
A non-contact voltage tester costs little and tells you whether a wire or outlet is live. It is a safety check, not a license to work on live circuits. Always turn off the breaker and test again before you touch wiring. Electrical work beyond simple jobs like replacing a switch or a light fixture should go to a licensed electrician.
Safety gear
Safety glasses, work gloves, a dust mask or respirator for sanding and dusty jobs, and hearing protection for loud tools are inexpensive and easy to forget. Wear them. A pair of safety glasses is cheaper than a visit to the emergency room, and you only have two eyes. Keep a basic first aid kit in the same place.
A sturdy stepladder
Look for a ladder rated for your weight plus your tools, usually Type 1A at 300 pounds or more. Place it on firm, level ground, keep three points of contact, and never stand on the top step. Do not use the ladder near overhead power lines. For work on a second story, hire a professional.
Caulk gun, putty knife, and a few fasteners
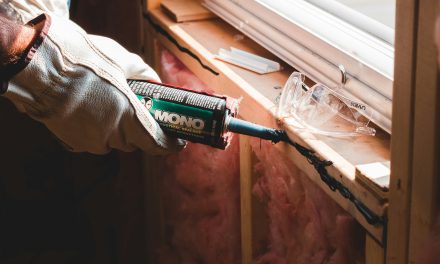
A caulk gun and a tube of silicone or acrylic caulk will seal bathrooms and windows. A putty knife helps with scraping and patching drywall. Keep an assortment of screws, wall anchors, nails, and picture hooks in a small organizer.
Mini-scenarios: what the basics let you do
The wobbly shelf
A shelf bracket is pulling out of the drywall. With a stud finder you locate the studs, drill pilot holes with the cordless drill, and screw the bracket into solid wood using longer screws. The shelf is steady in fifteen minutes and holds a full row of books.
The cabinet that will not close
A door hangs a little crooked. A Phillips screwdriver loosens the hinge adjustment screws, and a few tiny turns bring the door back into line. If the screw holes are stripped, a wooden toothpick dipped in glue and pressed into the hole gives the screw something to bite into.
The running toilet
The tank keeps refilling. You lift the lid, find a worn flapper, and replace it after shutting off the supply. An adjustable wrench for the supply nut and a cheap new flapper restore silence and cut the water bill.
Common mistakes
- Buying the biggest kit. Large sets contain many pieces you will never use. Build your kit piece by piece around the jobs you actually do.
- Using the wrong tool for the job. A screwdriver is not a chisel, and pliers are not a hammer. The wrong tool damages the work and the tool, and it is a leading cause of injury.
- Skipping eye protection. Most eye injuries in home workshops are preventable with ten-dollar glasses.
- Working with dull blades and bits. Dull tools slip and require extra force, which leads to accidents and rough results.
- Ignoring the manual. Cordless drills, ladders, and stud finders all have limits and instructions worth a few minutes of reading.
- Leaving tools out in the rain or garage dampness. Rust is slow, but it is certain.
- Driving screws without pilot holes near edges. The board splits, and the repair becomes a bigger one.
- Not asking for help. Lifting heavy objects alone and balancing on a ladder are better done with a second person.
When to call a professional
Owning tools makes you more capable, but it does not make every job a good idea. Know when to stop and call a licensed professional:
- Electrical beyond the basics. Anything inside the main panel, new circuits, aluminum wiring, repeated tripped breakers, or burning smells.
- Gas lines and appliances. If you smell gas, leave the house and call the gas company or 911 from outside.
- Structural work. Removing a wall, cutting a joist, or repairing sagging floors. Walls may carry loads you cannot see.
- Roofing and high work. Falls from roofs and tall ladders cause serious injuries every year.
- Major plumbing. Work on main lines, sewer lines, or anything involving soldering inside walls.
- Hazardous materials. Suspected asbestos in older insulation or floor tiles, and lead paint in homes built before 1978. Follow EPA guidance, and do not sand or scrape these materials yourself.
- Permitted work. Many jurisdictions require permits and inspections for electrical, plumbing, and structural projects. A licensed contractor knows the local code.
If a job feels wrong, it probably is. A professional visit costs far less than the damage of a mistake you did not see coming.
Frequently asked questions
How much should I spend on a starter toolkit?
Many people can assemble a capable kit for somewhere between 150 and 300 dollars, depending on the drill. Buy tools one at a time as you need them, and favor quality for tools that you will use heavily. Borrowed and secondhand tools in good condition can also be a bargain.
Should I buy a corded or cordless drill?
For most homeowners, cordless is more convenient and powerful enough for everyday jobs. A corded drill gives unlimited run time and is often cheaper, but it needs an outlet or extension cord. If you occasionally drill into concrete, consider renting a hammer drill for the job.
What size screwdriver set do I really need?
A set with Phillips sizes 1 through 3 and flathead tips in three sizes covers most household screws. Add a small precision set for eyeglasses and electronics and a few Torx and square bits for modern furniture and appliances.
Do I need metric and standard tools?
Yes, if you own imported furniture, bikes, or appliances. Most American-made fixtures use inch sizes, while many imported products use metric. An adjustable wrench and a multi-bit driver help bridge the gap, and a small metric socket and hex key set is a worthwhile addition.
How do I keep my tools from rusting?
Store them in a dry place, wipe off moisture after use, and apply a light coat of oil to bare steel. A silica gel packet or two in the toolbox helps in humid areas. If you find surface rust, remove it with fine steel wool and oil.
Is a tool set with 200 pieces a good deal?
Usually not. The number is made up mostly of small bits and sockets, and the main tools are often basic. A smaller set of well-made tools serves you better and lasts longer.
How can I learn to use these tools safely?
Read the instructions that come with each tool, watch a few reputable how-to videos from hardware stores and manufacturers, and practice on scrap wood before you work on something important. Many community colleges, hardware stores, and local libraries offer free or low-cost beginner classes.
Where should I keep my toolkit?
Choose a dry spot that is easy to reach, such as a closet shelf or a basement cabinet. Keep dangerous items, such as blades and batteries, out of reach of children, and keep a flashlight and a basic first aid kit nearby.
A good toolkit grows slowly, much like a good kitchen. You buy what you need for the job in front of you, take care of it, and a few years later you realize that you can fix most of what goes wrong in your home. Start with these eight, learn them well, and wear your safety glasses. The first time a stubborn problem gives way in your hands, you will understand why so many people keep the same hammer for thirty years.