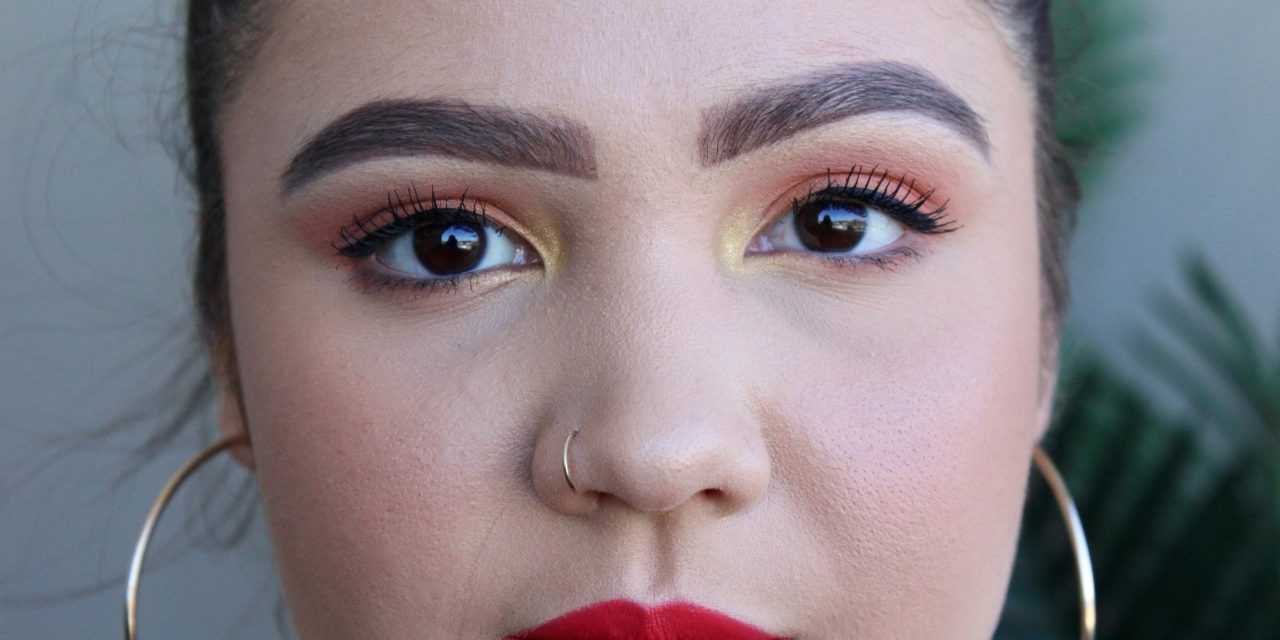
The foundation of achieving beautifully filled-in eyebrows lies in understanding your natural eyebrow shape. Each individual possesses a unique brow structure influenced by genetics, facial features, and bone structure. The natural arch of your eyebrows can significantly enhance your overall appearance, framing your face and accentuating your eyes. To identify your natural shape, observe the three key points: the start, arch, and tail of your brows. The starting point typically aligns with the inner corner of your eye, while the arch should peak above the outer edge of your iris. The tail should taper off towards the end of your brow, ideally aligning with the outer corner of your eye.
Recognizing your natural eyebrow shape is crucial for creating a harmonious look. For instance, individuals with round faces may benefit from slightly arched brows to elongate their appearance, while those with angular features might prefer softer, straighter brows to balance their sharpness. Understanding these nuances allows for a tailored approach to filling in eyebrows, ensuring that the final result complements your unique facial structure.
If you’re just starting to explore the art of eyebrow filling, you might find it helpful to read a related article that offers tips and techniques for beginners. This guide not only covers the basics of choosing the right products but also provides step-by-step instructions to achieve a natural look. For more insights on enhancing your beauty routine, check out this article on how to fill in eyebrows for beginners at this link.
Choosing the Right Tools for Filling In Eyebrows
Selecting appropriate tools is essential for achieving flawless eyebrows. The market offers a plethora of options, including eyebrow pencils, powders, gels, and pomades. Each tool serves a distinct purpose and can yield varying results based on individual preferences and desired outcomes. For instance, eyebrow pencils are ideal for precise application and filling in sparse areas, while powders provide a softer finish and are excellent for creating a more natural look.
When choosing tools, consider the texture and formulation that best suits your skin type and brow hair. A fine-tipped pencil allows for detailed strokes that mimic natural hair growth, while a gel or pomade can offer long-lasting hold and definition. Additionally, investing in quality brushes, such as an angled brush for pomades or a spoolie for blending, can significantly enhance the application process. Ultimately, the right tools empower you to achieve beautifully defined eyebrows that elevate your overall makeup look.
Selecting the Perfect Eyebrow Color

Choosing the right eyebrow color is paramount in achieving a cohesive and polished appearance. The ideal shade should complement your hair color and skin tone while enhancing your natural features. Generally, individuals with blonde hair may opt for shades one to two tones darker than their hair color, while those with darker hair can select shades that are one to two tones lighter for a softer effect. For redheads, warm auburn or copper tones can create a harmonious balance.
It is also essential to consider undertones when selecting eyebrow color. Cool-toned individuals may benefit from ashy or taupe shades, while warm-toned individuals can opt for golden or caramel hues. Testing colors in natural light can provide a more accurate representation of how the shade will appear on your brows. Ultimately, selecting the perfect eyebrow color enhances your overall makeup look and ensures that your brows seamlessly blend with your hair and complexion.
Prepping Your Eyebrows for Application

Before diving into the application process, proper preparation of your eyebrows is crucial for achieving optimal results. Start by cleansing the brow area to remove any excess oils or makeup residue that may hinder product adherence. Following this step, consider exfoliating the skin around your brows gently to eliminate dead skin cells and promote a smooth canvas for application.
Additionally, grooming your eyebrows is essential for maintaining their shape and ensuring an even application. Use tweezers or wax to remove any stray hairs outside your desired shape. If you prefer a fuller look, consider trimming longer hairs with small scissors to create a more polished appearance without sacrificing volume. Prepping your eyebrows not only enhances the final look but also contributes to the longevity of the products used during application.
If you’re just starting to fill in your eyebrows and want some helpful tips, you might find it useful to check out a related article that discusses the basics of eyebrow shaping and filling techniques. Learning the right methods can make a significant difference in achieving a polished look. For more insights on this topic, you can read about it in this informative piece on how to fill in eyebrows for beginners. Additionally, if you’re interested in understanding more about nature, you can explore how to tell bees apart from wasps and hornets by following this link.
Mapping Out Your Eyebrow Shape
Mapping out your eyebrow shape is a critical step in achieving symmetry and balance. Utilizing a brow mapping technique allows you to visualize where each key point of your brow should be positioned. Begin by using a brow pencil or a thin brush to mark three essential points: the start of the brow, the highest point of the arch, and the tail end.
To determine where to place these points accurately, hold a straight object like a pencil vertically against the side of your nose; this will indicate where your brow should begin. Next, angle the pencil from the outer edge of your nose through the center of your pupil to find the arch’s peak. Finally, extend the pencil from the outer edge of your nose to the outer corner of your eye to locate where the tail should end. This mapping technique ensures that both brows are symmetrical and proportionate to each other and your facial features.
If you’re just starting out with filling in your eyebrows, you might find it helpful to read a related article that offers tips and techniques for beginners. Understanding the basics can make a significant difference in achieving a natural look. For more insights, check out this informative piece on how to fill in eyebrows effectively. You can find it here: how to fill in eyebrows for beginners. This guide will help you master the art of eyebrow shaping and filling, ensuring you look your best.
Applying Eyebrow Pencil or Powder with Light Strokes
Once you have mapped out your desired eyebrow shape, it’s time to apply product using light strokes for a natural finish. Begin at the front of the brow and work towards the tail using short, feathery motions that mimic natural hair growth. This technique prevents harsh lines and creates an illusion of fullness without appearing overly drawn on.
When using an eyebrow pencil, ensure that it is sharpened to achieve precision in application. For powders, use an angled brush to deposit product evenly along the mapped-out shape. Start with a light hand and gradually build up intensity as needed; this approach allows for better control over color saturation and ensures that you can achieve a soft gradient effect from front to tail.
Defining the Arch and Tail of Your Eyebrows
Defining the arch and tail of your eyebrows is crucial for creating a polished look that enhances your facial features. The arch serves as a focal point that draws attention to your eyes, while the tail provides balance and completes the overall shape. To define these areas effectively, focus on adding slightly more product at the arch’s peak and tapering off towards the tail.
When defining the arch, use small strokes to create dimension and depth; this technique adds character without compromising the natural appearance of your brows. For the tail, ensure that it tapers off gently rather than abruptly; this creates a more flattering silhouette that complements various face shapes. Remember to step back periodically during application to assess symmetry and make adjustments as necessary.
Blending for a Natural Look Using a Spoolie Brush
Blending is an essential step in achieving beautifully filled-in eyebrows that appear natural rather than overly done. After applying product, use a spoolie brush to comb through your brows gently; this action helps distribute product evenly while softening any harsh lines created during application.
Begin at the front of the brow and work towards the tail using upward motions; this technique mimics natural hair growth patterns and creates a seamless transition between filled areas and natural hairs. If you find any areas that appear too dark or heavy after blending, consider using a clean spoolie brush to lighten those sections further by brushing through them again.
Setting Your Eyebrows with Gel or Wax
To ensure that your beautifully filled-in eyebrows maintain their shape throughout the day, setting them with gel or wax is essential. Brow gels come in clear or tinted formulas; clear gels provide hold without adding color, while tinted gels can enhance depth and fullness.
When applying gel or wax, use an upward motion with an applicator brush or spoolie to coat each hair evenly; this action helps lock in shape while providing additional definition. For those with particularly unruly brows, consider using a stronger hold wax that offers long-lasting control without compromising flexibility.
Correcting Mistakes and Cleaning Up Edges
Mistakes during eyebrow application are common but easily correctable with a few simple techniques. If you accidentally apply too much product or create uneven lines, don’t panic; there are effective methods for rectifying these issues. A clean concealer brush dipped in concealer can be used to outline and sharpen edges around your brows; this technique not only corrects mistakes but also highlights their shape.
For minor smudges or excess product outside of your mapped-out shape, use a cotton swab dipped in makeup remover to gently clean up those areas without disturbing the rest of your makeup. This precision ensures that you achieve crisp lines while maintaining an overall polished appearance.
Tips for Maintaining Your Filled-In Eyebrows Daily
Maintaining beautifully filled-in eyebrows requires consistent care and attention throughout each day. Start by incorporating a daily brow routine that includes grooming and touch-ups as needed; this practice ensures that your brows remain defined without appearing overdone.
Consider investing in products designed specifically for brow maintenance, such as nourishing oils or serums that promote healthy hair growth over time. Additionally, avoid excessive touching or rubbing of your brows throughout the day; this habit can lead to smudging or fading of products used during application.
In summary, achieving perfectly filled-in eyebrows involves understanding their natural shape, selecting appropriate tools and colors, prepping effectively before application, mapping out desired shapes accurately, applying products with precision using light strokes, defining key areas such as arches and tails carefully while blending for a seamless finish using spoolie brushes before setting them with gels or waxes—all while being prepared to correct mistakes along the way! By following these steps diligently each day alongside maintenance tips tailored specifically for brows—individuals can enjoy beautifully defined arches that enhance their overall appearance effortlessly!
FAQs
What tools do I need to fill in my eyebrows?
To fill in your eyebrows, you will typically need a few essential tools: an eyebrow pencil or powder, an angled brush (if using powder), a spoolie brush for blending, and a clear or tinted brow gel to set the look. Optional tools include a highlighter for the brow bone and tweezers for shaping.
How do I choose the right color for my eyebrow filler?
When selecting a color for your eyebrow filler, choose a shade that is one or two shades lighter than your natural hair color if you have dark hair, or one or two shades darker if you have light hair. This helps create a natural look. Additionally, consider your skin tone; warmer tones may suit warmer browns, while cooler tones may look better with ashier shades.
What is the best technique for filling in eyebrows?
The best technique for filling in eyebrows involves using short, hair-like strokes to mimic the natural hairs of your brows. Start by outlining the shape you want, then fill in sparse areas lightly. Use a spoolie brush to blend the product for a softer, more natural finish. Always build up the color gradually to avoid a harsh look.
How can I shape my eyebrows before filling them in?
To shape your eyebrows, start by determining your ideal brow shape based on your face shape. Use a pencil to mark key points: the start of the brow (aligned with the nostril), the arch (above the outer edge of the iris), and the end (aligned with the nostril and outer corner of the eye). You can then tweeze or wax any stray hairs outside these points to achieve your desired shape before filling them in.
How do I make my filled-in eyebrows last longer?
To make your filled-in eyebrows last longer, consider using a brow primer before applying any product. After filling in your brows, set them with a clear or tinted brow gel to lock the color in place. Additionally, avoid touching your brows throughout the day and consider using waterproof products if you expect to be in humid conditions.