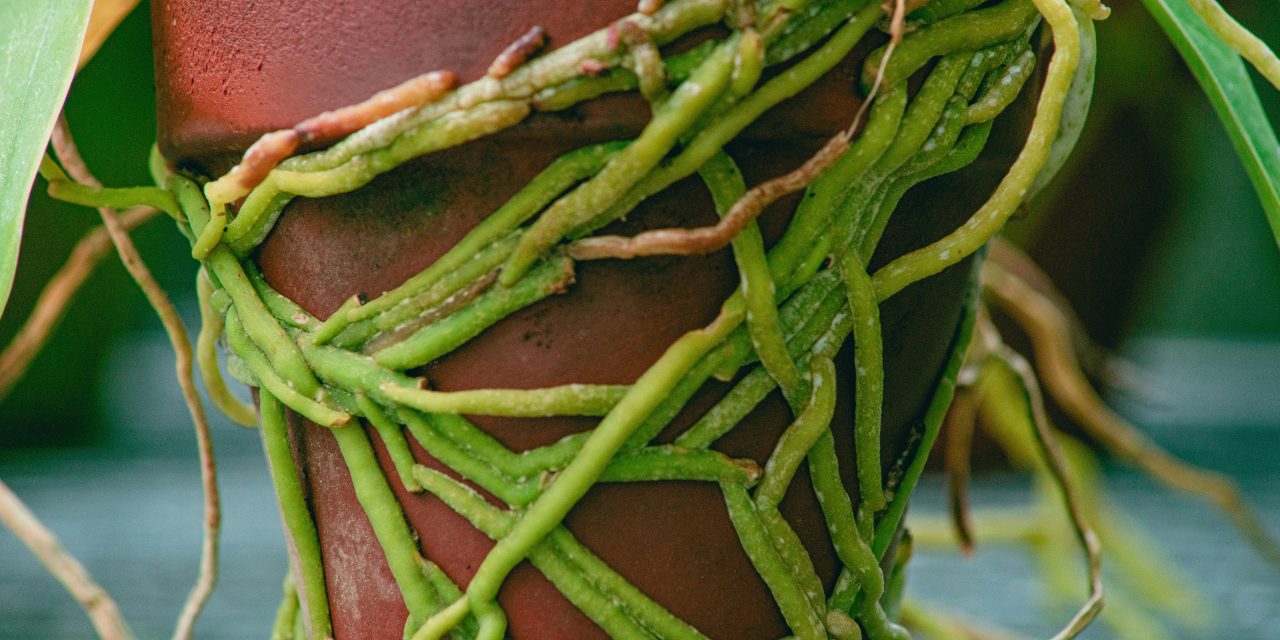
Root bound plants are a common issue faced by many indoor gardeners and horticulturists. This condition occurs when a plant’s roots grow excessively, filling the pot to the point where they begin to circle around the edges, restricting further growth. The signs of a root bound plant can be subtle at first but become increasingly evident over time. Key indicators include stunted growth, yellowing leaves, wilting despite adequate watering, and roots visibly protruding from drainage holes. In severe cases, the plant may exhibit signs of stress, such as leaf drop or poor flowering.
The primary cause of root bound conditions is inadequate pot size. When a plant is placed in a container that is too small, it cannot access the necessary nutrients and water required for optimal growth. Additionally, factors such as poor drainage, compacted soil, and insufficient watering can exacerbate the problem. Understanding these signs and causes is crucial for maintaining healthy houseplants and ensuring they thrive in their environment.
Choosing the Right Time to Repot Your Houseplant
Timing is critical when it comes to repotting houseplants. The best period for this task typically falls during the spring or early summer months when plants are actively growing. During this phase, they are more resilient and can recover from the stress of being moved to a new pot. Repotting during dormancy, such as in winter, can hinder growth and lead to further complications.
Observing your plant’s growth cycle can help determine the optimal time for repotting. If you notice roots emerging from the drainage holes or if the plant appears to be outgrowing its current container, it may be time to act. Additionally, if you observe a decline in overall health or vigor, it could indicate that the plant is root bound and requires immediate attention.
Selecting an Appropriate Pot for Repotting

Choosing the right pot is essential for the successful transition of your houseplant. The new container should be approximately 1-2 inches larger in diameter than the current pot to allow for adequate root expansion without overwhelming the plant. It is crucial to select a pot made from breathable materials such as terracotta or ceramic, which promote healthy air circulation and moisture retention.
Moreover, ensure that the new pot has sufficient drainage holes to prevent waterlogging, which can lead to root rot. Consider the plant’s growth habits; for instance, deep-rooted plants may require taller pots, while shallow-rooted varieties thrive in wider containers. By selecting an appropriate pot, you create an environment conducive to healthy root development and overall plant vitality.
Gathering Essential Tools and Materials

Before embarking on the repotting process, it is vital to gather all necessary tools and materials to ensure a smooth transition for your houseplant. Essential items include a new pot, fresh potting soil tailored to your plant’s specific needs (such as cactus mix for succulents or peat-based soil for tropical plants), pruning shears or scissors for trimming roots, and a trowel or scoop for transferring soil.
Additionally, having gloves on hand can protect your hands from dirt and potential irritants. A watering can or spray bottle will also be useful for hydrating the plant post-repotting. By preparing these tools in advance, you can streamline the process and minimize stress on both yourself and your plant.
Preparing the New Pot with Fresh Potting Soil
Once you have selected an appropriate pot, it is time to prepare it with fresh potting soil. Begin by placing a layer of soil at the bottom of the new container, ensuring it is evenly distributed. This layer should be thick enough to support the plant’s root ball without causing it to sit too low in the pot.
When choosing potting soil, opt for a high-quality mix that provides adequate drainage and aeration. For example, a blend containing perlite or vermiculite can enhance drainage capabilities while retaining moisture. Avoid using garden soil, as it may contain pests or diseases that could harm your houseplant. Properly preparing the new pot with suitable soil sets the foundation for successful repotting.
Carefully Removing the Plant from Its Current Pot
The next step involves carefully removing the plant from its current container. Begin by gently squeezing the sides of the pot to loosen any compacted soil and roots. If necessary, use a trowel or knife to carefully cut through any stubborn roots that may be clinging to the edges of the pot.
Once loosened, tilt the pot sideways and gently slide the plant out while supporting its base with one hand. Take care not to damage the foliage or stem during this process. If you encounter resistance, do not force it; instead, continue loosening the soil until it releases easily. This step is crucial in minimizing stress on the plant and ensuring a successful transition to its new home.
Inspecting and Loosening the Root Ball
After successfully removing the plant from its current pot, inspect the root ball for any signs of damage or disease. Healthy roots should appear white or light tan and feel firm to the touch. If you notice darkened or mushy roots, this may indicate root rot or other issues that require attention.
Gently loosen any tightly bound roots by carefully untangling them with your fingers or using pruning shears if necessary. This process encourages healthy growth by allowing roots to spread out into their new environment rather than continuing to circle around each other. Taking time to inspect and loosen the root ball is essential for promoting robust root development in your houseplant.
Trimming Excess or Damaged Roots
Once you have inspected and loosened the root ball, it is important to trim any excess or damaged roots before repotting. Using clean pruning shears or scissors, carefully cut away any brown or mushy roots that may be indicative of decay. This step not only helps prevent disease but also encourages new growth by redirecting energy towards healthy roots.
Be cautious not to remove too much of the root system; aim to trim only what is necessary to promote health without compromising stability. A well-maintained root system is vital for nutrient uptake and overall plant vitality. By addressing damaged roots during repotting, you set your houseplant up for success in its new environment.
Positioning the Plant in the New Pot Correctly
Positioning your plant correctly in its new pot is crucial for ensuring optimal growth and stability. Begin by placing the plant in the center of the new container, ensuring that it sits at the same depth as it did in its previous pot. This prevents stress on the stem and allows for proper moisture retention around the root system.
Once positioned correctly, take a moment to adjust any roots that may be sticking out excessively or curling back towards themselves. This will help promote healthy growth patterns as they adapt to their new surroundings. Proper positioning not only enhances aesthetics but also contributes significantly to your plant’s overall health.
Filling and Firming Soil Around the Roots
After positioning your plant correctly in its new pot, it’s time to fill in around the roots with fresh potting soil. Gently add soil around the base of the plant while ensuring that no air pockets form within the root zone. Lightly press down on the soil as you fill to eliminate any gaps while avoiding excessive compaction that could hinder root growth.
Leave about an inch of space at the top of the pot to allow for watering without overflow. This space also helps maintain moisture levels without risking waterlogging. Properly filling and firming soil around the roots creates a stable environment that supports healthy growth and development.
Watering and Aftercare Tips for a Healthy Transition
Once repotting is complete, watering your newly potted plant is essential for helping it acclimate to its new environment. Thoroughly saturate the soil until water drains from the bottom of the pot; this ensures that all roots receive adequate hydration while promoting healthy soil structure.
Following watering, place your plant in a location with indirect sunlight to minimize stress during its adjustment period. Monitor humidity levels and avoid exposing it to drafts or extreme temperatures during this time. Regularly check moisture levels in the soil; allow it to dry slightly between waterings but avoid letting it become completely dry.
In addition to proper watering practices, consider fertilizing your plant with a balanced liquid fertilizer after a few weeks of recovery. This will provide essential nutrients that support growth as it establishes itself in its new home. By following these aftercare tips, you can ensure a smooth transition for your houseplant into its new pot.
In summary, understanding root bound plants is crucial for maintaining their health and vitality. Recognizing signs of root binding allows gardeners to take timely action by repotting during optimal seasons with appropriate pots and fresh soil. Gathering essential tools facilitates a smooth process while careful handling during removal and inspection promotes healthy root systems. Proper positioning and filling techniques ensure stability while aftercare practices support recovery post-repotting. By following these steps diligently, houseplant enthusiasts can foster thriving indoor gardens that flourish year-round.
FAQs
What is a root bound houseplant?
A root bound houseplant is one whose roots have grown too large for the pot, causing them to circle around the inside of the container. This can lead to restricted growth, nutrient deficiencies, and poor water absorption.
How can I tell if my houseplant is root bound?
Signs that your houseplant is root bound include roots growing out of the drainage holes, stunted growth, yellowing leaves, and soil that dries out quickly after watering. You may also notice that the plant is top-heavy or tipping over.
When is the best time to repot a root bound houseplant?
The best time to repot a root bound houseplant is during the spring or early summer when the plant is actively growing. This allows the plant to recover more quickly from the stress of repotting.
What type of pot should I use for repotting?
When repotting, choose a pot that is 1-2 inches larger in diameter than the current pot. Ensure that the new pot has drainage holes to prevent water from accumulating at the bottom, which can lead to root rot.
What steps should I follow to repot a root bound houseplant?
To repot a root bound houseplant, first, gently remove the plant from its current pot. Loosen the roots if they are tightly bound. Place fresh potting soil in the new pot, position the plant at the desired height, and fill in around the roots with more soil. Water thoroughly after repotting.