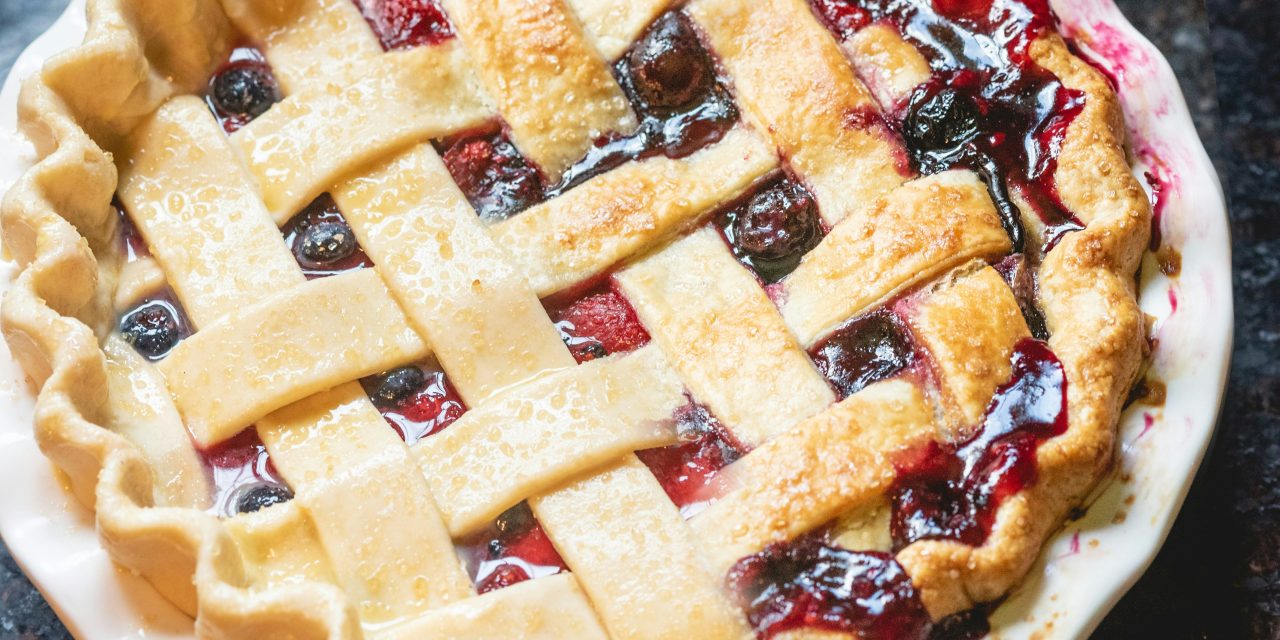
Frozen berries have become a staple in many kitchens, particularly when it comes to crafting delectable desserts like mixed berry pie. The convenience of frozen fruits allows for year-round access to a variety of berries, regardless of the season. This is particularly advantageous for those who wish to enjoy the vibrant flavors of strawberries, blueberries, raspberries, and blackberries without the constraints of seasonal availability. Moreover, frozen berries are often harvested at peak ripeness and flash-frozen, preserving their nutritional value and flavor profile.
Utilizing frozen berries not only simplifies the preparation process but also enhances the overall quality of the pie. The berries maintain their shape and texture during baking, resulting in a visually appealing dessert. Additionally, frozen berries can be more economical than fresh ones, especially when purchased in bulk. This article will guide you through the process of creating a mouthwatering mixed berry pie using frozen berries, ensuring that you achieve a delightful balance of flavors and textures.
If you’re looking to elevate your dessert game, consider making a delicious mixed berry pie using frozen berries. This simple yet delightful recipe allows you to enjoy the flavors of summer all year round. For more inspiration on how to enhance your garden and grow your own fresh ingredients, check out this related article on the top 10 best perennial flowers for full sun gardens. Not only will you have fresh berries for your pie, but you’ll also create a beautiful outdoor space.
Gathering Your Ingredients and Tools
Before embarking on your pie-making journey, it is essential to gather all necessary ingredients and tools. For a classic mixed berry pie, you will need the following components:
– **Frozen Berries**: A combination of strawberries, blueberries, raspberries, and blackberries is ideal. Aim for approximately 4 cups of mixed berries.
– **Sugar**: About ¾ cup granulated sugar will help balance the tartness of the berries.
– **Cornstarch**: Approximately ¼ cup is required to thicken the filling.
– **Lemon Juice**: A tablespoon of fresh lemon juice enhances the flavor and brightness of the pie.
– **Pie Crust**: You can either make your own or purchase a pre-made crust for convenience.
– **Butter**: Two tablespoons of unsalted butter will add richness to the filling.
– **Egg Wash**: One egg mixed with a tablespoon of water or milk for glazing the crust.
In addition to these ingredients, ensure you have the following tools on hand:
– **Mixing Bowls**: For combining ingredients.
– **Measuring Cups and Spoons**: Precision is key in baking.
– **Rolling Pin**: If making your own crust, a rolling pin is essential for achieving the desired thickness.
– **Pie Dish**: A standard 9-inch pie dish is recommended for this recipe.
– **Baking Sheet**: To catch any drips during baking.
Having everything prepared in advance will streamline the process and allow you to focus on creating a delicious pie.
Preparing the Frozen Berries for Baking

The preparation of frozen berries is crucial to achieving a successful mixed berry pie. Begin by removing the berries from the freezer and allowing them to thaw slightly at room temperature for about 15-20 minutes. This step helps to release excess moisture that could otherwise lead to a soggy crust. After thawing, gently pat the berries dry with a paper towel to absorb any remaining moisture.
Once dried, transfer the berries into a mixing bowl. At this stage, it is essential to incorporate sugar and cornstarch into the mixture. The sugar will draw out the natural juices from the berries while the cornstarch acts as a thickening agent during baking. Add the lemon juice to enhance flavor and mix gently to ensure that all ingredients are evenly distributed without crushing the delicate berries.
Allow this mixture to sit for about 10 minutes. This resting period enables the sugar to dissolve and creates a syrupy consistency that will coat the berries beautifully during baking. Properly preparing your frozen berries sets the foundation for a flavorful filling that will shine in your mixed berry pie.
Crafting the Perfect Pie Crust

The crust is an integral component of any pie, providing structure and texture that complements the filling. Whether you choose to make your own or use a store-bought option, crafting a perfect pie crust requires attention to detail. If opting for homemade, start by combining flour, salt, and cold butter in a mixing bowl. Use a pastry cutter or your fingers to work the butter into the flour until it resembles coarse crumbs.
Next, gradually add ice-cold water, one tablespoon at a time, mixing until the dough comes together. Be cautious not to overwork the dough; it should be slightly crumbly but hold together when pressed. Once formed, wrap the dough in plastic wrap and refrigerate for at least 30 minutes. Chilling allows the gluten to relax, resulting in a tender crust.
When ready to assemble your pie, roll out the chilled dough on a floured surface to about 1/8-inch thickness. Carefully transfer it into your pie dish, ensuring there are no tears or holes. Trim any excess dough hanging over the edges and reserve it for decorative elements later on. A well-crafted crust serves as a sturdy base for your mixed berry filling while providing a delightful crunch when baked.
If you’re looking to make a delicious mixed berry pie using frozen berries, you might find it helpful to explore some tips on creating a seamless baking routine. A related article that offers valuable insights is available here: how to establish a cleaning routine, which can help you keep your kitchen organized and efficient while you bake. With the right preparation, your mixed berry pie will turn out perfectly, allowing you to enjoy a delightful dessert with minimal stress.
Combining the Filling Ingredients
With your frozen berries prepared and pie crust ready, it’s time to combine all filling ingredients into one harmonious mixture. In your mixing bowl containing the thawed berries, add in the measured sugar and cornstarch if you haven’t already done so. Stir gently but thoroughly to ensure that each berry is coated with sugar and cornstarch.
Incorporating lemon juice at this stage is crucial as it not only enhances flavor but also balances out the sweetness from the sugar. The acidity from lemon juice brightens up the overall taste profile of your pie. If desired, you can also add a pinch of cinnamon or nutmeg for an extra layer of warmth and complexity.
Once all ingredients are combined, allow them to sit for an additional 5-10 minutes. This resting period allows flavors to meld together while ensuring that the cornstarch has time to absorb some of the berry juices. The result will be a luscious filling that is both flavorful and perfectly thickened for your mixed berry pie.
Assembling the Mixed Berry Pie
Assembling your mixed berry pie is an exciting step that brings together all your hard work into one beautiful dessert. Begin by preheating your oven to 425°F (220°C) so that it reaches optimal baking temperature by the time you finish assembling.
Pour your prepared berry filling into the chilled pie crust, spreading it evenly with a spatula or spoon. Ensure that you distribute the berries uniformly across the crust for even baking and presentation. If you reserved any excess dough from earlier, now is the time to create decorative elements such as lattice strips or cut-out shapes to place on top of your filling.
If opting for a lattice design, roll out additional dough and cut it into strips using a sharp knife or pastry cutter. Weave these strips over your filling in an alternating pattern for an elegant finish. Alternatively, you can use cookie cutters to create fun shapes like stars or hearts from leftover dough and place them atop your filling.
Once assembled, trim any excess dough from around the edges of your pie dish and crimp or flute them for an attractive finish. This not only enhances aesthetics but also helps seal in moisture during baking.
Adding the Finishing Touches: Crust Design and Egg Wash
The finishing touches on your mixed berry pie can elevate its appearance significantly while adding flavor and texture. One essential step is applying an egg wash before baking; this involves whisking together one egg with a tablespoon of water or milk until well combined. Using a pastry brush, gently apply this mixture over the crust’s surface.
The egg wash serves multiple purposes: it creates a beautiful golden-brown color as it bakes while also providing a slight sheen that enhances visual appeal. Additionally, it helps seal any seams in your crust, preventing juices from leaking out during baking.
For added flair, consider sprinkling coarse sugar over the crust after applying the egg wash. This not only adds sweetness but also creates a delightful crunch once baked. If desired, you can also sprinkle cinnamon or nutmeg over specific areas for an aromatic touch that complements the berry filling beautifully.
Baking the Pie to Perfection
With your mixed berry pie fully assembled and adorned with finishing touches, it’s time to bake it to perfection. Place your pie on a baking sheet lined with parchment paper; this will catch any potential drips from bubbling juices during baking. Transfer it into your preheated oven set at 425°F (220°C) and bake for approximately 15 minutes.
After this initial phase, reduce the oven temperature to 350°F (175°C) and continue baking for an additional 30-40 minutes or until the filling is bubbling and the crust is golden brown. Keep an eye on your pie during this time; if you notice excessive browning on the edges before it’s fully baked, cover them with aluminum foil to prevent burning.
The aroma wafting through your kitchen will be irresistible as your mixed berry pie bakes! Once done, remove it from the oven and allow it to cool slightly before proceeding to set it aside for cooling completely.
Cooling and Setting the Pie
Cooling is an essential step in ensuring that your mixed berry pie sets properly before serving. After removing it from the oven, place your pie on a wire rack at room temperature for at least 2 hours. This cooling period allows steam to escape while enabling the filling to thicken further as it cools down.
Avoid cutting into your pie too soon; doing so may result in runny filling that does not hold its shape when served. Patience is key here! Once cooled completely, you can slice into your masterpiece with confidence knowing that each piece will hold its form beautifully.
If you’re preparing ahead of time or wish to serve later, consider refrigerating your cooled pie for up to 3 days in an airtight container or covered with plastic wrap. This ensures freshness while allowing flavors to meld even further.
Serving Suggestions and Storage Tips
When it comes time to serve your mixed berry pie, consider pairing it with complementary accompaniments that enhance its flavors even more. A dollop of freshly whipped cream adds richness while balancing out tartness from berries beautifully. Alternatively, serve slices alongside vanilla ice cream for an indulgent treat that contrasts warm pie with cold creaminess.
For those who prefer lighter options, consider serving with Greek yogurt drizzled with honey; this adds creaminess without overwhelming sweetness while providing additional protein content.
In terms of storage tips, ensure that any leftover slices are kept covered in an airtight container in either room temperature or refrigerated conditions depending on how quickly you plan on consuming them. For longer storage periods beyond three days, consider freezing individual slices wrapped tightly in plastic wrap followed by aluminum foil; this preserves freshness while allowing you to enjoy later!
Troubleshooting Common Issues with Frozen Berry Pies
Even experienced bakers may encounter challenges when making frozen berry pies; however, understanding common issues can help mitigate potential problems effectively:
1. **Soggy Crust**: If you find yourself dealing with a soggy bottom crust after baking, consider pre-baking (blind baking) your crust before adding filling next time around; this helps create a barrier against moisture seeping through.
2. **Runny Filling**: A runny filling may occur if there isn’t enough cornstarch used or if berries were not properly drained before mixing; ensure accurate measurements next time!
3. **Burnt Edges**: If edges brown too quickly during baking but center remains undercooked—cover edges with aluminum foil until center finishes cooking through.
4. **Uneven Baking**: To avoid uneven baking results due to hot spots in ovens—rotate pies halfway through cooking time!
By addressing these common issues proactively through careful preparation techniques—your frozen berry pies will consistently turn out deliciously!
In summary, using frozen berries for mixed berry pie offers convenience without sacrificing flavor or quality. By following each step meticulously—from gathering ingredients through cooling—you can create an exquisite dessert that delights everyone at your table! With proper storage techniques and troubleshooting tips in mind—your culinary creations will be enjoyed long after they’re made!
FAQs
Can I use frozen berries for mixed berry pie?
Yes, you can use frozen berries for mixed berry pie. In fact, frozen berries are a convenient option as they are available year-round and can be just as flavorful as fresh berries when baked.
Do I need to thaw frozen berries before using them in the pie?
It is not necessary to thaw frozen berries before using them in your pie. You can add them directly to the pie filling, but you may need to adjust the baking time slightly to ensure they cook through properly.
What types of berries work best for a mixed berry pie?
Common types of berries that work well in a mixed berry pie include blueberries, raspberries, strawberries, and blackberries. You can use a combination of these berries for a more complex flavor.
How do I prevent the pie from becoming too watery?
To prevent your mixed berry pie from becoming too watery, you can add a thickening agent such as cornstarch or tapioca starch to the berry filling. This will help absorb excess moisture released during baking.
What temperature should I bake the mixed berry pie at?
Typically, you should bake a mixed berry pie at 375°F (190°C) for about 45-55 minutes, or until the crust is golden brown and the filling is bubbling. Be sure to check the pie periodically to avoid over-baking.