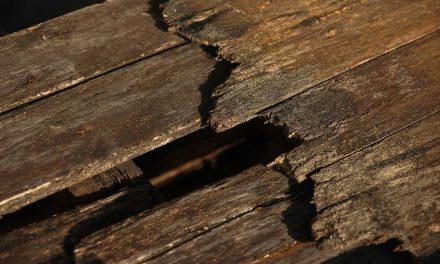
Squeaky floors are a common nuisance in many homes, often attributed to a variety of factors that can compromise the integrity of flooring systems. The primary cause of squeaks is the movement between floorboards and the underlying joists. This movement can occur due to several reasons, including natural settling of the house, changes in humidity, and temperature fluctuations that cause wood to expand and contract. Over time, these factors can lead to gaps forming between the floorboards and joists, resulting in the characteristic squeaking sound when weight is applied.
Another significant contributor to squeaky floors is the use of inadequate fasteners or poor installation techniques during the initial construction or renovation of the flooring. If nails or screws are not properly secured, they can loosen over time, allowing for movement that generates noise. Additionally, older homes may have experienced wear and tear that exacerbates these issues, making it essential for homeowners to understand the underlying causes to effectively address the problem.
Identifying the Exact Location of the Squeak
Before attempting any repairs, it is crucial to accurately identify the source of the squeak. This process often involves a systematic approach to pinpointing the exact location where the noise originates. Start by walking across the floor in various areas while listening carefully for squeaks. Pay attention to which boards produce noise and note their locations. It may be helpful to have a partner assist by listening from below if there is access to a basement or crawl space.
Once you have identified the noisy areas, it is beneficial to inspect them visually. Look for gaps between floorboards or signs of movement in the joists beneath. Using a flashlight can help illuminate dark spaces and reveal any potential issues. Marking these locations with tape or chalk can assist in keeping track of problem areas as you prepare for repairs.
Preparing Your Tools and Materials

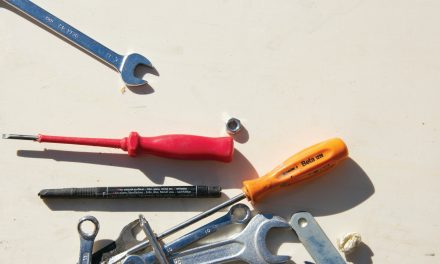
Equipping yourself with the right tools and materials is essential for effectively addressing squeaky floors. A comprehensive toolkit should include a hammer, a drill with appropriate bits, finishing nails or screws, powdered graphite or talcum powder, construction adhesive, and shims. Additionally, having a measuring tape and a level can aid in ensuring that your repairs are precise and effective.
Before beginning any work, it is advisable to gather all necessary materials in one location to streamline the repair process. This preparation not only saves time but also minimizes disruptions during repairs. Ensuring that you have high-quality materials will contribute to the longevity of your fixes and help prevent future squeaks from developing.
Using Powdered Graphite to Lubricate Floor Joists

One effective method for reducing squeaks involves lubricating the floor joists with powdered graphite. This dry lubricant can significantly decrease friction between moving parts, thereby minimizing noise. To apply powdered graphite, locate the squeaky areas identified earlier and carefully lift any loose floorboards if possible. Sprinkle a generous amount of powdered graphite directly onto the joists beneath.
Once applied, gently press down on the floorboards to allow the graphite to penetrate into any gaps between the joists and boards. This method is particularly advantageous because it does not create a mess like liquid lubricants might, and it does not attract dust or dirt over time. After applying graphite, walk across the area again to test for any remaining squeaks; if necessary, additional applications may be warranted.
Applying Talcum Powder or Baby Powder Between Floorboards
Another simple yet effective solution for squeaky floors is using talcum powder or baby powder as a lubricant between floorboards. This method works similarly to powdered graphite by filling gaps and reducing friction. To implement this technique, first identify the squeaky boards and gently lift them if possible. Sprinkle a light layer of talcum powder between the boards, ensuring even coverage.
After applying the powder, walk across the area to help distribute it evenly into any crevices. The powder will act as a barrier that reduces friction when weight is applied, effectively silencing squeaks. This solution is particularly useful for minor squeaks and can be reapplied as needed without significant effort.
Securing Loose Floorboards with Finishing Nails or Screws
If squeaks persist after lubrication efforts, it may be necessary to secure loose floorboards more permanently using finishing nails or screws. Begin by identifying which boards are loose and require additional fastening. Using a drill or hammer, carefully drive finishing nails or screws into the boards at an angle to ensure they penetrate deeply into the joists beneath.
When securing floorboards, it is essential to avoid overdriving nails or screws, as this can damage the wood and create additional noise. Instead, aim for a snug fit that holds the boards firmly in place without compromising their structural integrity. Once completed, check for any remaining squeaks by walking across the area again; if necessary, repeat this process until all loose boards are secured.
Reinforcing Subfloor with Construction Adhesive
In cases where squeaks are caused by movement between the subfloor and joists, reinforcing this connection with construction adhesive can provide a long-lasting solution. Begin by identifying areas where movement occurs and ensure they are clean and free from debris. Apply a bead of construction adhesive along the seams where the subfloor meets the joists.
After applying adhesive, press down firmly on the subfloor to ensure proper adhesion. It may be beneficial to use weights or clamps to hold everything in place while the adhesive cures according to manufacturer instructions. This method not only reduces noise but also enhances overall stability within your flooring system.
Installing Shims Between Joists and Subfloor
Installing shims between joists and subfloor can also help eliminate squeaks caused by gaps or unevenness in flooring systems. Shims are thin pieces of wood that can be inserted into spaces where movement occurs. To begin this process, locate areas where squeaks are prevalent and assess whether there are gaps between joists and subfloor.
Carefully lift any loose floorboards in these areas and insert shims into gaps as needed. Ensure that shims fit snugly without forcing them into place; they should provide support without causing additional stress on surrounding materials. Once installed, replace floorboards and check for any remaining noise by walking across the area.
Utilizing Squeak-Relief Kits for Easy Fixes
For homeowners seeking a more straightforward solution, commercially available squeak-relief kits offer an efficient way to address noisy floors without extensive repairs. These kits typically include specialized screws designed to secure loose floorboards directly to joists while minimizing damage to visible surfaces.
To use a squeak-relief kit, follow the manufacturer’s instructions carefully. Generally, this involves drilling pilot holes through the floorboards into the joists below before inserting screws designed specifically for this purpose. Once installed, these screws effectively eliminate movement that causes squeaking while remaining discreetly hidden from view.
Checking and Tightening Stair Treads and Risers
Squeaky stairs can be just as bothersome as squeaky floors; therefore, it is essential to check stair treads and risers for any signs of looseness or wear. Begin by inspecting each tread and riser for movement when weight is applied; if any are loose, they will likely produce noise during use.
To secure loose stair components, use finishing nails or screws as needed to fasten treads firmly against risers and stringers beneath them. Additionally, applying construction adhesive along joints can further enhance stability and reduce noise when ascending or descending stairs.
Preventative Maintenance to Avoid Future Squeaks
Preventative maintenance plays a crucial role in avoiding future squeaks in flooring systems. Regularly inspecting your floors for signs of wear or movement can help catch potential issues before they escalate into more significant problems requiring extensive repairs. Additionally, maintaining consistent humidity levels within your home can minimize wood expansion and contraction that contributes to squeaking.
Consider using area rugs in high-traffic zones to reduce wear on flooring surfaces over time. Furthermore, ensuring proper ventilation in crawl spaces or basements can help regulate moisture levels that affect wood integrity. By implementing these preventative measures, homeowners can enjoy quieter floors while prolonging their lifespan.
In summary, addressing squeaky floors involves understanding their causes, identifying specific locations of noise, preparing appropriate tools and materials, and employing various techniques such as lubrication with powdered graphite or talcum powder, securing loose boards with nails or screws, reinforcing subfloors with construction adhesive, installing shims, utilizing squeak-relief kits, checking stair components, and practicing preventative maintenance strategies. By taking these steps diligently, homeowners can effectively silence their floors while ensuring long-term stability and comfort within their living spaces.
### FAQ Section
1. **What causes floors to squeak?**
– Floors typically squeak due to movement between floorboards and joists caused by settling, humidity changes, or inadequate fastening during installation.
2. **How can I identify where my floor is squeaking?**
– Walk across your floor while listening for noise; mark areas where you hear squeaks for further inspection.
3. **What tools do I need to fix squeaky floors?**
– Essential tools include a hammer, drill with bits, finishing nails/screws, powdered graphite/talcum powder, construction adhesive, shims, measuring tape, and a level.
4. **Is powdered graphite effective for lubricating floor joists?**
– Yes! Powdered graphite reduces friction between moving parts effectively without creating messes like liquid lubricants.
5. **Can I use baby powder instead of talcum powder?**
– Yes! Baby powder serves as an effective alternative lubricant between floorboards.
6. **How do I secure loose floorboards?**
– Use finishing nails or screws driven at an angle into loose boards to fasten them securely against joists beneath.
7. **What is construction adhesive used for?**
– Construction adhesive reinforces connections between subfloors and joists to minimize movement that causes noise.
8. **What are shims used for?**
– Shims fill gaps between joists and subflooring to provide additional support and stability.
9. **Are there commercial kits available for fixing squeaky floors?**
– Yes! Squeak-relief kits contain specialized screws designed for easy installation without extensive repairs.
10. **How can I prevent future squeaks?**
– Regular inspections, maintaining humidity levels, using area rugs in high-traffic zones, and ensuring proper ventilation can help prevent future issues.
In conclusion, addressing squeaky floors requires understanding their causes and employing various techniques for effective repair while also implementing preventative measures for long-term maintenance success.
FAQs
What causes squeaky floors?
Squeaky floors are typically caused by the movement of floorboards against each other or against the subfloor. This can occur due to loose nails, gaps between the boards, or the natural expansion and contraction of wood due to changes in humidity and temperature.
Can I fix squeaky floors without removing the flooring?
Yes, there are several methods to fix squeaky floors without removing the flooring. Common techniques include using screws to secure loose floorboards, applying talcum powder or graphite to reduce friction, or using wood glue to fill gaps between boards.
What tools do I need to fix squeaky floors?
To fix squeaky floors, you may need a few basic tools such as a drill, screws, a hammer, a measuring tape, wood glue, and possibly a floor squeak repair kit. Additionally, a flashlight can help you locate the source of the squeak in dark areas.
Is it safe to walk on squeaky floors while fixing them?
While it is generally safe to walk on squeaky floors, caution is advised. If you are in the process of making repairs, it’s best to avoid putting weight on the affected areas until the repairs are completed to prevent further damage or injury.
How long does it take to fix squeaky floors?
The time it takes to fix squeaky floors can vary depending on the method used and the extent of the problem. Simple fixes, like applying talcum powder or tightening screws, can take as little as 30 minutes, while more involved repairs may take a few hours.