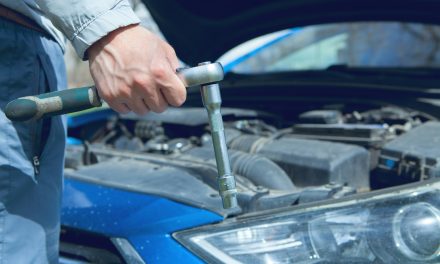
Proper headlight alignment is crucial for ensuring optimal visibility during nighttime driving and adverse weather conditions. Misaligned headlights can lead to a range of issues, including reduced illumination of the road ahead, blinding oncoming drivers, and increased risk of accidents. According to the National Highway Traffic Safety Administration (NHTSA), approximately 50% of all accidents occur at night, highlighting the significance of effective lighting systems. Properly aimed headlights not only enhance the driver’s ability to see but also improve the safety of other road users by preventing glare.
Moreover, well-aligned headlights contribute to the longevity of the vehicle’s lighting system. When headlights are misaligned, they may cause uneven wear on the bulbs and reflectors, leading to premature failure. This can result in increased maintenance costs and the need for frequent replacements. Therefore, understanding the importance of headlight alignment is essential for both safety and cost-effectiveness.
If you’re looking to improve your driving experience by properly aiming your car headlights at home, you might find it helpful to read a related article that discusses various DIY car maintenance tips. This article not only covers headlight alignment but also offers insights into other essential car care practices. For more information, you can check out the article here: DIY Car Maintenance Tips.
Gathering the Necessary Tools and Materials
Before embarking on the headlight alignment process, it is imperative to gather all necessary tools and materials. The primary tools required include a tape measure, a level, a screwdriver or wrench (depending on your vehicle’s adjustment mechanism), and a marking pen or tape. Additionally, a flat surface is essential for accurate measurements.
In terms of materials, having a clean cloth or paper towel on hand is advisable for cleaning the headlight lenses before adjustment. Dirty lenses can scatter light and create an illusion of misalignment. Furthermore, if your vehicle uses halogen or LED bulbs, ensure you have replacement bulbs available in case any are found to be faulty during inspection. Having these tools and materials ready will streamline the adjustment process and enhance accuracy.
Preparing Your Vehicle for Headlight Adjustment

Preparation is key when it comes to adjusting your vehicle’s headlights. Begin by ensuring that your vehicle is parked on a level surface, as this will provide a stable foundation for accurate measurements. It is also advisable to check that your tires are properly inflated, as uneven tire pressure can affect the vehicle’s stance and subsequently impact headlight alignment.
Next, ensure that your vehicle is free from excess weight. Remove any heavy items from the trunk or back seat that could alter the vehicle’s center of gravity. Additionally, make sure that all lights are functioning correctly before proceeding with adjustments. This includes checking both low and high beams, as well as turn signals and brake lights. A thorough inspection will help identify any underlying issues that may need addressing before focusing on alignment.
Setting Up a Suitable Location for Aiming Your Headlights

Choosing an appropriate location for headlight aiming is critical for achieving accurate results. Ideally, this should be done in a dimly lit area or at night to minimize interference from ambient light. A flat wall or garage door serves as an excellent backdrop for measuring headlight beam patterns.
Position your vehicle approximately 25 feet away from the wall, ensuring that it is centered and perpendicular to the wall surface. This distance allows for precise measurements while providing ample space for adjustments. Mark the centerline of your vehicle on the wall using tape or chalk; this will serve as a reference point for aligning your headlights accurately.
If you’re looking to improve your nighttime driving experience, properly aiming your car headlights is essential for safety and visibility. You can find a helpful guide on how to aim car headlights at home that walks you through the process step by step. Additionally, if you’re interested in other home improvement tips, you might enjoy this article on making a delicious tuna noodle casserole with pantry staples, which you can check out here. Taking care of your vehicle and your meals can go hand in hand for a well-rounded approach to home maintenance.
Measuring and Marking the Headlight Beam Pattern
Once your vehicle is positioned correctly, it’s time to measure and mark the headlight beam pattern. Turn on your headlights and observe where the light hits the wall. The ideal beam pattern should be slightly below the centerline mark you created earlier. Using a tape measure, determine the height of your headlight from the ground and replicate this measurement on the wall.
Mark this point clearly with tape or chalk; this will serve as your target for vertical adjustment. It’s important to note that different vehicles may have varying specifications for headlight alignment, so consulting your owner’s manual can provide specific guidelines tailored to your model.
Adjusting the Vertical Aim of Your Headlights
With your measurements in place, you can now proceed to adjust the vertical aim of your headlights. Most vehicles have adjustment screws located near the headlight assembly; these may require a screwdriver or wrench to manipulate.
To adjust the vertical aim, turn the screw clockwise or counterclockwise as needed until the top edge of the beam aligns with your marked point on the wall. It’s advisable to make small adjustments incrementally and recheck frequently to avoid over-adjusting. Once you achieve the desired alignment, ensure that both headlights are set to the same height for balanced illumination.
Adjusting the Horizontal Aim of Your Headlights
After successfully adjusting the vertical aim, focus on horizontal alignment next. This step ensures that your headlights illuminate the road directly in front of you without veering too far left or right, which could blind other drivers or leave gaps in visibility.
To adjust horizontal aim, locate the horizontal adjustment screw on each headlight assembly. Similar to vertical adjustments, turn these screws gradually while observing where the light beam hits on the wall. The ideal position should be slightly to the right of center to avoid dazzling oncoming traffic while still providing adequate illumination for your path ahead.
Testing the Headlight Alignment in Real Conditions
Once adjustments are complete, it’s essential to test your newly aligned headlights in real-world conditions. Take your vehicle out for a nighttime drive in an area with minimal street lighting to evaluate visibility effectively. Pay attention to how well you can see road signs, pedestrians, and obstacles in your path.
Additionally, observe how other drivers react to your headlights; if they appear to be excessively bright or cause discomfort, further adjustments may be necessary. Testing in various conditions will provide insight into whether your adjustments have been successful or if additional fine-tuning is required.
Troubleshooting Common Headlight Aiming Issues
Despite careful adjustments, you may encounter common issues that affect headlight alignment. One prevalent problem is bulb misalignment due to improper installation or wear over time. If you notice that one headlight appears dimmer than the other or does not align correctly despite adjustments, it may be time to replace the bulb.
Another issue could stem from suspension problems or uneven tire wear affecting vehicle height. If adjustments do not yield satisfactory results, consider having your suspension system inspected by a professional mechanic to rule out underlying issues that could impact alignment.
Safety Tips While Performing Headlight Adjustments
Safety should always be a priority when performing headlight adjustments. Ensure that your vehicle is parked securely with the engine off before beginning any work on the headlights. Use caution when handling tools around electrical components to avoid accidental damage or injury.
Additionally, wearing safety goggles can protect your eyes from debris while working near the headlight assembly. If you are unsure about any aspect of the adjustment process or feel uncomfortable performing it yourself, do not hesitate to seek professional assistance.
When to Seek Professional Assistance for Headlight Aiming
While many individuals can successfully adjust their headlights at home, certain situations warrant professional intervention. If you have attempted adjustments multiple times without success or if you suspect underlying mechanical issues affecting alignment, consulting a qualified technician is advisable.
Professional mechanics possess specialized tools and expertise that can diagnose complex problems beyond simple misalignment. They can also provide comprehensive inspections of your vehicle’s lighting system and recommend necessary repairs or replacements to ensure optimal performance.
In summary, proper headlight alignment is essential for safe driving conditions at night and during inclement weather. By gathering necessary tools, preparing your vehicle adequately, and following systematic steps for adjustment, you can enhance visibility while minimizing risks associated with misaligned headlights. Regular checks and maintenance will ensure that your lighting system remains effective over time, contributing significantly to overall road safety.
FAQs
What tools do I need to aim my car headlights at home?
To aim your car headlights at home, you will typically need a flat surface, a measuring tape, a screwdriver or wrench (depending on your headlight adjustment mechanism), and a level or a headlight aiming tool if available. Additionally, a wall or garage door can serve as a reference point for alignment.
How do I prepare my car for headlight aiming?
Before aiming your headlights, ensure your car is on a level surface and that the tires are properly inflated. Remove any heavy items from the trunk and ensure that the fuel tank is at least half full. This helps to maintain the car’s normal ride height during the adjustment process.
What is the correct height for headlight aiming?
The correct height for aiming headlights typically depends on the vehicle’s make and model. A common guideline is to aim the headlights so that the top of the beam is at or slightly below the height of the headlights when the car is on a level surface. This is usually about 2 to 4 inches below the center of the headlight lens.
How do I adjust the headlights once I have them positioned?
To adjust the headlights, locate the adjustment screws or knobs on the headlight assembly. These are usually found on the top or side of the headlight housing. Turn the screws clockwise or counterclockwise to raise or lower the beam, or to adjust the horizontal alignment. Make small adjustments and check the beam pattern frequently to ensure proper alignment.
How can I check if my headlights are properly aimed?
To check if your headlights are properly aimed, park your car about 25 feet away from a wall or garage door with the headlights on. The top of the beam should be at or just below the height of the headlight center, and the beams should be evenly spaced apart. You can also ask someone to observe the light pattern while you adjust to ensure optimal visibility.