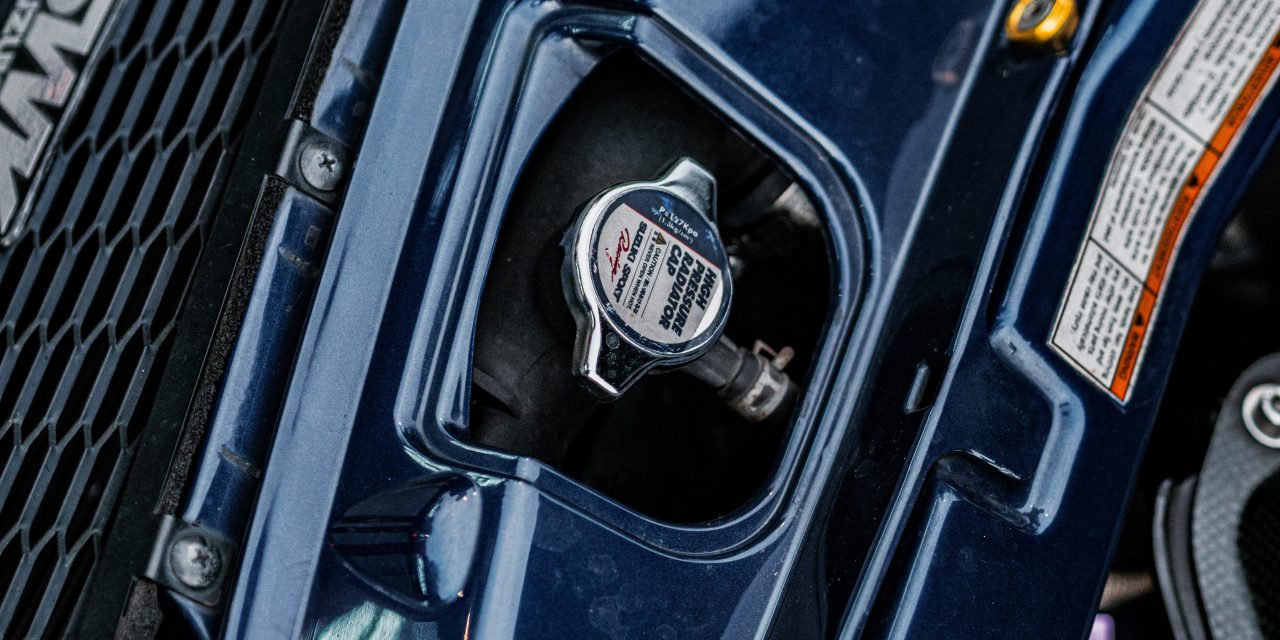
The gas cap is a seemingly inconspicuous component of a vehicle, yet it plays a pivotal role in maintaining the integrity of the fuel system. Its primary function is to seal the fuel tank, preventing fuel vapors from escaping into the atmosphere and ensuring that the fuel remains uncontaminated. A properly functioning gas cap is essential for optimal engine performance, fuel efficiency, and compliance with environmental regulations. When the gas cap is compromised, it can lead to a myriad of issues, including decreased fuel economy, increased emissions, and potential damage to the vehicle’s evaporative emissions control system (EVAP).
Moreover, a faulty gas cap can trigger the check engine light on the dashboard, indicating that there is an issue within the vehicle’s emissions system. This warning should not be ignored, as it may lead to more significant problems if left unaddressed. Understanding the importance of a proper gas cap is crucial for vehicle owners who wish to maintain their car’s performance and longevity while also contributing to environmental conservation.
If you’re looking to enhance your automotive maintenance skills, you might find it helpful to read an article on how to replace a gas cap on a car. This task is essential for ensuring your vehicle runs efficiently and prevents fuel evaporation. For a delicious break after your DIY project, consider checking out this recipe for creamy one-pot ditalini pasta with spinach, which can be found here.
Identifying Signs That Your Gas Cap Needs Replacement
Recognizing when a gas cap requires replacement is vital for maintaining vehicle efficiency and performance. One of the most common indicators is the illumination of the check engine light. This warning signal often suggests that there is a leak in the fuel system, which could be traced back to a faulty gas cap. Additionally, if you notice a strong odor of gasoline around your vehicle, it may indicate that fuel vapors are escaping due to an inadequate seal.
Physical signs can also provide clues regarding the condition of your gas cap. Cracks, wear, or deformation on the cap itself are clear indicators that it may no longer be functioning effectively. Furthermore, if you find that your gas cap does not click securely when closed or feels loose, it is time to consider a replacement. Regularly inspecting your gas cap can prevent more severe issues down the line and ensure that your vehicle operates efficiently.
Gathering the Necessary Tools and Materials

Before embarking on the process of replacing your gas cap, it is essential to gather all necessary tools and materials to ensure a smooth and efficient operation. The primary item required is, of course, a new gas cap that is compatible with your vehicle’s make and model. It is advisable to consult your owner’s manual or an automotive parts store to ensure you select the correct replacement.
In addition to the new gas cap, you may need basic tools such as gloves for hygiene and protection against any residual fuel or contaminants. A clean cloth can also be useful for wiping down any surfaces around the gas tank opening before installation. Having these materials on hand will streamline the process and minimize any potential complications during the replacement.
Locating the Gas Cap on Your Vehicle

Locating the gas cap on your vehicle is typically straightforward, as it is usually situated on one side of the rear quarter panel or integrated into the fuel door. Most vehicles have a designated fuel door that can be opened either manually or automatically, depending on the model. Once you have accessed this compartment, you will find the gas cap secured in place.
It is important to familiarize yourself with your vehicle’s specific design, as some models may have unique features related to their fuel systems. For instance, certain vehicles may have locking gas caps for added security against fuel theft. Understanding where your gas cap is located will facilitate easier access during maintenance and replacement tasks.
If you’re looking to tackle some basic car maintenance, replacing a gas cap is a straightforward task that can help prevent fuel evaporation and improve your vehicle’s efficiency. For more information on how to handle common household issues, you might find this article on garbage disposals helpful, especially if you encounter problems like humming but not working. You can read it here: garbage disposal troubleshooting. Remember, keeping your car in good shape often involves small fixes that can make a big difference.
Removing the Old Gas Cap Safely
Removing the old gas cap requires careful handling to avoid any spillage or contamination of fuel vapors. Begin by ensuring that your vehicle is parked on a level surface and that the engine is turned off. If you have recently refueled, allow some time for any residual pressure in the fuel tank to dissipate before proceeding.
To remove the gas cap, simply turn it counterclockwise until it releases from its position. If you encounter resistance or difficulty in removing it, check for any debris or dirt around the threads that may be obstructing its removal. Once detached, place the old gas cap in a safe location away from any open flames or sources of ignition to prevent accidents.
Choosing the Right Replacement Gas Cap
Selecting an appropriate replacement gas cap is crucial for ensuring compatibility with your vehicle’s fuel system. When shopping for a new gas cap, consider factors such as size, threading type, and whether it includes any additional features like a locking mechanism or venting capabilities. It is advisable to consult your vehicle’s owner manual or seek assistance from an automotive professional if you are uncertain about which type to purchase.
Additionally, opting for original equipment manufacturer (OEM) parts can provide peace of mind regarding quality and fitment. While aftermarket options may be more affordable, they may not always meet the same standards as OEM components. Investing in a high-quality replacement gas cap can save you from future complications related to leaks or improper sealing.
Installing the New Gas Cap Correctly
Once you have acquired the correct replacement gas cap, it is time to install it properly to ensure optimal performance. Begin by cleaning the area around the fuel filler neck with a clean cloth to remove any dirt or debris that could interfere with sealing. This step is crucial for preventing leaks and ensuring that vapors do not escape.
To install the new gas cap, align it with the threads on the fuel filler neck and turn it clockwise until you hear a click or feel resistance indicating that it is securely fastened. It is essential not to overtighten the cap, as this could damage both the cap and the filler neck. A snug fit will suffice to create an effective seal without risking damage.
Ensuring a Secure Fit to Prevent Leaks
After installing the new gas cap, verifying that it fits securely is paramount in preventing leaks and maintaining fuel efficiency. A properly sealed gas cap will prevent fuel vapors from escaping into the atmosphere while also keeping contaminants out of the fuel system. To ensure a secure fit, gently tug on the gas cap after installation; it should not wobble or feel loose.
If you notice any signs of leakage or if the check engine light remains illuminated after replacing the gas cap, further investigation may be necessary. This could involve checking for additional issues within the EVAP system or ensuring that there are no other leaks present in the fuel system.
Resetting the Check Engine Light (If Applicable)
In cases where replacing the gas cap has resolved an issue but the check engine light remains illuminated, resetting this warning light may be necessary. Depending on your vehicle’s make and model, there are various methods for resetting the check engine light. One common approach involves disconnecting the battery for several minutes; however, this method may reset other electronic systems in your vehicle as well.
Alternatively, using an OBD-II scanner can provide a more precise method for resetting just the check engine light without affecting other settings. Many automotive stores offer rental services for these scanners if you do not own one yourself. After resetting, monitor your vehicle’s performance closely to ensure that no further issues arise.
Testing the New Gas Cap for Proper Function
After installation and resetting any warning lights, testing your new gas cap for proper function is essential to confirm its effectiveness. One way to do this is by conducting a visual inspection for any signs of leakage around the gas cap area after refueling. Additionally, pay attention to any unusual odors of gasoline while driving; these could indicate that vapors are escaping due to an improper seal.
Another method involves monitoring your vehicle’s fuel efficiency over time. If you notice an improvement in mileage after replacing your gas cap, it is likely functioning correctly. Conversely, if issues persist despite having installed a new cap, further investigation into other components of your fuel system may be warranted.
Tips for Maintaining Your Gas Cap and Fuel System
Maintaining your gas cap and overall fuel system is crucial for ensuring long-term vehicle performance and efficiency. Regularly inspect your gas cap for signs of wear or damage; proactive replacement can prevent more significant issues down the line. Additionally, always ensure that your gas cap is securely fastened after refueling to maintain an effective seal.
It is also advisable to periodically check for leaks in your fuel system by observing any unusual odors or pooling gasoline beneath your vehicle. If you suspect a leak or notice any warning lights on your dashboard, consult with an automotive professional promptly to address potential issues before they escalate.
In conclusion, understanding and maintaining your vehicle’s gas cap is essential for optimal performance and environmental compliance. By recognizing signs of wear, selecting appropriate replacements, and ensuring proper installation and maintenance practices, vehicle owners can enhance their car’s longevity while contributing positively to environmental conservation efforts.
### FAQ Section
1. **How often should I replace my gas cap?**
– It’s advisable to inspect your gas cap regularly for signs of wear or damage and replace it as needed—typically every few years or when you notice issues like leaks or warning lights.
2. **Can I drive my car with a faulty gas cap?**
– While it’s possible to drive with a faulty gas cap, doing so can lead to decreased fuel efficiency and increased emissions; it’s best to address any issues promptly.
3. **What happens if I lose my gas cap?**
– Losing your gas cap can lead to fuel evaporation and contamination; it’s important to replace it immediately with an appropriate replacement.
4. **Are aftermarket gas caps reliable?**
– Aftermarket options can vary in quality; it’s often recommended to choose OEM parts for guaranteed fitment and reliability unless you find a reputable aftermarket brand.
5. **How do I know if my check engine light is related to my gas cap?**
– If your check engine light illuminates shortly after refueling or if you notice signs of leakage around your gas cap area, it may indicate an issue with this component.
6. **Can I reset my check engine light myself?**
– Yes, you can reset it by disconnecting your battery or using an OBD-II scanner; however, ensure that any underlying issues are resolved first.
7. **What should I do if my new gas cap doesn’t fit properly?**
– If you encounter fitment issues with your new gas cap, double-check compatibility with your vehicle’s specifications; if problems persist, consult with an automotive professional.
8. **Is there a specific way to clean my old gas cap before disposal?**
– Yes, clean it with soap and water while wearing gloves; ensure no residual fuel remains before disposing of it according to local regulations.
9. **What are some common causes of a faulty gas cap?**
– Common causes include wear and tear from exposure to elements, improper sealing due to debris accumulation, or physical damage from mishandling.
10. **How does a faulty gas cap affect my car’s emissions?**
– A faulty gas cap can lead to increased emissions due to vapor leaks; this not only affects environmental compliance but can also result in costly repairs if left unaddressed.
In summary, maintaining a proper gas cap is crucial for optimal vehicle performance and environmental responsibility. By understanding its importance and following best practices for inspection and replacement, drivers can ensure their vehicles operate efficiently while minimizing their ecological footprint.
FAQs
What are the signs that I need to replace my gas cap?
Common signs that indicate a need to replace your gas cap include a check engine light on your dashboard, fuel odors around your vehicle, or visible damage such as cracks or wear on the gas cap itself. Additionally, if you notice that your fuel economy has decreased, it may be due to a faulty gas cap.
How do I know which gas cap to buy for my car?
To find the correct gas cap for your vehicle, you can check your owner’s manual for specifications or visit an auto parts store where staff can assist you. You can also look for the part number on your existing gas cap or search online using your vehicle’s make, model, and year to find compatible options.
Is it difficult to replace a gas cap?
No, replacing a gas cap is generally a simple task that can be done in a few minutes. Most gas caps can be removed by turning them counterclockwise and replaced by turning the new cap clockwise until it clicks into place. No special tools are required for this process.
Can I drive my car without a gas cap?
While you can technically drive your car without a gas cap, it is not advisable. Driving without a gas cap can lead to fuel evaporation, decreased fuel efficiency, and potential contamination of the fuel system. Additionally, it may trigger the check engine light and cause emissions issues.
How often should I check my gas cap?
It is a good practice to check your gas cap regularly, especially during routine maintenance or when refueling. Inspect it for any signs of wear, damage, or improper sealing. If you notice any issues, it’s best to replace it promptly to maintain optimal vehicle performance and fuel efficiency.