When it comes to preparing sunny side up eggs, the choice of pan plays a pivotal role in achieving the desired outcome. A non-stick skillet is often recommended due to its ability to prevent the delicate egg whites from adhering to the surface, ensuring a smooth release once cooked. The ideal diameter for such a pan typically ranges from 8 to 10 inches, providing ample space for one or two eggs without overcrowding. Additionally, a heavy-bottomed pan is advantageous as it distributes heat evenly, reducing the risk of hot spots that can lead to uneven cooking.
Another consideration is the material of the pan. Stainless steel, cast iron, and ceramic-coated pans each have their unique benefits. Stainless steel pans are durable and can withstand high temperatures, while cast iron skillets retain heat exceptionally well, allowing for consistent cooking. Ceramic-coated pans offer a non-stick surface without the use of chemicals, making them a healthier option. Ultimately, selecting the right pan is crucial for achieving perfectly cooked sunny side up eggs that boast both visual appeal and flavor.
If you’re looking to elevate your breakfast game, mastering the art of making perfect sunny side up eggs is essential. For more tips on maintaining a clean and organized kitchen while you cook, check out this helpful article on essential household cleaning tips. It provides valuable insights that can help you create a sparkling environment, making your cooking experience even more enjoyable. You can read it here: 10 Essential Household Cleaning Tips for a Sparkling Home.
Selecting Fresh Eggs for Optimal Flavor
The freshness of eggs significantly influences the flavor and texture of sunny side up eggs. Fresh eggs have firmer whites and vibrant yolks, which contribute to a more appealing presentation and taste. To determine the freshness of an egg, one can perform a simple water test: place the egg in a bowl of water; if it sinks and lays flat on the bottom, it is fresh. If it stands upright or floats, it is best to discard it as it may be spoiled.
In addition to freshness, the source of the eggs can also impact flavor. Eggs from pasture-raised hens tend to have richer yolks and a more robust taste compared to those from conventionally raised chickens. This is due to their varied diet, which includes access to insects and greens. When selecting eggs, consider purchasing from local farms or farmers’ markets where you can inquire about the hens’ living conditions and diet, ensuring you are getting high-quality eggs that will elevate your sunny side up dish.
Preheating the Pan to the Perfect Temperature

Preheating the pan is an essential step in cooking sunny side up eggs effectively. The ideal temperature for cooking eggs is around 250°F (121°C). This moderate heat allows the whites to set without overcooking the yolks, which should remain runny and luscious. To preheat your pan, place it on medium-low heat for several minutes before adding any cooking fat.
To test if the pan has reached the right temperature, sprinkle a few drops of water onto the surface; if they dance and evaporate quickly, the pan is ready for cooking. Proper preheating not only ensures even cooking but also helps in achieving that coveted golden edge around the egg whites. Skipping this step can lead to unevenly cooked eggs with rubbery whites or overcooked yolks, detracting from the overall experience.
The choice of cooking fat can greatly influence both flavor and texture when preparing sunny side up eggs. Butter is a classic choice that imparts a rich, creamy flavor and helps achieve a beautiful golden color on the edges of the egg whites. It also adds a slight nuttiness when browned, enhancing the overall taste profile. However, butter has a lower smoke point (around 350°F or 177°C), which means it can burn if not monitored closely.
On the other hand, oils such as olive oil or avocado oil have higher smoke points (approximately 375°F or 190°C for olive oil and 520°F or 271°C for avocado oil), making them more forgiving in terms of heat management. Olive oil adds a fruity flavor that complements eggs well, while avocado oil provides a neutral taste that allows the egg’s natural flavors to shine through. Ultimately, the choice between butter and oil depends on personal preference and dietary considerations; both can yield delicious results when used correctly.
Cracking the Egg Gently to Avoid Breakage

Cracking an egg may seem like a simple task, but doing so gently is crucial for maintaining the integrity of both the yolk and white. To achieve this, hold the egg firmly in one hand and tap it against a flat surface rather than the edge of a bowl or pan; this minimizes the risk of shell fragments mixing with your dish. Once cracked, open the shell slowly over the pan to allow the contents to slide out gently.
If you find yourself struggling with broken yolks, consider using room temperature eggs instead of cold ones straight from the refrigerator. Cold eggs are more prone to breakage due to their increased density compared to warmer eggs. Additionally, using fresh eggs can help as they tend to have firmer structures that are less likely to break during handling.
If you’re looking to elevate your breakfast game, mastering the art of sunny side up eggs is essential. These eggs can be a delightful addition to any meal, but achieving the perfect runny yolk requires some technique. For those interested in enhancing their culinary skills further, you might find it helpful to explore the benefits of honey in your cooking. You can read more about this in a related article that discusses how honey can be a great natural sweetener and has various health benefits. Check it out here.
Cooking on Low Heat for Even Whites and Runny Yolks
Cooking sunny side up eggs on low heat is essential for achieving perfectly set whites while keeping yolks runny. High heat can cause the egg whites to cook too quickly, resulting in rubbery textures and overcooked yolks. By maintaining a low temperature (around 250°F or 121°C), you allow the whites to gradually firm up while preserving that desirable runny yolk.
To facilitate even cooking, consider tilting the pan slightly during cooking so that any uncooked whites can flow toward the hotter edges of the pan. This technique ensures that all parts of the egg receive consistent heat without risking overcooking any section. Patience is key; allowing sufficient time for cooking will reward you with beautifully cooked sunny side up eggs that are both visually appealing and delicious.
Covering the Pan to Help Set the Egg Whites
Covering the pan while cooking sunny side up eggs can be an effective technique for ensuring that egg whites set properly without overcooking the yolks. By trapping steam inside, you create a mini-oven effect that helps cook the tops of the whites evenly while maintaining their delicate texture. A lid made of glass allows you to monitor progress without lifting it off and losing heat.
When using this method, be mindful of timing; typically, covering for about 1-2 minutes should suffice for most sunny side up preparations. This technique not only enhances cooking efficiency but also contributes to a more visually appealing dish by ensuring that whites are fully opaque without compromising yolk consistency.
Seasoning at the Right Time for Enhanced Taste
Seasoning plays an integral role in elevating the flavor profile of sunny side up eggs. However, timing is crucial; adding salt too early can draw moisture out of the egg whites, leading to a watery texture. Instead, consider seasoning your eggs just before serving or immediately after they have finished cooking.
In addition to salt and pepper, various herbs and spices can enhance flavor complexity. Fresh herbs such as chives or parsley add brightness, while spices like paprika or cayenne pepper introduce warmth and depth. Experimenting with different seasonings allows you to customize your dish according to personal preferences while ensuring that each bite is bursting with flavor.
Checking for Doneness Without Overcooking
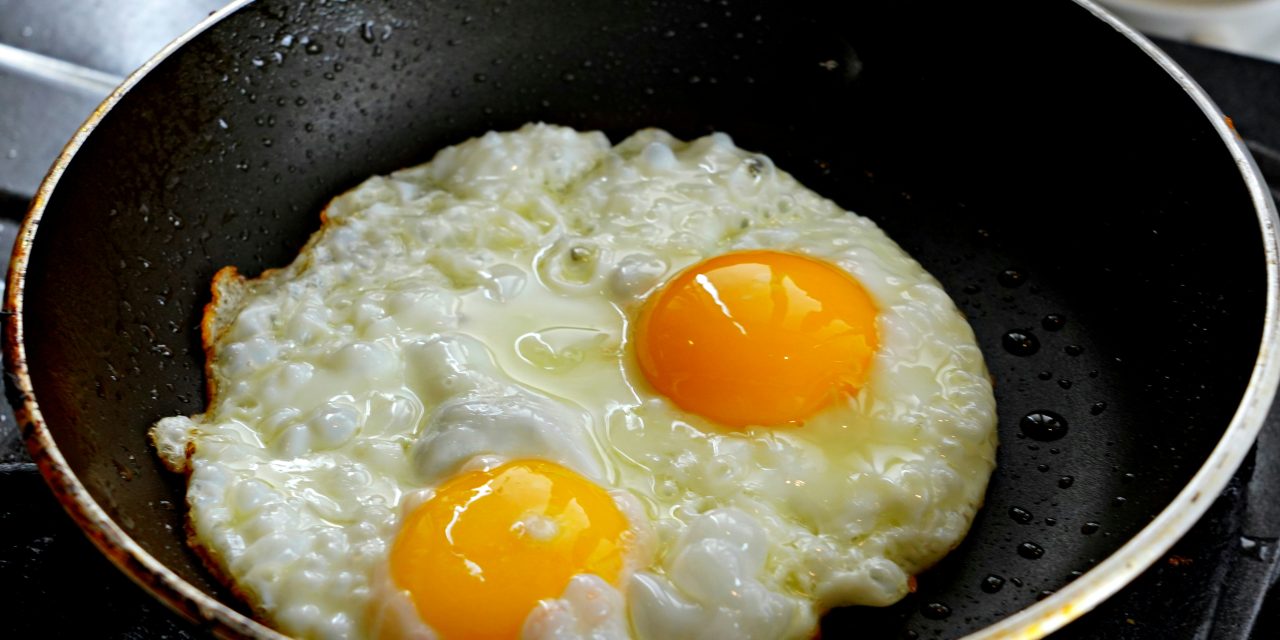
Determining when sunny side up eggs are perfectly cooked requires careful observation and practice. The ideal doneness is characterized by fully set whites that are opaque and firm while maintaining a runny yolk that jiggles slightly when gently shaken. To check for doneness without overcooking, use a spatula to gently lift one edge of an egg; if it slides easily from the pan and holds its shape without breaking apart, it’s ready to serve.
Another method involves gently pressing down on the yolk with a spatula; if it feels soft yet slightly resistant, it indicates that it remains runny inside. Avoid using high heat during this process as it can lead to overcooked yolks or rubbery whites—patience is key in achieving that perfect balance.
Serving Tips to Keep Your Eggs Perfectly Presented
Presentation matters when serving sunny side up eggs; an aesthetically pleasing dish enhances both enjoyment and appetite appeal. Start by using a clean plate that contrasts with the color of your eggs—white plates often work well as they allow vibrant yolks to stand out beautifully. Consider garnishing with fresh herbs or microgreens for added color and texture.
For an elegant touch, serve your sunny side up eggs atop toasted bread or alongside sautéed vegetables such as spinach or tomatoes. Drizzling with high-quality olive oil or balsamic reduction can elevate flavors further while adding visual interest. Remember that first impressions count; taking time to present your dish thoughtfully will enhance your dining experience.
Troubleshooting Common Sunny Side Up Egg Issues
Despite best efforts, challenges may arise when preparing sunny side up eggs. Common issues include broken yolks, uneven cooking, or rubbery textures—each requiring specific solutions:
1. **Broken Yolks**: Handle eggs gently during cracking; consider using room temperature eggs for better structural integrity.
2. **Uneven Cooking**: Ensure even heat distribution by preheating your pan adequately and adjusting temperature as needed throughout cooking.
3. **Rubbery Whites**: Maintain low heat throughout cooking; avoid rushing by allowing sufficient time for gentle cooking.
4. **Watery Whites**: Season at appropriate times; use fresh eggs as they tend to have firmer structures.
By understanding these common pitfalls and their solutions, you can refine your technique and consistently produce delicious sunny side up eggs.
In summary, mastering sunny side up eggs involves careful attention to detail—from selecting quality ingredients like fresh eggs and appropriate pans to employing precise cooking techniques such as low heat and proper seasoning timing. By following these guidelines and troubleshooting common issues effectively, you can create beautifully presented dishes that delight both visually and gastronomically every time you cook them.
FAQs
What ingredients do I need to make sunny side up eggs?
To make perfect sunny side up eggs, you will need fresh eggs, a non-stick skillet, and a small amount of cooking oil or butter. Optional ingredients include salt and pepper for seasoning.
What is the ideal cooking temperature for sunny side up eggs?
The ideal cooking temperature for sunny side up eggs is medium-low heat. This allows the whites to cook through without overcooking the yolks, ensuring they remain runny and bright.
How long should I cook sunny side up eggs?
Sunny side up eggs typically take about 2 to 3 minutes to cook. You should watch for the whites to become fully set while the yolks remain soft and runny.
Can I cover the skillet while cooking sunny side up eggs?
Yes, covering the skillet can help cook the tops of the egg whites more evenly without flipping the eggs. This method traps steam and helps the whites set while keeping the yolks intact.
What should I do if the egg whites are not cooking evenly?
If the egg whites are not cooking evenly, you can gently tilt the skillet to allow the uncooked whites to flow towards the hotter edges of the pan. Alternatively, you can use a spatula to carefully spread the whites for more even cooking.