The spider plant, scientifically known as *Chlorophytum comosum*, is a popular houseplant renowned for its air-purifying qualities and ease of care. This perennial plant is characterized by its long, arching leaves that can grow up to 12 inches in length, often displaying a vibrant green hue with white or yellow stripes. Native to tropical and southern Africa, the spider plant thrives in a variety of indoor environments, making it an ideal choice for both novice and experienced plant enthusiasts.
One of the most appealing aspects of the spider plant is its ability to adapt to different conditions. It can flourish in low light but also thrives in bright, indirect sunlight. Additionally, this resilient plant is known for producing “pups,” or small offshoots, which can be propagated to create new plants. Understanding the basic biology and growth habits of the spider plant is essential for providing optimal care and ensuring its longevity.
Choosing the Right Pot and Soil
Selecting an appropriate pot and soil is crucial for the health of your spider plant. The pot should have drainage holes to prevent water accumulation, which can lead to root rot. A standard plastic or ceramic pot works well, but ensure it is not too large; a pot that is too big can retain excess moisture, negatively impacting root health. A pot size of 6 to 8 inches in diameter is typically suitable for a mature spider plant.
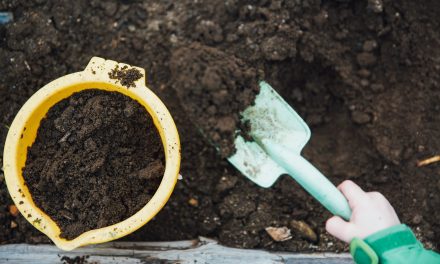
When it comes to soil, a well-draining potting mix is essential. A blend that includes peat moss, perlite, and vermiculite provides the necessary aeration and drainage. This combination allows for adequate moisture retention while preventing waterlogging. Additionally, consider using a soil mix that is slightly acidic to neutral (pH 6.0 to 7.0), as this range promotes optimal nutrient absorption.
Optimal Lighting Conditions for Growth

Spider plants are versatile when it comes to lighting conditions, but they perform best in bright, indirect sunlight. Direct sunlight can scorch their delicate leaves, leading to browning and damage. Ideally, place your spider plant near a window that receives filtered light or in a well-lit room where it can enjoy several hours of indirect sunlight each day.
If natural light is limited, consider using grow lights to supplement your spider plant’s light requirements. LED grow lights are energy-efficient and can provide the necessary spectrum for healthy growth. Position the lights approximately 12-18 inches above the plant and keep them on for about 12-14 hours daily to mimic natural daylight conditions.
Proper Watering Techniques

Watering is one of the most critical aspects of spider plant care. Overwatering is a common mistake that can lead to root rot, while underwatering can cause leaf tips to brown and die. To determine when to water, check the top inch of soil; if it feels dry to the touch, it’s time to water. Typically, spider plants prefer to be watered thoroughly but allowed to dry out slightly between waterings.
During the growing season (spring and summer), your spider plant may require more frequent watering due to increased evaporation rates and active growth. Conversely, during the dormant months (fall and winter), reduce watering frequency as the plant’s growth slows down. Always use room temperature water to avoid shocking the roots, and consider using distilled or rainwater if your tap water contains high levels of chlorine or fluoride.
Maintaining Ideal Humidity Levels
Spider plants thrive in moderate humidity levels, ideally between 40% and 60%. While they are relatively tolerant of lower humidity, excessively dry air can lead to leaf tip browning and overall stress on the plant. To maintain optimal humidity levels, consider placing a humidifier in the room or grouping your spider plant with other houseplants to create a microclimate.
Another effective method for increasing humidity is to use a pebble tray filled with water beneath the pot. As the water evaporates, it will raise the humidity around the plant without saturating the roots. Regular misting can also help increase humidity; however, avoid excessive moisture on the leaves as this can promote fungal diseases.
Fertilizing Your Spider Plant Correctly
Fertilization plays a vital role in promoting healthy growth and vibrant foliage in spider plants. During the growing season, apply a balanced liquid fertilizer every 4-6 weeks to provide essential nutrients such as nitrogen, phosphorus, and potassium. Look for a fertilizer with an N-P-K ratio of 20-20-20 or similar formulations designed for houseplants.
In contrast, during the dormant months, reduce or eliminate fertilization altogether as the plant’s nutrient requirements decrease. Over-fertilizing can lead to salt buildup in the soil, which may harm root health and cause leaf burn. Always follow the manufacturer’s instructions regarding dilution rates and application frequency for optimal results.
Pruning and Removing Dead Leaves
Regular pruning is essential for maintaining the health and appearance of your spider plant. Remove any dead or yellowing leaves promptly to prevent potential pest infestations and diseases from spreading. Use clean, sharp scissors or pruning shears to make clean cuts at the base of the leaf stem.
Additionally, pruning encourages bushier growth by allowing more light to reach the inner leaves. If your spider plant has produced pups, consider removing them during pruning sessions as well. This not only helps maintain an aesthetically pleasing shape but also allows you to propagate new plants easily.
Managing Common Pests and Diseases
Spider plants are generally resilient but can be susceptible to common pests such as spider mites, aphids, and mealybugs. Regularly inspect your plant for signs of infestation, including webbing or sticky residue on leaves. If pests are detected, isolate the affected plant immediately to prevent spreading.
To manage infestations, consider using insecticidal soap or neem oil as organic treatment options. These solutions effectively eliminate pests without harming beneficial insects or the environment. For fungal diseases like root rot or leaf spot caused by overwatering or poor air circulation, ensure proper watering techniques and improve airflow around the plant by spacing it adequately from other plants.
Repotting Your Spider Plant When Needed
Repotting is an essential aspect of spider plant care that should be performed every 1-2 years or when you notice roots emerging from drainage holes. This process allows for fresh soil and more space for root growth, promoting overall health and vitality. The best time to repot is during spring when the plant is actively growing.
When repotting, gently remove the spider plant from its current pot and carefully untangle any circling roots. Place it in a new pot that is one size larger than the previous one and fill it with fresh potting mix. Water thoroughly after repotting to help settle the soil around the roots.
Propagating New Spider Plants Easily
Propagation of spider plants is a straightforward process that can be accomplished through their pups or offsets. These small offshoots develop from the mother plant and can be rooted in soil or water before being planted separately. To propagate using pups, wait until they develop roots that are at least a few inches long.
Carefully cut the pup from the mother plant using clean scissors and place it in a small pot filled with well-draining soil. Water lightly and provide bright indirect light until new growth appears. Alternatively, you can place the pup in water until roots develop before transferring it to soil.
Creating the Perfect Environment for Longevity
To ensure your spider plant thrives for years to come, create an environment that mimics its natural habitat as closely as possible. This includes providing adequate light, humidity, temperature (ideally between 65°F – 75°F), and proper watering techniques. Regularly monitor your plant’s health by checking for signs of stress or nutrient deficiencies.
In addition to these factors, consider rotating your spider plant periodically to ensure even growth on all sides. By following these guidelines and providing attentive care, you can enjoy a flourishing spider plant that enhances your indoor space while improving air quality.
In summary, understanding how to care for your indoor spider plant involves selecting appropriate pots and soil, providing optimal lighting conditions, mastering watering techniques, maintaining humidity levels, fertilizing correctly, pruning regularly, managing pests effectively, repotting when necessary, propagating new plants easily, and creating an ideal environment for longevity. By implementing these practices diligently, you will cultivate a thriving spider plant that adds beauty and vitality to your home.
**FAQ Section**
1. **How often should I water my spider plant?**
Water when the top inch of soil feels dry; typically every 1-2 weeks during growing seasons.
2. **Can I grow my spider plant in low light?**
Yes, spider plants can tolerate low light but prefer bright indirect sunlight for optimal growth.
3. **What should I do if my spider plant’s leaves turn brown?**
Brown tips may indicate underwatering or low humidity; adjust watering frequency and increase humidity levels.
4. **How do I know when it’s time to repot my spider plant?**
Repot when roots emerge from drainage holes or every 1-2 years for fresh soil.
5. **What pests should I watch out for?**
Common pests include spider mites, aphids, and mealybugs; inspect regularly for signs of infestation.
6. **Is it safe for pets?**
Yes, spider plants are non-toxic to cats and dogs.
7. **How do I propagate my spider plant?**
Propagate by separating pups with roots from the mother plant or rooting them in water before planting in soil.
8. **What type of fertilizer should I use?**
Use a balanced liquid fertilizer with an N-P-K ratio of 20-20-20 during growing seasons.
9. **Can I use tap water for my spider plant?**
Yes, but distilled or rainwater is preferable if tap water contains high chlorine levels.
10. **How do I prevent root rot?**
Ensure proper drainage by using pots with holes and avoid overwatering; allow soil to dry slightly between waterings.
By adhering to these guidelines and addressing common concerns proactively, you will foster a healthy environment conducive to your spider plant’s growth and longevity.
FAQs
What type of light does a spider plant need?
Spider plants thrive in bright, indirect sunlight. They can tolerate lower light conditions, but their growth may slow down. Avoid placing them in direct sunlight, as this can scorch their leaves.
How often should I water my spider plant?
Water your spider plant when the top inch of soil feels dry to the touch. Typically, this means watering every 1-2 weeks, but the frequency may vary depending on the humidity and temperature of your home.
What type of soil is best for spider plants?
A well-draining potting mix is ideal for spider plants. A mixture that includes peat moss, perlite, and compost will provide the necessary drainage and nutrients for healthy growth.
How can I propagate my spider plant?
Spider plants can be easily propagated by separating the offsets, or “pups,” that grow from the mother plant. Once the pups have developed roots, they can be potted in their own containers.
Are spider plants safe for pets?
Yes, spider plants are non-toxic to both cats and dogs, making them a safe choice for households with pets. However, some pets may be attracted to the leaves and may chew on them, which could lead to mild digestive upset.