Creating a delectable homemade chicken gravy begins with the careful selection of ingredients and tools. The primary components include chicken drippings, which are the flavorful juices released during the roasting process, along with butter, flour, and chicken broth. These elements form the foundation of a rich and savory gravy. Additionally, you may want to incorporate seasonings such as salt, pepper, and garlic powder to enhance the flavor profile.
In terms of tools, having the right kitchen equipment is essential for a smooth preparation process. A sturdy whisk is crucial for blending the roux and drippings seamlessly, while a saucepan or skillet will serve as the cooking vessel. A fine-mesh strainer can be invaluable for achieving a silky texture in your final product. Lastly, a ladle or spoon will be necessary for serving the finished gravy. By gathering these ingredients and tools beforehand, you set yourself up for success in crafting a delicious accompaniment to your chicken dish.
If you’re looking to elevate your homemade chicken dishes, mastering the art of making chicken gravy from drippings is essential. Not only does it add rich flavor, but it also makes use of the delicious remnants left in the pan. For more tips on enhancing your culinary skills, check out this related article on the best containers for food storage, which can help you keep your ingredients fresh and ready for your next cooking adventure. You can read it here: Best Containers for Food Storage.
Collect the Pan Drippings from Roasted Chicken
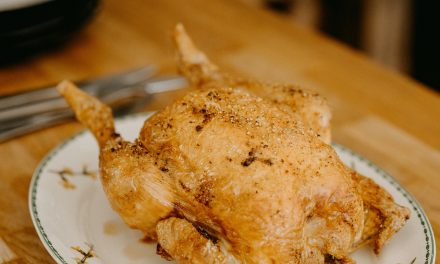
Once your chicken has been roasted to perfection, the next step involves collecting the pan drippings. These drippings are a treasure trove of flavor, containing concentrated juices, fats, and seasonings that have melded together during cooking. To collect them, carefully tilt the roasting pan to one side, allowing the liquid to pool in one corner. Using a ladle or turkey baster, gently extract the drippings while avoiding any burnt bits that may have settled at the bottom.
It is important to note that the quality of your drippings directly impacts the flavor of your gravy. If you have seasoned your chicken well with herbs and spices prior to roasting, those flavors will infuse into the drippings, resulting in a more robust gravy. Additionally, if you have used vegetables such as onions, carrots, or celery in the roasting pan, their natural sweetness will also contribute to the overall taste of your gravy. Collecting these drippings is a crucial step that lays the groundwork for a rich and flavorful sauce.
Skim Excess Fat from the Drippings
After collecting the pan drippings, it is essential to skim off any excess fat that may have accumulated on the surface. While some fat is necessary for flavor and texture, too much can result in a greasy gravy that lacks balance. To skim the fat effectively, allow the drippings to sit for a few minutes so that the fat rises to the top. Using a spoon or fat separator, carefully remove the layer of fat without disturbing the flavorful liquid beneath.
If you prefer a healthier option or are concerned about calorie content, consider using a fat separator—a specialized tool designed to separate fat from liquids easily. This device features a spout at the bottom that allows you to pour out the flavorful broth while leaving the fat behind. By skimming excess fat from your drippings, you ensure that your gravy maintains a rich flavor without becoming overly oily.
Prepare a Roux with Butter and Flour
The next step in creating your chicken gravy involves preparing a roux—a mixture of fat and flour that serves as a thickening agent. Begin by melting an appropriate amount of butter in your saucepan over medium heat. Typically, a ratio of 1:1 works well; for every tablespoon of butter, use an equal amount of flour. Once the butter has melted and is bubbling gently, add the flour and whisk continuously to combine.
Cooking the roux for several minutes is crucial to eliminate any raw flour taste while developing a nutty flavor. The roux should take on a light golden color; this indicates that it is ready for the next step. Be vigilant during this process, as burnt roux can impart an unpleasant bitterness to your gravy. A well-prepared roux serves as the backbone of your sauce, providing both thickness and depth of flavor.
If you’re looking to elevate your homemade meals, mastering the art of making chicken gravy from drippings is a fantastic skill to have. Not only does it enhance the flavor of your dishes, but it also makes use of every part of the chicken, reducing waste. For a comprehensive guide on this delicious technique, you can check out this related article on how to make homemade chicken gravy from drippings. Additionally, if you’re interested in exploring more culinary tips, you might find this article on top cat boarding facilities near me for your furry friend quite intriguing, as it highlights the importance of caring for your pets while you enjoy cooking at home.
Gradually Whisk in the Chicken Drippings and Broth
With your roux prepared, it’s time to incorporate the chicken drippings and broth into the mixture. Begin by gradually whisking in the collected drippings while ensuring there are no lumps forming. This gradual addition allows for better integration of flavors and prevents clumping. Once all drippings are incorporated, slowly add chicken broth to achieve your desired consistency.
The ratio of drippings to broth can vary based on personal preference; some may prefer a thicker gravy while others enjoy a lighter sauce. As you whisk continuously, observe how the mixture transforms into a smooth and velvety sauce. The combination of drippings and broth enhances the overall flavor profile while ensuring that your gravy has enough body to cling beautifully to your chicken dish.
Simmer and Stir Until the Gravy Thickens
After incorporating all liquid ingredients, bring your gravy mixture to a gentle simmer over medium heat. This step is crucial for allowing flavors to meld together while thickening the sauce. As it simmers, continue stirring frequently to prevent sticking or burning at the bottom of the pan. The heat activates the starches in the flour, causing them to swell and thicken the gravy.
Typically, this simmering process takes about 5-10 minutes; however, keep an eye on it as cooking times may vary based on your stovetop settings and desired thickness. If you find that your gravy is too thick for your liking, simply whisk in additional broth until you reach your preferred consistency. Conversely, if it’s too thin, allow it to simmer longer until it thickens adequately.
Season and Adjust the Flavor to Taste
Once your gravy has reached an ideal consistency, it’s time to season and adjust flavors according to personal preference. Start by adding salt and freshly ground black pepper; these basic seasonings enhance overall taste without overpowering other flavors present in the sauce. Taste as you go along—this ensures that you achieve a balanced flavor profile.
Consider incorporating additional seasonings such as garlic powder or onion powder for extra depth. If you desire a hint of acidity, a splash of lemon juice or vinegar can brighten up the flavors significantly. Remember that seasoning should be done gradually; it’s easier to add more than to correct an overly salty or seasoned gravy.
Optional: Add Herbs and Aromatics for Extra Flavor
For those looking to elevate their chicken gravy further, consider adding fresh herbs or aromatics during the simmering process. Herbs such as thyme, rosemary, or sage can impart delightful earthy notes that complement roasted chicken beautifully. Simply chop fresh herbs finely and stir them into your gravy during the last few minutes of cooking.
Alternatively, sautéing minced garlic or shallots in butter before adding them to your roux can introduce additional layers of flavor. These aromatics provide complexity and richness that can transform an ordinary gravy into something extraordinary. Experimenting with different herbs allows you to customize your sauce according to seasonal ingredients or personal preferences.
Strain the Gravy for a Smooth Finish
To achieve an exceptionally smooth finish for your chicken gravy, consider straining it through a fine-mesh sieve before serving. This step removes any lumps or bits of herbs that may have been added during cooking, resulting in a silky texture that enhances presentation. Place the sieve over a clean saucepan or bowl and pour the gravy through it slowly.
Using a spatula or spoon, gently press down on any solids left behind in the sieve to extract as much liquid as possible. This technique ensures that every drop of flavorful gravy makes it onto your plate while providing an elegant appearance when served alongside your chicken dish.
Serve the Gravy Warm with Your Favorite Chicken Dish
Once your homemade chicken gravy is complete and strained for smoothness, it’s time to serve it warm alongside your favorite chicken dish. Whether you’re pairing it with roasted chicken, fried chicken, or even turkey, this rich sauce enhances each bite with its savory goodness. Ladle generous portions over sliced meat or serve it on the side for dipping.
Presentation matters; consider garnishing with fresh herbs or cracked black pepper for an appealing touch before serving. The warmth of freshly made gravy complements not only chicken but also mashed potatoes or biscuits—making it an ideal accompaniment for various comfort foods.
Tips for Storing and Reheating Homemade Chicken Gravy
If you find yourself with leftover chicken gravy after enjoying your meal, proper storage techniques will ensure its longevity without sacrificing flavor or texture. Allow any remaining gravy to cool completely before transferring it into an airtight container; this prevents condensation from forming inside and maintains quality.
Homemade chicken gravy can be stored in the refrigerator for up to four days or frozen for up to three months—just be sure to label containers with dates for easy tracking! When reheating frozen gravy, thaw it overnight in the refrigerator before warming gently on low heat over stovetop or microwave until heated through.
To restore any lost consistency during storage or reheating processes, whisk in additional broth as needed until desired thickness is achieved once again.
In summary, crafting homemade chicken gravy involves several key steps: gathering ingredients and tools; collecting pan drippings; skimming excess fat; preparing roux; gradually whisking in liquids; simmering until thickened; seasoning; optionally adding herbs; straining for smoothness; serving warm alongside chicken dishes; and storing leftovers properly for future enjoyment. By following these detailed instructions carefully while incorporating personal touches along the way—such as unique seasonings or aromatics—you’ll create an unforgettable accompaniment that elevates any meal!
FAQs
What ingredients do I need to make homemade chicken gravy from drippings?
To make homemade chicken gravy from drippings, you will need the drippings from your roasted chicken, all-purpose flour, chicken broth or stock, salt, pepper, and optional seasonings like garlic powder or herbs for added flavor.
How do I collect drippings from the roasted chicken?
After roasting your chicken, place it on a cutting board and let it rest. Then, tilt the roasting pan to one side to gather the drippings in one corner. Use a spoon or a baster to collect the drippings, being careful to leave behind any burnt bits or excess fat.
What is the process for thickening the gravy?
To thicken the gravy, create a roux by whisking together equal parts of flour and fat (from the drippings) in a saucepan over medium heat. Cook for a few minutes until it turns golden brown, then gradually whisk in the chicken broth while stirring continuously until the mixture thickens to your desired consistency.
Can I make chicken gravy without drippings?
Yes, you can make chicken gravy without drippings by using chicken broth or stock as a base. Simply sauté some onions or garlic in butter, add flour to create a roux, and then gradually whisk in the chicken broth until thickened. Season to taste.
How can I store leftover chicken gravy?
Leftover chicken gravy can be stored in an airtight container in the refrigerator for up to 3-4 days. For longer storage, you can freeze it in a freezer-safe container for up to 3 months. When reheating, add a little water or broth to restore its consistency.