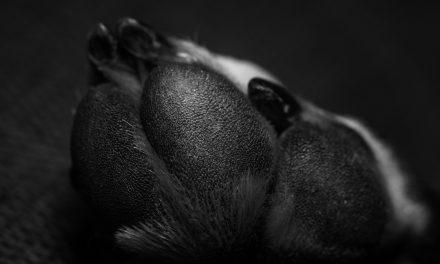
The anatomy of a dog’s nails is a crucial aspect to comprehend, especially when dealing with breeds that possess black nails. Unlike lighter-colored nails, which allow for easy visibility of the quick, black nails present a unique challenge. The nail consists of several components: the hard outer shell known as the claw, the inner core that houses blood vessels and nerves, and the quick, which is the living part of the nail. In black nails, the quick is not visible, making it difficult to determine where to cut without causing pain or bleeding.
The structure of a dog’s nail is designed to provide protection and support. The outer layer, composed of keratin, serves as a shield against environmental factors. Beneath this layer lies the sensitive quick, which is rich in blood vessels and nerve endings. Understanding this anatomy is essential for safe trimming practices. The quick can vary in length depending on the dog’s age, activity level, and overall health. Regular trimming helps maintain nail health and prevents discomfort or injury.
Tools Needed for Safe Nail Trimming
To ensure a safe and effective nail trimming experience, having the right tools is paramount. Essential instruments include nail clippers specifically designed for dogs, such as guillotine-style clippers or electric grinders. Each type has its advantages; guillotine clippers provide precision, while grinders offer a smoother finish and reduce the risk of splitting the nail.
In addition to clippers, having styptic powder or a styptic pencil on hand is crucial for managing any accidental cuts to the quick. This powder helps to quickly clot blood and minimize bleeding. A good quality nail file or grinder can also be beneficial for smoothing rough edges after trimming. Lastly, a flashlight or magnifying glass can assist in identifying the quick more accurately in black nails.
Preparing Your Dog for Nail Trimming

Preparation is key to a successful nail trimming session. Begin by creating a calm environment free from distractions. Choose a comfortable space where your dog feels secure, such as their favorite resting area. It may be helpful to have treats on hand to reward your dog for good behavior during the process.
Before starting, familiarize your dog with the tools you will be using. Allow them to sniff and inspect the clippers or grinder to reduce anxiety. Gradually introduce the trimming process by gently handling their paws and nails without cutting them initially. This desensitization technique can help your dog associate nail trimming with positive experiences, making future sessions less stressful.
Identifying the Quick in Black Nails

Identifying the quick in black nails can be challenging due to their opaque nature. However, there are techniques that can aid in locating it more accurately. One method involves examining the underside of the nail; often, you can see a slight color change or a translucent area that indicates where the quick begins.
Another approach is to trim small amounts of the nail gradually. By taking off tiny sections at a time, you can monitor for any signs of discomfort from your dog. If you notice any change in behavior or if the nail begins to bleed, stop immediately. This cautious method allows you to avoid cutting too deeply into the quick while still maintaining nail health.
Step-by-Step Guide to Trimming Black Dog Nails
Trimming black dog nails requires a systematic approach to ensure safety and effectiveness. Begin by positioning your dog comfortably, either sitting or lying down. Hold one paw firmly but gently, ensuring your dog feels secure. Start with one nail at a time; using your chosen clippers, position them at a slight angle to avoid crushing the nail.
As you begin to trim, focus on small increments rather than attempting to cut a large portion at once. This technique minimizes the risk of cutting into the quick and allows you to gauge how close you are getting to it. After each cut, inspect the nail closely for any signs of the quick or changes in color that may indicate proximity to sensitive areas.
Techniques to Avoid Cutting the Quick
Preventing accidental cuts to the quick requires careful attention and specific techniques during trimming sessions. One effective method is to use a flashlight or magnifying glass to illuminate and magnify the nail structure, allowing for better visibility of the quick’s location.
Additionally, consider using a technique called “the two-person method,” where one person holds and comforts the dog while another performs the trimming. This approach can help keep your dog calm and still while allowing for more precise cuts. Always remember to reward your dog with treats and praise after each successful trim to reinforce positive behavior.
Using Proper Lighting and Magnification
Proper lighting and magnification are essential components of successful nail trimming, especially when dealing with black nails. A well-lit environment allows for better visibility of the nail structure, making it easier to identify where the quick begins. Natural light is ideal; however, if that’s not available, consider using bright LED lights that mimic daylight.
Magnification tools such as handheld magnifying glasses can provide additional clarity when examining black nails. These tools help you see subtle color changes in the nail that indicate proximity to the quick. Investing in good lighting and magnification equipment can significantly enhance your ability to trim nails safely and effectively.
Tips for Calming a Nervous Dog During Trimming
Many dogs experience anxiety during nail trimming sessions, which can complicate the process. To help calm a nervous dog, consider employing several strategies. First, create a soothing atmosphere by playing soft music or using calming pheromone sprays designed for pets.
Additionally, practice deep breathing techniques yourself; dogs often pick up on their owner’s emotions. Speak softly and reassuringly throughout the process, offering treats as rewards for calm behavior. If your dog continues to show signs of distress, take breaks between trims to allow them time to relax before continuing.
What to Do If You Accidentally Cut the Quick
Accidentally cutting the quick can be distressing for both you and your dog; however, knowing how to respond can mitigate panic and ensure proper care. If bleeding occurs, apply styptic powder immediately to help clot the blood and minimize discomfort. Press it gently onto the affected area for several seconds until bleeding stops.
After addressing the bleeding, comfort your dog with soothing words and gentle petting. Monitor them closely for any signs of excessive pain or distress following the incident. If bleeding persists or if your dog appears unusually uncomfortable, consult your veterinarian for further evaluation and treatment options.
Maintaining Healthy Nails Between Trims
Maintaining healthy nails between trims is essential for preventing overgrowth and ensuring overall paw health. Regularly check your dog’s nails every few weeks; if they begin to touch the ground when standing, it’s time for a trim. Additionally, providing appropriate surfaces for your dog to walk on can naturally wear down their nails.
Incorporating activities that promote natural nail wear—such as walks on rough terrain—can also be beneficial. Furthermore, consider using paw wax or protective booties during outdoor activities to shield their nails from excessive wear or injury.
When to Seek Professional Help for Nail Care
While many pet owners can manage their dog’s nail care at home, there are instances when seeking professional assistance is advisable. If you find yourself consistently struggling with trimming black nails or if your dog exhibits extreme anxiety during sessions, consulting a professional groomer or veterinarian may be beneficial.
Additionally, if you notice any abnormalities in your dog’s nails—such as discoloration, swelling, or signs of infection—prompt veterinary attention is necessary. Professionals possess specialized tools and expertise that can ensure safe and effective nail care tailored to your dog’s specific needs.
In summary, understanding black dog nails involves recognizing their unique anatomy and challenges associated with trimming them safely. Equipping yourself with appropriate tools and preparing your dog adequately can lead to successful trimming sessions. Identifying the quick accurately is crucial; employing proper techniques can prevent accidental cuts while maintaining healthy nails between trims is essential for overall paw health. Should complications arise or if anxiety persists during trimming sessions, seeking professional help is always an option worth considering for optimal care.
FAQs
What is the quick in a dog’s nail?
The quick is the sensitive part of a dog’s nail that contains blood vessels and nerves. It appears as a pinkish area within the nail, and cutting into it can cause pain and bleeding. It’s important to avoid cutting the quick when trimming your dog’s nails.
How can I identify the quick in black dog nails?
Identifying the quick in black dog nails can be challenging since it is not visible like in lighter-colored nails. To locate the quick, look for a slight change in texture or color as you trim the nail. Trim small amounts gradually, and stop when you see a darker area or feel resistance, indicating you are nearing the quick.
What tools are best for trimming black dog nails?
The best tools for trimming black dog nails include a pair of sharp dog nail clippers or a nail grinder. Clippers come in various styles, such as guillotine or scissors, while grinders allow for more gradual shaping and can help avoid cutting the quick.
How often should I trim my dog’s nails?
Generally, you should trim your dog’s nails every 3 to 4 weeks, but this can vary based on the dog’s activity level and the surfaces they walk on. Regular trimming helps prevent overgrowth and reduces the risk of injury or discomfort.
What should I do if I accidentally cut the quick?
If you accidentally cut the quick, apply a styptic powder or cornstarch to the bleeding nail to help stop the bleeding. Keep your dog calm and avoid further trimming until the nail has healed. If the bleeding does not stop or if you notice signs of infection, consult your veterinarian.