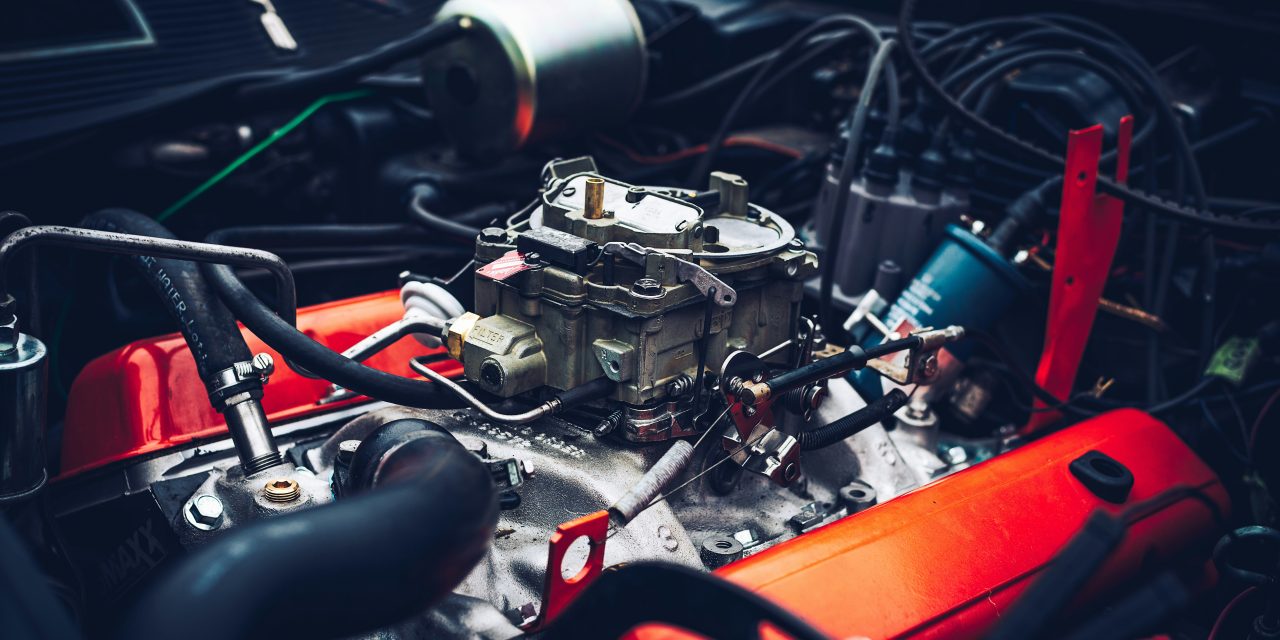
Before embarking on the task of cleaning your engine bay, it is crucial to prepare your workspace meticulously. A clean, organized environment not only enhances efficiency but also ensures safety throughout the process. Begin by selecting a well-ventilated area, preferably outdoors or in a garage with ample airflow. This will help dissipate any fumes from cleaning agents and prevent inhalation of harmful vapors. Lay down a tarp or old newspapers to catch any drips or spills, protecting the ground beneath your vehicle.
Gathering the necessary supplies is equally important. Essential items include an engine degreaser, soft brushes, microfiber cloths, a bucket, low-pressure water source, and safety gear such as gloves and goggles. Engine degreasers come in various formulations; choose one that is biodegradable and safe for your vehicle’s components. Additionally, consider having a vacuum cleaner on hand to remove loose debris effectively. Having all these supplies ready will streamline the cleaning process and minimize interruptions.
When it comes to maintaining your vehicle, cleaning the engine bay is an essential task that can enhance performance and longevity. For a comprehensive guide on how to clean your car engine bay safely, you might find this article helpful: How to Clean Car Engine Bay Safely. It provides step-by-step instructions and tips to ensure that you can effectively clean your engine without causing damage to sensitive components.
Ensuring Engine is Cool Before Starting
Prior to initiating any cleaning procedures, it is imperative to ensure that the engine is completely cool. Working on a hot engine poses significant risks, including burns from hot surfaces or steam generated by contact with water. Allowing the engine to cool down for at least 30 minutes after operation is advisable. This precaution not only protects you but also prevents damage to sensitive components that may be adversely affected by sudden temperature changes.
Once the engine has cooled sufficiently, conduct a visual inspection to identify any areas that may require special attention during the cleaning process. Look for oil leaks, corrosion, or any signs of wear that could indicate underlying issues. Addressing these concerns early can save time and money in the long run, ensuring that your vehicle remains in optimal condition.
Disconnecting the Battery for Safety

Safety should always be a priority when working on any vehicle maintenance task. Disconnecting the battery is a critical step before cleaning the engine bay. This action prevents accidental electrical shorts and protects sensitive electronic components from potential damage caused by moisture or cleaning agents. To disconnect the battery, locate the negative terminal, typically marked with a minus sign (-), and use a wrench to loosen the terminal clamp. Once loose, carefully lift it off and secure it away from the battery to avoid accidental reconnection.
In addition to preventing electrical hazards, disconnecting the battery allows you to clean without worrying about triggering any electrical systems inadvertently. This precaution is particularly important for modern vehicles equipped with numerous electronic components that could be sensitive to water exposure.
Covering Sensitive Components and Electrical Parts

After disconnecting the battery, it is essential to protect sensitive components and electrical parts from moisture and cleaning agents. Cover items such as the air intake, exposed wiring, and any sensors with plastic bags or aluminum foil. This step ensures that water does not enter critical areas that could lead to malfunctions or corrosion over time.
Additionally, consider using tape to secure these coverings in place, preventing them from shifting during the cleaning process. Taking this precaution will safeguard your vehicle’s electrical systems and prolong their lifespan, ultimately enhancing overall performance.
When it comes to maintaining your vehicle, knowing how to clean your car engine bay safely is essential for both performance and longevity. A well-maintained engine bay can help you spot potential issues early and keep your car running smoothly. For additional tips on proper maintenance techniques, you might find this article on cleaning methods particularly useful, as it provides insights that can be applied to various aspects of vehicle care.
Removing Loose Debris and Dust
Before applying any cleaning agents, it is vital to remove loose debris and dust from the engine bay. Start by using a vacuum cleaner with a brush attachment to eliminate dirt, leaves, and other particles that may have accumulated over time. Pay special attention to crevices and hard-to-reach areas where debris tends to gather.
Following vacuuming, use a soft brush or cloth to wipe down surfaces gently. This step will help dislodge any remaining dust particles and prepare the engine bay for deeper cleaning. A clean surface allows degreasers to work more effectively, ensuring that grime and grease are removed thoroughly.
Cleaning your car’s engine bay can be a daunting task, but with the right techniques, it can be done safely and effectively. It’s important to take precautions to avoid damaging sensitive components while ensuring that the area is free of dirt and grime. For a comprehensive guide on maintaining your vehicle, you might find this article on how to tell if your cat is overweight particularly interesting, as it highlights the importance of regular care and attention, whether it be for pets or your car.
Applying Engine Degreaser Correctly
With the engine bay prepped and free of loose debris, it’s time to apply the engine degreaser. Choose a degreaser that is compatible with your vehicle’s materials; many modern formulations are designed to be safe for plastics and rubber components. Following the manufacturer’s instructions, spray the degreaser evenly across all surfaces of the engine bay, focusing on areas with heavy grease buildup.
When applying the degreaser, ensure that you cover all components adequately without saturating them excessively. A light misting is often sufficient for most areas. Allow the degreaser to sit for several minutes as recommended on the product label; this dwell time enables it to penetrate and break down stubborn grease effectively.
Letting the Degreaser Soak In
After applying the degreaser, patience is key as it needs time to work its magic. Allowing the degreaser to soak in for approximately 10-15 minutes will enhance its effectiveness in loosening grime and grease deposits. During this period, avoid direct sunlight on the engine bay if possible; excessive heat can cause the degreaser to dry too quickly, reducing its efficacy.
While waiting for the degreaser to penetrate, take this opportunity to inspect other areas of your vehicle that may require attention or maintenance. This proactive approach can help you identify potential issues before they escalate into more significant problems.
Using a Soft Brush to Scrub Stubborn Areas
Once the degreaser has had ample time to work, it’s time to tackle stubborn areas with a soft brush. Using a brush with gentle bristles will prevent scratching or damaging sensitive surfaces while effectively removing built-up grime. Focus on areas where grease accumulates most heavily, such as around oil filters, valve covers, and other mechanical components.
As you scrub, be mindful of your technique; use circular motions and light pressure to avoid damaging delicate parts. For particularly stubborn spots, reapply degreaser as needed to aid in loosening debris further. This meticulous approach ensures that every inch of your engine bay receives thorough attention.
Rinsing the Engine Bay with Low-Pressure Water
After scrubbing away grime and grease, it’s time to rinse off the degreaser using low-pressure water. High-pressure water can force moisture into sensitive electrical components or create additional problems by dislodging parts inadvertently. Using a garden hose or a spray bottle set to low pressure will allow you to rinse effectively without risking damage.
Begin rinsing from the top of the engine bay and work your way downwards, ensuring that all degreaser residue is removed completely. Pay special attention to areas where dirt may have accumulated during scrubbing; thorough rinsing will leave your engine bay looking pristine.
Drying the Engine Bay Thoroughly
Once rinsing is complete, drying the engine bay thoroughly is essential before reconnecting any electrical components or starting the vehicle again. Use microfiber cloths or absorbent towels to wipe down surfaces gently, removing excess moisture that could lead to corrosion or electrical issues.
For hard-to-reach areas where moisture may linger, consider using compressed air or a leaf blower on a low setting to help expedite drying. Ensuring that all surfaces are dry will prevent potential problems down the line and maintain optimal performance of your vehicle’s components.
Reconnecting the Battery and Final Inspection
With everything cleaned and dried thoroughly, it’s time to reconnect the battery safely. Begin by attaching the negative terminal back onto its post and securing it tightly with a wrench. This step restores power to your vehicle’s electrical systems while ensuring safety during operation.
After reconnecting the battery, conduct a final inspection of your engine bay before closing it up. Check for any loose connections or components that may have shifted during cleaning. Ensure that all protective coverings have been removed from sensitive parts and that everything appears in order. A thorough inspection guarantees that your vehicle is ready for operation without any lingering issues.
In summary, cleaning your engine bay involves several critical steps: preparing your workspace, ensuring safety through cooling and disconnecting the battery, protecting sensitive components, removing debris, applying degreaser effectively, scrubbing stubborn areas, rinsing thoroughly, drying completely, and finally reconnecting the battery while conducting a final inspection. By following these steps diligently, you can maintain your vehicle’s performance while enhancing its longevity through regular maintenance practices.
FAQs
What tools do I need to clean my car engine bay safely?
To clean your car engine bay safely, you will need a few essential tools: a soft brush or sponge, a vacuum cleaner with a brush attachment, a spray bottle, degreaser or engine cleaner, microfiber towels, and protective gear such as gloves and goggles. Additionally, a plastic bag or aluminum foil can be used to cover sensitive electrical components.
How do I prepare my engine bay for cleaning?
Before cleaning your engine bay, ensure the engine is cool to avoid burns. Disconnect the battery to prevent any electrical issues. Remove any loose debris, such as leaves or dirt, and cover sensitive components like the air intake, battery terminals, and exposed wiring with plastic bags or aluminum foil to protect them from water and cleaning solutions.
What cleaning products are safe to use on an engine bay?
Safe cleaning products for an engine bay include biodegradable degreasers and specialized engine cleaners. Avoid using harsh chemicals like bleach or ammonia, as they can damage engine components. Always check the labels for compatibility with automotive surfaces and opt for products that are non-toxic and environmentally friendly.
How do I rinse the engine bay after cleaning?
After applying the degreaser and scrubbing the surfaces, rinse the engine bay gently using a low-pressure water source, such as a garden hose with a spray nozzle. Avoid using a high-pressure washer, as it can force water into sensitive electrical components. Make sure to direct the water away from covered areas to prevent damage.
What should I do after cleaning the engine bay?
After cleaning the engine bay, remove any protective coverings from electrical components and allow the engine to air dry completely. You can also use a microfiber towel to wipe down surfaces and remove excess moisture. Once dry, reconnect the battery and consider applying a protectant to plastic and rubber components to prevent cracking and fading.