Your tires are the only part of the car that actually touches the road. Four patches of rubber, each roughly the size of your hand, handle every bit of your braking, steering, and acceleration. Yet most of us give them a glance at best, usually when a dashboard light comes on or a neighbor mentions that one looks a little flat. The good news is that two quick checks, air pressure and tread depth, tell you most of what you need to know, and both take less time than waiting for a coffee.
This guide walks through both checks the way a patient friend with a garage would show you. You will learn when to check, what tools to buy or borrow, how to read the numbers, what the numbers mean for safety and wear, and when a problem is bigger than a do-it-yourself fix. Nothing here requires special skills, and the whole routine fits into about five minutes once a month.
Key takeaways
- Check pressure when the tires are cold, meaning the car has sat for at least three hours or been driven less than a mile.
- Use the pressure listed on the sticker inside the driver’s door jamb or in the owner’s manual, not the number molded into the tire sidewall.
- Tires slowly lose air all the time, and pressure drops roughly 1 psi for every 10 degrees Fahrenheit the temperature falls.
- Most new tires start with about 10/32 to 11/32 of an inch of tread, and 2/32 of an inch (about 1.6 mm) is the legal minimum in most states.
- For wet roads, many drivers and tire professionals treat 4/32 of an inch as the point to start shopping for replacements.
- Uneven wear is a clue. It often points to a pressure, alignment, or suspension problem that new tires alone will not fix.
- Do not forget the spare, and do not ignore a tire pressure warning light.
Why These Two Checks Matter So Much
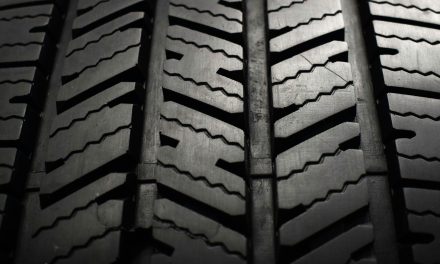
Pressure and tread do different jobs, and each one can fail on its own. Air pressure sets the shape of the contact patch, the part of the tire pressing on the pavement. Too little air and the sidewalls flex too much, the tire runs hot, and the steering feels vague. Too much air and the tire bulges in the middle, so less rubber grips and the ride turns harsh. Tread, on the other hand, is the channel system that pushes water out from under the tire. When the grooves wear down, the tire can no longer clear water fast enough, and the car can ride up on a thin film of water, which is called hydroplaning.
The two also affect each other. A tire that is run underinflated wears fast on its outer edges. A tire that is overinflated wears down the center. So when you check both together, you get a small picture of how your car has been treated and whether something is quietly going wrong.
Safety, wear, and wallet
Correct pressure helps the car stop in a shorter distance, handle predictably in an emergency swerve, and avoid overheating on a long highway run. Underinflation is a common contributor to tire failure, which is why federal rules require a warning system in modern passenger vehicles. Proper pressure also helps tires last longer and can save a little fuel, since a soft tire takes more effort to roll. None of this is dramatic on any single day, but over a year of driving it adds up to money you keep in your pocket.
Tools You Need
You do not need much, and none of it is expensive. Here is the short list.
- A tire pressure gauge. Digital gauges are easy to read and tend to be accurate. Dial gauges are also good. The cheap pencil-style stick gauges work but can be harder to read to the exact pound.
- An air source. A small plug-in compressor that lives in the trunk is handy. Otherwise, you can use the air machine at a gas station, though those hoses and gauges are often worn out and inaccurate, so always confirm with your own gauge.
- A tread depth gauge. These are cheap and read in 32nds of an inch, which is the standard way tires are measured. If you do not have one, a penny and a quarter will do the job.
- A flashlight and a rag. Light helps you see the grooves and the sidewall, and the rag keeps your hands clean.
- Valve caps. Keep all four on. They keep dirt and moisture out of the valve.
Check your gauge against another
Gauges can drift or get dropped. If you own one, it is worth comparing it with a second gauge now and then, perhaps a friend’s or the one at a tire shop. If the two disagree by more than a pound or two, trust the better quality one, and consider replacing the other. A gauge that reads wrong will make you chase the wrong number every month.
Finding the Right Pressure for Your Car
This is where many people trip up. The number printed on the tire sidewall is the maximum pressure the tire can safely hold. It is not the pressure you should use. The right number is the one the vehicle manufacturer chose for your specific car, taking into account its weight, suspension, and handling.
Where to look
- Open the driver’s door and look at the edge of the door or the pillar for a placard. It lists the recommended cold pressure for front and rear tires, and often for the spare.
- If the sticker is missing or unreadable, check the owner’s manual, usually in the section on tires or specifications.
- Some vehicles list a different pressure for heavy loads or towing. Follow the manual if you are carrying a full load of passengers and cargo or pulling a trailer.
The front and rear numbers can differ, especially on trucks, vans, and SUVs. Do not assume all four tires want the same pressure. If you replace your tires with a different size than the original, the manual or placard may no longer apply exactly, and a reputable tire shop can tell you the right setting for the new size.
What cold means
Recommended pressures are cold pressures. Driving heats the air inside, which raises the reading by several pounds. If you check right after a highway drive, you will see a number that looks high, and if you let air out to match the sticker, the tire will be underinflated once it cools. The best time is first thing in the morning before you drive, or after the car has been parked for about three hours. If you must add air at a station a few miles from home, check at home the next morning and fine-tune then.
How to Check Tire Pressure, Step by Step
- Park on level ground and turn off the engine. Set the parking brake.
- Remove the valve cap from the first tire and put it somewhere safe, such as your pocket, so it does not roll away.
- Press the gauge firmly onto the valve stem. You should hear a short hiss, and then it should stop. If air keeps leaking out, reseat the gauge and press straighter.
- Read the number. With a digital gauge, wait for the reading to settle. With a pencil gauge, read where the stick stops.
- Compare it with the placard. Write down the reading for each tire so you can see trends.
- Adjust. If it is low, add air in short bursts and recheck. If it is high, press the small pin in the center of the valve stem briefly to release air, and recheck.
- Replace the cap and hand-tighten it.
- Repeat for all four tires and the spare.
Adding air without overshooting
It is much easier to add than to remove, so go slowly. Add a couple of pounds, remove the hose, check, and repeat. If you are at a gas station machine, many let you set a target number, but do not trust it fully. After filling, verify with your own gauge. Also remember that it is normal for the readings to vary by a pound or so from one tire to the next, and a pound is not worth worrying about. A gap of five pounds or more between two tires is worth a closer look.
What a low tire might mean
If one tire is consistently lower than the others week after week, it may have a slow leak. Common culprits include a nail or screw in the tread, a leaking valve stem, a corroded wheel rim where the bead seals, or a cracked rim after a pothole hit. You can sometimes find a slow leak by spraying a mix of dish soap and water over the tread, valve, and bead, then watching for growing bubbles. Do not try to plug a sidewall puncture or a tire with a damaged inner liner. Take it to a tire shop for a proper inspection and repair, or replacement.
The Tire Pressure Warning Light
Since 2008, passenger cars and light trucks sold in the US have been required to carry a tire pressure monitoring system, often called TPMS. Its light, which looks like a horseshoe-shaped cross section with an exclamation mark, usually comes on when one or more tires are about 25 percent below the recommended pressure. That is a lot. A tire can be a few pounds low, which already hurts handling and wear, without ever triggering the light. So the light is a safety net, not a replacement for a monthly check.
If the light comes on
- Check all four tires with a gauge as soon as it is safe, and inflate to the placard pressure.
- The light may take a few minutes of driving to turn off after you fix the pressure. Some cars have a reset button or a menu procedure, so look in the manual.
- If the light flashes for about a minute and then stays on when you start the car, that usually signals a fault in the monitoring system itself, such as a dead sensor battery. A shop can diagnose it.
- If a tire looks visibly flat, bulging, or damaged, do not keep driving on it. Pull over somewhere safe.
Cold weather often lights the TPMS lamp on the first chilly morning of fall. That is simply the air contracting, and it is a fine reminder to top off all four tires.
How Temperature and Season Change the Numbers
Air pressure rises and falls with temperature. A good rule of thumb is about 1 psi for every 10 degrees Fahrenheit (roughly 0.1 bar for every 18 degrees Celsius change). If you filled your tires on a warm 70 degree afternoon and a cold snap drops the overnight low to 30 degrees, you could be down about 4 psi without any leak at all.
| Temperature change | Approximate pressure change |
|---|---|
| Drop of 10 degrees F (about 5.5 C) | Down about 1 psi |
| Drop of 20 degrees F (about 11 C) | Down about 2 psi |
| Drop of 40 degrees F (about 22 C) | Down about 4 psi |
| Rise of 20 degrees F (about 11 C) | Up about 2 psi |
Tires also leak a small amount of air through the rubber itself, typically a pound or two per month. This is normal, and it is the main reason a monthly check is recommended rather than a yearly one. Drivers who skip winter checks often spend the coldest months riding on soft tires.
Altitude and long trips
If you drive from sea level into the mountains, the outside air pressure drops, and the gauge may read a little higher because it measures the difference between the inside of the tire and the air outside. For most trips this is minor. Before a long road trip, though, check all the tires, including the spare, in the morning before you leave, and again if you load the car heavily.
How to Check Tread Depth
Tread is measured in 32nds of an inch. A new passenger tire usually starts around 10/32 or 11/32, although some truck and winter tires start deeper. The legal minimum in most states is 2/32 of an inch, which is about 1.6 millimeters. A few states set different rules, and some commercial vehicles have stricter ones, so check your local regulations. But the legal minimum is not a safe target. Tires lose much of their wet grip well before they reach it.
The penny test
- Take a US penny and hold it so that Lincoln’s head is upside down and facing you.
- Slide the penny into a tread groove, headfirst.
- If the top of Lincoln’s head is fully visible, the tread is at or below 2/32 of an inch. The tire is worn out and needs replacement.
- If part of the head is covered by the tread, you have more than 2/32 left.
The quarter test
The quarter gives you an earlier warning. Insert it into the groove with Washington’s head facing down. If the tread touches the top of his head, you have at least 4/32 of an inch. If you can see the whole head, you are under 4/32, and it is time to start planning for new tires, particularly if you drive in rain or snow a lot. For winter driving on snowy roads, many tire experts suggest replacing tires closer to 5/32.
Using a tread depth gauge
A gauge is more precise and lets you track wear over time. Push the base flat across the tread so it sits on the surface, press the probe down into the groove until it bottoms out, and read the scale. Measure in at least three places across each tire, at the inner edge, the center, and the outer edge, and then in a few spots around the circumference. Write the numbers down. If the three measurements differ by 2/32 or more, something is causing uneven wear.
Wear bars
Look inside the main grooves for small raised bars of rubber that sit across the groove at 2/32 of an inch. When the tread surface is level with those bars, the tire has reached the legal limit. You can usually spot the location of the bars from small triangle marks on the shoulder of the tire. This is a quick visual check, but a penny or a gauge is more exact.
| Tread depth | What it means |
|---|---|
| 10/32 to 11/32 in | Typical new tire |
| 6/32 to 9/32 in | Good, plenty of life |
| 5/32 in | Consider replacing if you drive in snow |
| 4/32 in | Wet braking suffers, start shopping |
| 3/32 in | Replace soon |
| 2/32 in or less | Legal limit reached, replace now |
Reading the Wear Pattern
How the tread wears is as informative as how much is left. Run your hand lightly across the tread, and look at it in good light. Be careful when you run your hand, because a steel belt wire or a sharp object can be sticking out of a worn tire.
Common patterns and likely causes
- Wear in the center only: the tire has been overinflated. Check your pressure habits.
- Wear on both outer edges: the tire has been underinflated, or the car is often heavily loaded and driven hard in corners.
- Wear on one edge only: usually an alignment problem, often camber or toe. Have the alignment checked.
- Feathered edges, where the tread blocks feel smooth one way and sharp the other: often a toe alignment issue.
- Cupping or scalloping, which looks like dips around the tire: typically worn shocks, struts, or other suspension parts, or a wheel that is out of balance.
- Flat spots: can come from hard braking with locked wheels, or from a car sitting for a long period.
If you see any of these, fixing the cause matters more than replacing the tires. New rubber on a car with a bent suspension part will chew itself up again.
Inspecting the Rest of the Tire
While you are down at wheel level, give the whole tire a look. This takes only a minute per wheel.
- Sidewalls: look for cracks, cuts, bulges, or bubbles. A bulge means the inner structure has been damaged, often by a pothole or curb, and the tire can fail without warning. A tire with a sidewall bulge should be replaced.
- Tread surface: look for nails, screws, stones lodged in the grooves, and cuts. Do not pull out a nail you find, if the tire is holding air. Take it to a shop so it can be repaired correctly.
- Valve stems: check for cracks or a stem that is leaning over.
- Age: find the DOT code on the sidewall. The last four digits show the week and year of manufacture. For example, 2422 means the 24th week of 2022. Many vehicle and tire makers advise having tires inspected by a professional once they are about six years old, and replacing them at about ten years regardless of the tread left, since the rubber hardens with time.
A Simple Monthly Routine
You can build this into a habit with almost no effort. Pick a day, such as the first Saturday of each month, and do the same sequence every time.
- Check cold pressure on all four tires and the spare, and adjust.
- Do a quick tread check with a penny or gauge on each tire, at the inner, middle, and outer sections.
- Look over the sidewalls and tread for damage or debris.
- Jot down the numbers in your phone or on a card in the glove box.
- Before long trips and in the first cold week of the year, do the whole routine again.
Mini-scenario: the slow leak that wasn’t obvious
Imagine you check your tires on the first of the month and find the rear passenger tire is 5 psi lower than the others. You top it off. A month later it is down by 4 psi again, while the others have barely moved. That pattern is your clue. Without your notes, you might have blamed the weather. Because you wrote the numbers down, you know this tire is losing air faster than normal, and you can take it to a tire shop for a leak check before it turns into a roadside flat.
Common Mistakes
- Using the sidewall number. That is the maximum, not the target.
- Checking hot tires and letting air out. The tire will be too soft once cool.
- Trusting the gas station gauge. Those are often badly worn.
- Skipping the spare. A spare with no air is no help on the worst day.
- Waiting for the dashboard light. It comes on only after the tire is already quite low.
- Measuring tread in only one spot. Wear is often uneven, and the worst spot decides when to replace.
- Replacing only one tire without thinking about it. Mixing a new tire with three worn ones, or mixing sizes, can affect handling and may be a problem on all-wheel-drive vehicles. Ask a tire shop what is right for your car.
- Ignoring age. Tires with lots of tread can still be dangerously old.
- Forgetting the valve caps. They are small but protect against leaks.
When to Call a Professional
Most pressure and tread checks are simple do-it-yourself tasks. Some things are not. Take the car to a certified mechanic or a reputable tire shop if you notice any of the following.
- A bulge, bubble, or deep crack in the sidewall.
- A tire that keeps losing air even after you have checked the valve and found nothing obvious.
- A nail or other object in the tread, or any puncture in the shoulder or sidewall.
- Uneven wear that keeps coming back, a steering wheel that pulls to one side, or vibration at highway speeds.
- A TPMS light that flashes on startup and stays on, or one that returns after you have set correct pressures.
- Tread at or near 2/32 of an inch, or tires older than the age ranges your manufacturer recommends.
- Any doubt about whether a tire is safe. When in doubt, have it looked at.
Do not ignore any red warning light on your dashboard, and if a tire goes suddenly flat while driving, grip the wheel firmly, ease off the gas, avoid slamming the brakes, and steer to a safe place before stopping. If you need to change a tire yourself, use the jack only on the lift points in your manual, never get under a car held up by a jack alone, and use proper jack stands for anything beyond a quick wheel swap.
Frequently Asked Questions
How often should I check my tire pressure?
Once a month is a good baseline, and before any long trip. Also check after a big temperature swing, because a sharp drop in temperature can lower your pressure noticeably in a single night.
Is it okay to check pressure after driving?
It is better to check cold. If you have driven only a short distance, say under a mile, the reading is still close to cold. After a longer drive, the tires are warm and the reading will run a few pounds high, so wait a few hours if you can.
What happens if I overinflate my tires slightly?
A pound or two over is not likely to cause trouble. Larger amounts shrink the contact patch, make the ride harsher, wear the center of the tread faster, and can reduce grip, especially on wet roads. Go back to the placard number.
Can I use the penny test on any tire?
Yes, for passenger vehicle tires. It tells you if you have reached the 2/32 inch limit. For an earlier warning, use the quarter test. A real depth gauge is more accurate and is inexpensive.
Should I fill my tires with nitrogen?
Nitrogen leaks out of tires a bit more slowly, but ordinary compressed air is about 78 percent nitrogen already. The most important thing is correct pressure, checked regularly. Regular air is fine for most drivers, and you can mix the two if you need to top up.
Do I need to check the spare tire?
Yes. Spares often sit for years and lose air. Many compact spares call for a higher pressure than the regular tires, so check the number on the spare itself or in the manual. Also note that compact spares are meant for short, slow trips only.
Why does my tire pressure light come on when it gets cold?
Cold air takes up less space, so pressure drops as temperatures fall. If the tires were only a little above the trigger point, a cold morning can tip them below it. Add air to the recommended pressure and the light should go out after a short drive.
Can I rotate or replace just one tire?
You can replace a single tire if the others still have plenty of tread, but the difference in height can matter, particularly with all-wheel-drive systems. A tire shop can measure and advise on what your vehicle needs.
A Few Minutes That Pay Off
Tire care is one of those small habits that quietly protects you. A cheap gauge, a penny, and a few minutes each month will keep you ahead of most roadside surprises. Check your tires cold, write the numbers down, look for patterns, and let a professional handle anything that looks off. Your future self, stopped at a green light instead of a gravel shoulder, will appreciate it.