You spend more time inside your car than you do in some rooms of your house, yet the interior rarely gets the attention the exterior does. Crumbs slide under the seats, a coffee ring settles into the cupholder, sunscreen and hand lotion film over the steering wheel, and the dashboard slowly collects a layer of dust that makes everything look tired. A good interior detail is one of the most satisfying jobs you can do on a car, and it changes how every drive feels.
This guide covers the whole job in a sensible order, from emptying the cabin to the final wipe of the glass. It explains what to use on each material, how to handle stains and odors, how to protect electronics and airbags, and where people most often cause damage with cleaners that were too strong. You can do the entire process at home with a modest set of supplies and an afternoon.
Key takeaways
- Work from top to bottom and dry to wet: declutter, vacuum, then wipe, then glass, then floors last if you shampoo.
- Spray cleaner onto the cloth or brush, not directly onto screens, switches, or vents.
- Test any cleaner on a hidden spot first, and match the product to the surface: fabric, vinyl, leather, plastic, or glass.
- Go easy on moisture. Soaked seats and carpets can grow mildew and can harm seat-mounted sensors and wiring.
- Never mix cleaning products, and keep doors open for ventilation while you work.
- Check the owner’s manual before cleaning around airbags, heated seats, and touchscreens.
Before you start: prep and safety
Pick the time and place
Work in the shade with the doors open. Heat dries cleaners too fast, which leaves streaks and residue, and a car sitting in direct sun can have dashboard surfaces hot enough to burn skin. Fresh air also matters because many cleaners give off fumes in a small space. If you must work in a garage, open the main door fully and let air move through the cabin.
Turn off the car and protect the electronics
Switch the engine off, take the key out of the ignition or move the key fob well away from the car, and set the parking brake. Modern cabins are full of sensors, touchscreens, and buttons. Moisture dripping into a gap around a switch panel or a shifter can cause trouble that is expensive to track down. Keep liquids under control and use damp, not dripping, cloths.
Airbags and seat sensors
Airbag modules sit in the steering wheel hub, dashboard, seat sides, door panels, and sometimes the roof pillars. Seats also contain occupancy sensors, and some seats have heating elements and side airbags under the upholstery. Do not saturate seat fabric or leather, do not pick at airbag covers, and do not spray anything under or around them. If you ever notice an airbag light on the dash, have it checked by a certified technician. It is a warning light and should never be ignored.
Gather your supplies
- A vacuum with a crevice tool and a soft brush attachment.
- A handful of clean microfiber cloths, in different colors if you want to keep tasks separate.
- A soft detailing brush, or a clean paintbrush, for vents, seams, and switches.
- An all-purpose interior cleaner that is safe for plastic, vinyl, and rubber.
- A fabric or upholstery cleaner, plus a stiff-bristle brush for carpets and a softer one for seats.
- A pH-balanced leather cleaner and conditioner if your seats are leather.
- Automotive glass cleaner, or a mild solution of distilled water and a small splash of white vinegar for glass only.
- Cotton swabs, a plastic trim tool or old credit card for tight gaps, and a small trash bag.
- Disposable gloves and a dust mask if you are sensitive to dust or mold.
Cleaning chemicals and common sense
Read each label and follow it. Never mix bleach with ammonia or with acidic products such as vinegar or some bathroom cleaners, because the fumes can be dangerous. Keep products in their original bottles. Avoid household cleaners with strong solvents on dashboards and screens, since they can cloud plastics, dull coatings, and strip anti-glare layers.
Step 1: Empty the car and take out the mats
Remove everything that is not bolted down
Clear the door pockets, seat-back pockets, console, glove box, trunk, and under the seats. Throw out trash, make a pile for things that belong in the house, and give yourself a quick look at what has been quietly accumulating. Old receipts, half-empty water bottles, and loose change all love to hide in the cracks.
Check for anything that should not be there
Sharp objects, syringes, spilled medications, and broken glass should be handled carefully with gloves. A dead or rotting food item is a likely source of odor. Open the glove box and console and look for leaking batteries, melted crayons, or old sunscreen. Do not leave lighters or aerosol cans in a hot car.
Take out the floor mats
Pull floor mats out and set them aside to be cleaned separately. Many factory mats are held by clips or posts, so lift them gently. Do not stack aftermarket mats on top of factory mats, since a loose mat can slide under the pedals and interfere with them. After cleaning, make sure each mat is dry, correctly seated, and secured by its retaining hooks if it has them.
Step 2: Vacuum thoroughly, top to bottom
Start high
Dust falls, so begin with the headliner, visors, and dashboard. Use a soft brush attachment and light strokes. The headliner is attached with adhesive that can fail if you rub it hard or soak it, so go gently and never scrub. Move to the door panels, seat backs, and seat surfaces.
Work into the seams
Use the crevice tool along the seat rails, between the seat cushion and backrest, under the console, and around seat belt buckles. Run a brush along the vents while the vacuum follows to catch the dust. Push the front seats all the way forward to vacuum the rear footwell, then all the way back for the front footwell. Be careful around seat rails and wiring, and do not yank any cables hidden under the seats.
Carpets last
Carpets hold the most dirt. Before vacuuming, use a stiff brush to agitate the fibers, which lifts sand and pet hair to the surface. Work in overlapping lines, then repeat in the opposite direction. For pet hair, a rubber glove or a squeegee-style hair tool dragged across the carpet can bunch hair up so the vacuum can grab it. If fine dust blows around, wear a mask.
Step 3: Clean hard surfaces
Dashboard, console, and door panels
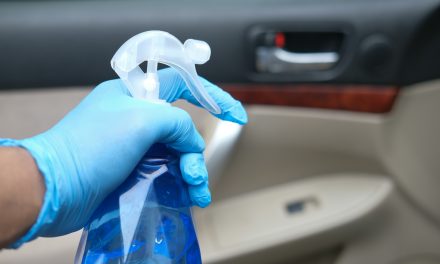
Lightly spray all-purpose cleaner on a microfiber cloth and wipe the surface in sections. Use a soft brush on textured areas, air vents, and around buttons. Use cotton swabs in tiny gaps. Wipe off residue with a second, slightly damp cloth, then dry. This two-cloth habit prevents streaks and a sticky feel.
Avoid overspray on glossy black trim and on touchscreens, which scratch easily. If your cabin has piano-black plastic, use a clean, dry, very soft cloth and light pressure, since even a dusty cloth can leave fine marks.
Touchscreens and instrument clusters
Turn the display off so you can see the dust. Dampen a clean microfiber cloth lightly with water or a screen-safe cleaner approved by the manufacturer, wipe gently, and dry with another soft cloth. Do not spray any liquid directly on a screen or cluster. Skip ammonia-based glass cleaners, which can damage anti-glare and oleophobic coatings.
Steering wheel, shifter, and controls
These are the dirtiest touchpoints because of skin oil, lotion, and sweat. Wipe with a cloth lightly dampened with all-purpose cleaner or a leather-safe cleaner, depending on the material. Be gentle around the airbag cover and control buttons. After cleaning, do not use a slick protectant on the steering wheel or pedals. A slippery wheel is unsafe.
Pedals and rubber
Wipe rubber pedal covers with a lightly damp cloth, then dry thoroughly. Do not apply dressings or silicone sprays here. Slippery pedals are a real hazard, and even a thin residue can turn a foot in the wrong direction.
Cupholders and door pockets
Use a damp cloth wrapped around a spoon handle, or a small brush, to scrape out sticky residue. If a cupholder is badly gummed up, a little warm soapy water on a cloth, followed by a clean wipe, usually does it. Dry well to avoid mildew.
Seat belts
Pull the belt fully out and clip it so it stays out. Wipe with a cloth and mild soap solution. Do not use bleach, strong solvents, or dye, because they can weaken webbing. Let it dry fully before letting it retract. If a belt is frayed, cut, or will not latch or retract properly, it needs professional replacement.
Step 4: Clean fabric seats and carpet
Treat spots before you clean the whole surface
Blot, never rub, fresh spills with a clean cloth to lift as much as possible. For dried stains, lightly spray an upholstery cleaner, give it the dwell time listed on the label, then agitate with a soft brush and blot with a clean towel. Repeat in thin applications rather than flooding the fabric.
Cleaning the whole seat
Lightly mist the cleaner across a section, brush in gentle circles, and lift the soil with a microfiber towel. Work one seat panel at a time to prevent the cleaner from drying. Overwetting is the usual mistake. Foam in the cushion holds water, and damp seats take a long time to dry and may smell musty. A wet-dry vacuum or extractor, if you have access to one, pulls much of the moisture out.
Carpets and mats
Spray cleaner on the carpet, scrub in lines with a stiff brush, and blot or extract. For rubber mats, wash with soapy water, rinse, and let them dry fully. For carpeted mats, vacuum first, scrub with cleaner, rinse as needed, and let them air dry outside before putting them back.
Drying matters
Leave the doors open on a dry day, or run a fan inside the car. If it is humid, bring a small dehumidifier or a bucket of moisture absorber. Do not close up a damp cabin overnight. Mildew can start within a day or two, and it is hard to get rid of once it sets in.
Step 5: Leather, vinyl, and synthetic surfaces
Know what you have
Many cars use a mix of real leather, coated leather, and synthetic leather-like material. The owner’s manual or the dealer can tell you which one is in your car. Coated surfaces tolerate mild cleaners well, while uncoated leather is more sensitive.
Cleaning leather
Vacuum first so grit does not scratch the leather. Apply a pH-balanced leather cleaner to a soft brush or cloth, work it gently across a small section, and wipe off the residue with a clean damp cloth. Use light pressure. Dye on leather can transfer to a cloth, which is normal for some seats, but heavy color transfer may mean the finish is worn.
Conditioning
After the leather dries, a thin layer of conditioner can help keep it supple. Avoid greasy or silicone-based products that leave a slippery surface, and do not condition perforated seats heavily, since clogging the holes can affect ventilation. Skip conditioner on heated or cooled seats if the manual warns against it.
Vinyl and synthetic materials
Use a mild all-purpose cleaner or diluted soapy water, a soft brush, and a damp cloth. Wipe, rinse, and dry. Keep dyes, bleach, and harsh solvents away from these surfaces.
Step 6: Glass and mirrors
Clean the inside of the windshield properly
The inside of the windshield collects a hazy film from plastics off-gassing and skin oils. Spray glass cleaner on a clean microfiber cloth, wipe the glass, and follow with a dry cloth. Use a second, dry cloth for the final buff. Cleaning at an angle is awkward. Many people drape the cloth over a hand and reach across, or use a long-handled tool made for windshields.
Avoid streaks
Streaks come from too much cleaner, a dirty cloth, or cleaning in the sun. Wipe the top of the glass with horizontal strokes and the bottom with vertical strokes so you can tell which side a streak is on. If your windows are tinted, use a cleaner labeled safe for tint and do not scrub the edge of the film.
Mirrors and cameras
Clean the rearview mirror carefully. Spray the cloth, not the mirror, since liquid running into the mirror housing can damage electronics such as auto-dimming sensors. Clean camera lenses and sensors with a soft, dry cloth or lightly dampened microfiber, and never use abrasive materials on them.
Step 7: Details most people skip
Vents and crevices
A soft brush and cotton swabs clean vents far better than a cloth. Brush dust toward you and vacuum it as you go. Compressed air in short bursts can help, but wear eye protection and keep the nozzle away from delicate switches.
Door jambs and sills
Open each door and wipe the jamb, hinge areas, and sill with a damp cloth. They collect grime from shoes and hands. Check that drain holes at the bottom of door edges are clear, since blocked drains hold water that can lead to rust.
The trunk or cargo area
Remove the cargo liner, vacuum underneath, and wipe plastic trim. Check the spare tire well for moisture or rust. Pooled water there can signal a leak in the taillight seals or trunk gasket.
The headliner
If you must spot clean a stain, use a barely damp cloth with a small amount of mild cleaner and dab. Do not rub, spray directly, or soak, because the adhesive and backing can fail and the fabric can sag.
Handling stains and odors
Common stains and what to try
| Stain | First step | Notes |
|---|---|---|
| Coffee or soda | Blot, then use upholstery cleaner | Sugary spills get sticky, so rinse with a damp cloth afterward |
| Grease or oil | Blot, then a cleaner made for grease | Test first, repeat in thin passes |
| Ink | Dab with a cloth and a cleaner approved for the material | Do not rub, which spreads it |
| Chocolate or melted candy | Let it harden, lift off solids, then clean | Do not heat it |
| Mud | Let it dry, then vacuum and clean | Wet mud smears into carpet |
| Pet accidents or vomit | Blot, then use an enzyme cleaner made for the surface | Enzyme cleaners break down odor sources |
Getting rid of odors for real
Masking smells with air fresheners only covers them for a while. Find the source first: trash, spilled milk, wet carpet, pet accidents, a dirty cabin air filter, or smoke residue. Clean the source, dry the area completely, and then air out the car for several hours with doors open.
Baking soda sprinkled on dry carpet and seats, left for several hours and then vacuumed, can absorb light odors. For smoke odor or a strong musty smell, you may need a professional deep clean. A dirty cabin air filter is a common cause of stale smells, and replacing it is often a simple job described in the owner’s manual.
Mold and mildew
If you see black or green fuzzy spots, or the car smells like a damp basement, there is a moisture source. Wear gloves and a mask, dry the area, and clean with a product designed for automotive interiors. Do not mix products. Look for leaks around the windshield, sunroof drains, door seals, or heater core, and have a mechanic inspect any persistent dampness. A sweet smell with a foggy windshield and damp carpet on the passenger side can point to a heater core leak, which needs professional repair.
Step 8: Finishing touches
Protect surfaces sensibly
A light application of a UV protectant made for interior plastics and vinyl can help reduce fading and cracking. Choose matte products so you do not get glare on the dash, apply a small amount to a cloth, and buff off excess. Do not apply it to the steering wheel, pedals, or seats you slide across, where slipperiness is a safety problem.
Reinstall and recheck
Put mats back and confirm they are locked down and not touching the pedals. Check that seat controls, windows, and the seat belt latches all work normally. Look for any warning lights on the dash after you start the car. If a light appeared after cleaning, a connector may have gotten wet, so stop and have it inspected.
Final glass and air out
Give glass one last wipe once everything else is done, since dust from the work settles on it. Leave the doors open a bit longer if you used liquid cleaners, so the cabin can finish drying.
A realistic weekend schedule
If you want a plan, here is one that fits a regular sedan or small SUV with ordinary dirt:
- Minutes 0 to 20: empty the car, bag the trash, pull the mats.
- Minutes 20 to 50: vacuum top to bottom, with brush and crevice work.
- Minutes 50 to 90: clean hard surfaces, vents, and controls.
- Minutes 90 to 130: treat seats and carpets, work stains, clean mats.
- Minutes 130 to 150: clean and condition leather if needed.
- Minutes 150 to 170: do glass, mirrors, and jambs.
- Minutes 170 to 180: reinstall mats and take a last look.
A family car with kids, pets, or spilled food may take double that. Spread the job over two sessions if you like, which also gives seats time to dry.
Keeping the interior clean longer
- Keep a small trash bag in the car and empty it every week.
- Use all-weather rubber mats in wet or snowy climates.
- Keep a clean microfiber cloth in the glove box for quick wipes.
- Take shoes off or knock them clean before getting in on muddy days.
- Use a sunshade in hot weather to reduce dashboard fading and cracking.
- Restrict food and drinks, or use cups with lids.
- Use a seat cover or blanket for pets and a washable liner in the cargo area.
- Replace the cabin air filter on the schedule in the owner’s manual.
Common mistakes
- Soaking seats or carpet, which leads to mildew and can affect sensors and wiring.
- Spraying cleaner directly on screens, switches, vents, or mirrors.
- Using household glass cleaner with ammonia on tint or touchscreens.
- Applying slick protectant to the steering wheel, pedals, or driver’s seat.
- Scrubbing the headliner, which weakens its adhesive.
- Mixing cleaning chemicals or working with the doors closed.
- Forgetting to test a cleaner on a hidden area first.
- Putting wet mats back in the car, or stacking mats on top of each other.
- Using bleach on seat belts or upholstery.
- Masking odors instead of removing their source.
When to call a professional
- You have persistent dampness, a musty smell, or foggy windows that suggest a leak. Have a certified mechanic or body shop find the source.
- An airbag, seat belt, or other safety warning light is on, or a belt is frayed or fails to latch.
- Stains involve biohazards, heavy mold, or strong smoke, which may call for professional extraction or ozone-free deep cleaning.
- Leather is cracked, peeling, or torn, or the headliner is sagging.
- A cleaning accident gets liquid into electronics, and the infotainment, climate controls, or seat functions start behaving strangely.
- You are not sure what your seats or trim are made from, and you want a careful, tested approach.
Never ignore a red warning light on the dashboard, whether or not it appears after cleaning. Check the owner’s manual and have it diagnosed promptly.
Frequently asked questions
How often should I deep clean my car’s interior?
Two to four times a year works for most drivers, with quick vacuuming and wipe-downs monthly. Families with kids or pets may want to clean more often.
Can I use household cleaners in my car?
Some mild ones are fine, but many contain solvents, bleach, or ammonia that can damage plastics, coatings, and tint. Choose automotive products when you can, and always test a hidden spot first.
Is it safe to use baby wipes on the dashboard?
They are fine for a light cleanup of hard surfaces in a pinch, but some leave residue or can dull finishes over time. Do not use them on screens unless the manufacturer says it is okay.
How do I clean my car’s interior without leaving streaks?
Use less product, use two cloths, one to clean and one to dry, and work in the shade. Replace cloths as they get dirty.
How can I get rid of a bad smell for good?
Find and remove the source, dry the area, and consider replacing the cabin air filter. Enzyme cleaners work well on organic odors, and baking soda can help for light smells.
Is it okay to use a steam cleaner?
Steam can be effective, but heat and moisture can harm adhesives, electronics, and leather. If you try it, use low moisture and short passes, and check the manual or ask a professional first.
Can I clean the seat belts?
Yes, with mild soap and water, then let them dry fully while extended. Never use bleach or harsh solvents, and replace any belt that is frayed or damaged.
Should I condition leather seats every time?
No. Clean them regularly, and condition lightly a few times a year, depending on climate and use. Over-conditioning can leave seats greasy.
A clean cabin is a small luxury you give yourself every time you open the door. Take it step by step, keep things dry and gentle, and do not be discouraged by the first look at what is under the seats. By the end you will have a car that smells fresher, feels better, and holds its value a little better too.