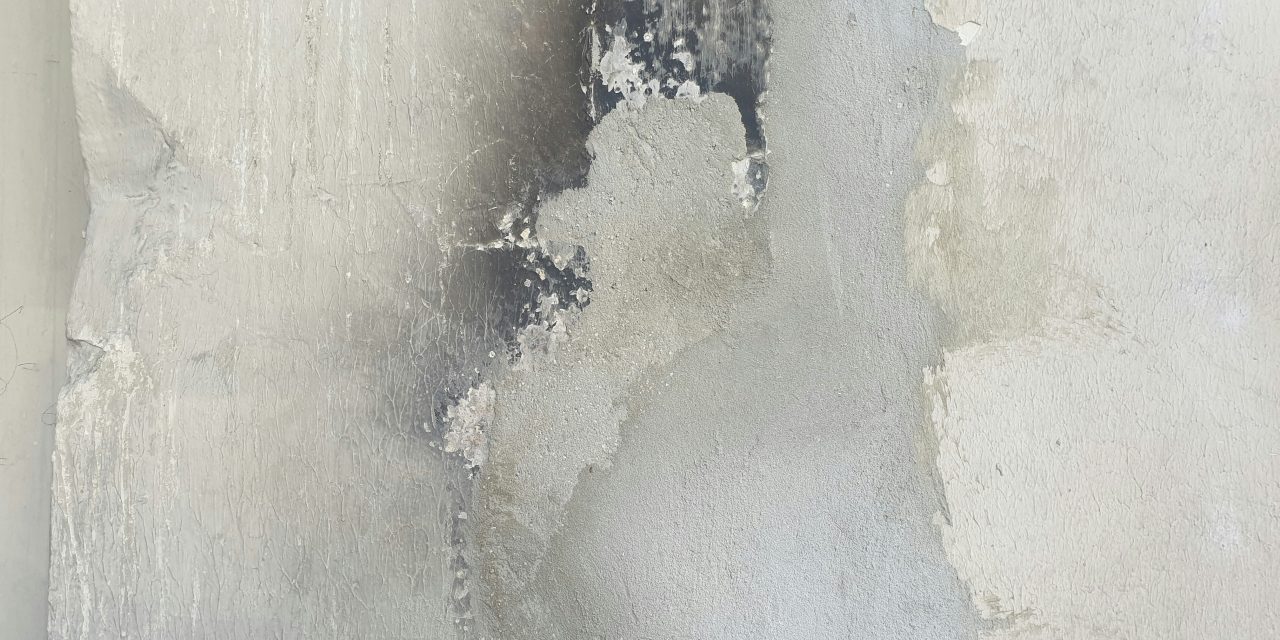
Water damage in drywall is a prevalent issue that can arise from various sources, including leaks, flooding, or high humidity levels. Drywall, also known as gypsum board, is a construction material composed of a gypsum core sandwiched between two sheets of heavy paper. While it is a popular choice for interior walls due to its affordability and ease of installation, it is highly susceptible to moisture. When exposed to water, drywall can weaken, warp, and develop unsightly stains, leading to structural integrity concerns and aesthetic issues.
The consequences of water damage extend beyond mere appearance; they can also pose significant health risks. Prolonged exposure to moisture creates an ideal environment for mold and mildew growth, which can lead to respiratory problems and allergic reactions. Understanding the nature of water damage in drywall is crucial for homeowners and property managers alike, as it enables them to take timely action to mitigate risks and restore their living spaces.
Assessing the Extent of the Damage
Before embarking on any repair work, it is essential to assess the extent of the water damage thoroughly. This evaluation involves inspecting not only the visible areas of drywall but also hidden spaces that may have been affected. Start by examining the surface for discoloration, sagging, or bubbling, which are indicative of moisture infiltration. Use a moisture meter to measure the moisture content within the drywall; readings above 1% typically indicate water damage.
Additionally, check adjacent areas such as baseboards, insulation, and framing for signs of dampness or decay. If the damage is extensive or if you suspect structural issues, it may be prudent to consult a professional contractor or water damage restoration specialist. They possess the expertise and equipment necessary to conduct a comprehensive assessment and recommend appropriate remediation strategies.
Safety Precautions Before Starting Repairs

Safety should always be a priority when dealing with water-damaged drywall. Before initiating repairs, ensure that the area is safe for work. Turn off electricity in the affected zone to prevent electrical hazards, especially if there is standing water present. Wear protective gear such as gloves, goggles, and a mask to shield yourself from potential contaminants and irritants.
If mold growth is suspected, consider using an N95 respirator to filter out airborne spores. Ensure proper ventilation in the workspace by opening windows or using fans to circulate air. If the damage is extensive or if you are unsure about the safety of the environment, it may be best to seek professional assistance to mitigate risks effectively.
Tools and Materials Needed for Drywall Repair

Having the right tools and materials on hand is essential for a successful drywall repair project. Key tools include:
1. Utility knife: For cutting drywall and trimming damaged sections.
2. Drywall saw: Useful for making precise cuts in drywall.
3. T-square: Ensures straight cuts and accurate measurements.
4. Tape measure: Essential for measuring dimensions accurately.
5. Mud pan and drywall knife: For applying joint compound smoothly.
6. Sanding block or pole sander: To achieve a smooth finish on repaired areas.
7. Primer and paint: To finish the repaired surface.
In addition to tools, gather materials such as replacement drywall sheets, joint tape, joint compound (also known as mud), and screws or nails for securing new drywall sections. Having these items readily available will streamline the repair process and enhance efficiency.
How to Dry Out Water-Damaged Drywall Properly
Properly drying out water-damaged drywall is crucial to prevent further deterioration and mold growth. Begin by removing any standing water using a wet/dry vacuum or towels. Once the area is dry, use fans and dehumidifiers to circulate air and reduce humidity levels effectively. Aim for a relative humidity level below 50% to inhibit mold growth.
If the drywall has absorbed significant moisture, it may be necessary to remove sections of it to facilitate thorough drying. Cut out damaged areas using a utility knife or drywall saw, ensuring that you extend beyond visible damage to ensure all moisture is eliminated. Allow the exposed framing and insulation to dry completely before proceeding with repairs.
Identifying Mold and Mildew Growth
Mold and mildew can develop rapidly in damp environments, making it essential to identify their presence early on. Mold typically appears as black, green, or white patches on surfaces and may emit a musty odor. Mildew, on the other hand, often appears as a powdery substance on surfaces.
To check for mold growth behind drywall, look for discoloration or soft spots on the surface. If you suspect mold is present, conduct a thorough inspection using a flashlight to illuminate hidden areas. If mold is detected, it is crucial to address it promptly using appropriate remediation techniques.
Step-by-Step Guide to Repairing Minor Water Damage
For minor water damage repairs, follow these steps:
1. **Preparation**: Gather all necessary tools and materials before starting.
2. **Cut Out Damaged Drywall**: Use a utility knife or drywall saw to remove damaged sections carefully.
3. **Install New Drywall**: Cut replacement drywall pieces to fit snugly into the openings created.
4. **Secure New Drywall**: Use screws or nails to attach the new drywall securely to the framing.
5. **Apply Joint Tape**: Cover seams with joint tape to create a smooth transition between old and new drywall.
6. **Apply Joint Compound**: Use a drywall knife to spread joint compound over taped seams and screw heads.
7. **Sand Smooth**: Once dry, sand the area until smooth for an even finish.
Following these steps will help restore your wall’s integrity while minimizing visible signs of repair.
When to Cut Out and Replace Damaged Drywall Sections
Determining when to cut out and replace damaged drywall sections depends on several factors, including the extent of moisture absorption and visible deterioration. If the drywall feels soft or crumbles easily when pressed, it is likely beyond repair and should be replaced entirely.
Additionally, if mold growth is present within the drywall or if there are extensive water stains that indicate prolonged exposure to moisture, cutting out affected sections is advisable. In cases where more than 20% of a wall’s surface area is damaged or if structural components are compromised, consulting with a professional contractor may be necessary for proper evaluation and remediation.
Installing New Drywall and Seam Finishing Techniques
Installing new drywall requires precision and attention to detail for optimal results. Begin by measuring and cutting new drywall sheets according to the dimensions of the openings created during repairs. Ensure that edges are straight for seamless installation.
Once installed, apply joint tape over seams using a drywall knife for smooth application. Follow this by applying joint compound over the tape in thin layers, feathering out the edges for a seamless transition between old and new surfaces. Allow each layer to dry completely before sanding down imperfections with fine-grit sandpaper.
For best results, apply at least two coats of joint compound, sanding between applications for an even finish. This technique ensures that seams are virtually invisible once painted.
Painting and Finishing Your Repaired Wall
After completing repairs and achieving a smooth surface through sanding, it’s time to paint your wall for a polished look. Start by applying a primer specifically designed for drywall; this step enhances paint adhesion while preventing stains from bleeding through.
Once the primer has dried completely, select a high-quality paint suitable for interior walls. Use a roller for larger areas and a brush for corners and edges for even coverage. Depending on your color choice and desired finish, you may need multiple coats of paint; allow adequate drying time between applications.
Finishing touches such as touch-ups on trim or baseboards can further enhance the overall appearance of your repaired wall.
Preventative Measures to Avoid Future Water Damage
Preventing future water damage requires proactive measures aimed at minimizing moisture exposure in your home. Here are several strategies:
1. **Regular Inspections**: Conduct routine checks of plumbing systems, roofs, gutters, and downspouts for leaks or blockages.
2. **Proper Ventilation**: Ensure adequate ventilation in areas prone to humidity such as bathrooms and kitchens by using exhaust fans.
3. **Seal Cracks**: Inspect exterior walls for cracks or gaps that could allow water infiltration; seal these areas promptly.
4. **Install Moisture Barriers**: Consider installing vapor barriers in basements or crawl spaces to reduce humidity levels.
5. **Maintain Landscaping**: Ensure that landscaping slopes away from your home’s foundation to prevent water pooling near walls.
By implementing these preventative measures, homeowners can significantly reduce their risk of experiencing water damage in drywall.
In summary, understanding water damage in drywall involves recognizing its causes and effects while assessing damage accurately before repairs begin. Safety precautions are paramount during this process, alongside having appropriate tools ready for use. Proper drying techniques are essential in preventing mold growth while minor repairs can be accomplished through systematic steps involving cutting out damaged sections and installing new drywall effectively. Finally, painting and finishing techniques enhance aesthetics while preventative measures safeguard against future incidents of water damage in your home environment.
FAQs
What are the signs of water-damaged drywall?
Signs of water-damaged drywall include discoloration or staining, a sagging appearance, peeling paint or wallpaper, and a musty odor. You may also notice soft or crumbling areas when you touch the drywall.
Can I repair water-damaged drywall myself?
Yes, you can repair water-damaged drywall yourself if the damage is minor. This typically involves cutting out the damaged section, replacing it with new drywall, and applying joint compound and paint. However, for extensive damage or mold growth, it may be best to hire a professional.
When should I replace water-damaged drywall instead of repairing it?
You should replace water-damaged drywall if it has extensive mold growth, is severely warped or crumbling, or if the damage extends beyond a small area. Additionally, if the drywall has been wet for an extended period, replacement is often necessary to prevent further issues.
How can I prevent water damage to drywall in the future?
To prevent water damage to drywall, ensure proper sealing around windows and doors, maintain your roof and gutters, and promptly fix any plumbing leaks. Additionally, using moisture-resistant drywall in areas prone to humidity, such as bathrooms and kitchens, can help mitigate risks.
What tools and materials do I need to repair water-damaged drywall?
To repair water-damaged drywall, you will need tools such as a utility knife, drywall saw, tape measure, and a drywall knife. Materials include new drywall, joint compound, drywall tape, screws, and paint. Safety gear like gloves and a mask is also recommended when working with damaged materials.