Composting is a natural process that transforms organic waste into nutrient-rich soil amendments. This sustainable practice not only reduces landfill waste but also enhances soil health, promotes plant growth, and contributes to environmental conservation. At its core, composting involves the decomposition of organic materials by microorganisms, fungi, and other decomposers. The end product, known as compost, is a dark, crumbly substance that is rich in essential nutrients such as nitrogen, phosphorus, and potassium.
The fundamental principles of composting revolve around the balance of carbon-rich materials (browns) and nitrogen-rich materials (greens). Understanding the carbon-to-nitrogen ratio is crucial for successful composting. Ideally, a ratio of 30:1 (carbon to nitrogen) is recommended to facilitate optimal microbial activity. Additionally, factors such as moisture content, aeration, and temperature play significant roles in the composting process. By grasping these basics, individuals can effectively manage their compost systems and reap the benefits of this eco-friendly practice.
Choosing the Right Compost Bin or Pile
Selecting an appropriate compost bin or pile is essential for efficient composting. Various options are available, ranging from simple homemade structures to commercially manufactured bins. The choice largely depends on available space, budget, and personal preferences. For instance, a compost pile can be an informal heap in a designated area of the yard, while a bin offers a more contained and aesthetically pleasing solution.
When considering a compost bin, factors such as size, material, and design should be taken into account. Bins made from wood, plastic, or metal each have their advantages and disadvantages. Wooden bins are often favored for their natural appearance and breathability, while plastic bins are lightweight and easy to clean. Additionally, some bins come equipped with features like aeration vents and removable panels for easy access to finished compost. Ultimately, the right choice will depend on individual needs and the scale of composting intended.
Selecting the Ideal Location for Your Compost

The location of your compost bin or pile significantly influences its efficiency and effectiveness. An ideal site should be easily accessible for adding materials and turning the compost while also being situated in a spot that receives adequate sunlight and shade. Sunlight helps to maintain warmth within the pile, promoting microbial activity, while shade can prevent excessive moisture loss during hot weather.
Furthermore, it is crucial to avoid placing the compost near water sources or areas prone to flooding to prevent leachate contamination. A well-drained area with good air circulation is optimal for composting. Additionally, consider proximity to your garden or kitchen for convenience when adding kitchen scraps or utilizing finished compost. By carefully selecting the location, you can enhance the overall success of your composting efforts.
Gathering Green and Brown Materials

The success of composting hinges on the careful selection of materials used in the process. Organic waste can be categorized into two primary types: green materials and brown materials. Green materials are rich in nitrogen and include items such as vegetable scraps, grass clippings, coffee grounds, and fresh plant trimmings. These materials provide the necessary nutrients for microbial growth.
On the other hand, brown materials are high in carbon and include dried leaves, straw, cardboard, and wood chips. A balanced mix of both types is essential for creating an effective compost pile. Aim for a ratio of approximately three parts brown materials to one part green materials to achieve optimal decomposition rates. By gathering a diverse array of organic waste, you can create a nutrient-dense compost that will benefit your garden.
Preparing Materials for Composting
Before adding materials to your compost pile or bin, proper preparation is vital to ensure efficient decomposition. Larger items should be shredded or chopped into smaller pieces to increase surface area and facilitate microbial activity. For example, breaking down branches or large vegetable scraps can significantly speed up the composting process.
Additionally, it is essential to avoid adding certain materials that may hinder decomposition or introduce pathogens into the compost. Items such as meat, dairy products, oily foods, and diseased plants should be excluded from your compost pile. By carefully preparing your materials and adhering to best practices, you can create an environment conducive to rapid decomposition and high-quality compost production.
Layering Your Compost Pile Correctly
Layering is a critical aspect of successful composting that helps maintain aeration and moisture levels within the pile. A well-structured compost pile typically consists of alternating layers of green and brown materials. Start with a base layer of coarse brown materials like straw or small branches to promote airflow at the bottom of the pile.
Subsequent layers should alternate between green and brown materials in a balanced manner. For instance, after the base layer, add a layer of green materials followed by a layer of brown materials. This method not only enhances aeration but also ensures that microorganisms have access to both nitrogen and carbon sources throughout the decomposition process. Proper layering contributes to an efficient breakdown of organic matter and accelerates the overall composting timeline.
Maintaining Proper Moisture Levels
Moisture content is a crucial factor in the composting process that directly affects microbial activity and decomposition rates. Ideally, your compost pile should maintain a moisture level similar to that of a damp sponge—moist but not soggy. Insufficient moisture can slow down decomposition, while excessive moisture can lead to anaerobic conditions that produce foul odors.
To maintain proper moisture levels, regularly monitor your compost pile by checking its texture and aroma. If it feels dry, add water gradually while turning the pile to distribute moisture evenly. Conversely, if it becomes too wet, incorporate dry brown materials to absorb excess moisture. Striking the right balance will ensure that microorganisms thrive and efficiently break down organic matter.
Turning and Aerating Your Compost
Aeration is vital for promoting aerobic decomposition within your compost pile. Turning the pile regularly introduces oxygen into the mix, which is essential for aerobic microorganisms responsible for breaking down organic matter efficiently. Depending on the size of your pile and environmental conditions, turning may be necessary every few weeks or once every month.
When turning your compost, use a pitchfork or shovel to mix the materials thoroughly. This process not only aerates the pile but also helps redistribute moisture and temperature throughout the mixture. Additionally, turning allows you to monitor the progress of decomposition and identify any areas that may require adjustments in moisture or material balance.
Monitoring Temperature and Decomposition
Temperature monitoring is an integral part of successful composting that provides insights into microbial activity and decomposition progress. As microorganisms break down organic matter, they generate heat within the pile. A well-functioning compost pile typically reaches temperatures between 130°F (54°C) and 160°F (71°C), indicating active decomposition.
Using a compost thermometer can help you gauge internal temperatures accurately. If temperatures exceed 160°F (71°C), it may be necessary to turn the pile to prevent overheating and ensure continued microbial activity. Conversely, if temperatures drop below 100°F (38°C), it may indicate insufficient moisture or lack of nitrogen-rich materials. Regularly monitoring temperature allows you to make informed adjustments to optimize decomposition rates.
Knowing When Your Compost Is Ready to Use
Determining when your compost is ready for use involves assessing its appearance, texture, and aroma. Finished compost should have a dark brown color with a crumbly texture resembling rich soil. It should also have an earthy smell rather than any unpleasant odors associated with decomposition.
Typically, the composting process takes anywhere from several weeks to several months depending on factors such as temperature, material composition, and aeration practices. A good rule of thumb is that if you can no longer identify individual components within the pile and it has cooled down significantly from its peak temperature, it is likely ready for use in your garden.
Using Your Finished Compost in the Garden
Once your compost has matured into a nutrient-rich amendment, it can be utilized in various ways within your garden ecosystem. Incorporating finished compost into garden beds enhances soil structure by improving aeration and drainage while providing essential nutrients for plant growth.
You can apply finished compost as a top dressing around established plants or mix it into planting holes when starting new seedlings or transplants. Additionally, using compost as mulch helps retain soil moisture while suppressing weed growth. By integrating this organic amendment into your gardening practices, you contribute to sustainable agriculture while fostering healthy plant development.
In summary, composting is an invaluable practice that transforms organic waste into nutrient-rich soil amendments through natural decomposition processes involving microorganisms. By understanding key principles such as material selection, layering techniques, moisture management, aeration practices, temperature monitoring, and proper usage in gardening applications—individuals can effectively harness this eco-friendly method for enhancing soil health while reducing waste in landfills.
### FAQ Section
1. **What types of materials can I add to my compost?**
– You can add vegetable scraps, fruit peels, grass clippings, leaves, coffee grounds, eggshells, straw, cardboard (shredded), and small branches.
2. **Are there any materials I should avoid?**
– Yes! Avoid adding meat scraps, dairy products, oily foods, diseased plants, pet waste (from carnivores), and any synthetic materials.
3. **How often should I turn my compost?**
– It’s recommended to turn your compost every 2-4 weeks depending on environmental conditions and pile size.
4. **What if my compost smells bad?**
– A foul odor usually indicates anaerobic conditions due to excess moisture or insufficient aeration; turning the pile and adding dry brown materials can help rectify this issue.
5. **How long does it take for compost to mature?**
– Compost can take anywhere from 3 months to 1 year to mature depending on factors like temperature, material composition, aeration practices, and moisture levels.
6. **Can I use finished compost immediately?**
– Yes! Once your compost has matured into a dark crumbly substance with an earthy smell—it’s ready for use in your garden.
7. **Is it necessary to buy a commercial composter?**
– No! While commercial options provide convenience and efficiency features—homemade bins or piles work just as effectively if managed properly.
8. **Can I compost during winter?**
– Yes! Composting can continue during winter months; however, decomposition may slow down due to lower temperatures—insulating your pile can help maintain warmth.
9. **What are some signs my compost is ready?**
– Finished compost will have a dark color resembling rich soil with no identifiable food scraps; it should also emit an earthy aroma rather than unpleasant odors.
10. **How do I store excess finished compost?**
– Store excess finished compost in a dry area away from direct sunlight; using breathable containers like burlap sacks allows airflow while preventing moisture buildup.
By following these guidelines on effective composting practices—from understanding basic principles through utilizing finished product—you can contribute positively towards sustainable gardening efforts while minimizing waste generation!
FAQs
What materials can I use to make compost at home?
You can use a variety of organic materials to make compost, including kitchen scraps like fruit and vegetable peels, coffee grounds, eggshells, and yard waste such as grass clippings, leaves, and small branches. Avoid using meat, dairy, and oily foods as they can attract pests and create odors.
How long does it take for compost to be ready?
The time it takes for compost to be ready can vary depending on factors such as the materials used, the composting method, and environmental conditions. Generally, it can take anywhere from 2 to 6 months for compost to fully decompose and be ready for use in your garden.
What is the ideal ratio of green to brown materials?
The ideal ratio of green (nitrogen-rich) to brown (carbon-rich) materials is typically around 1:3. This means for every one part of green materials, you should use three parts of brown materials. This balance helps to create a healthy compost environment that promotes decomposition.
How often should I turn my compost pile?
It is recommended to turn your compost pile every 2 to 4 weeks. Turning the pile aerates it, helping to speed up the decomposition process and ensuring that all materials break down evenly. If your compost is not heating up, more frequent turning may be necessary.
Can I compost in an apartment or small space?
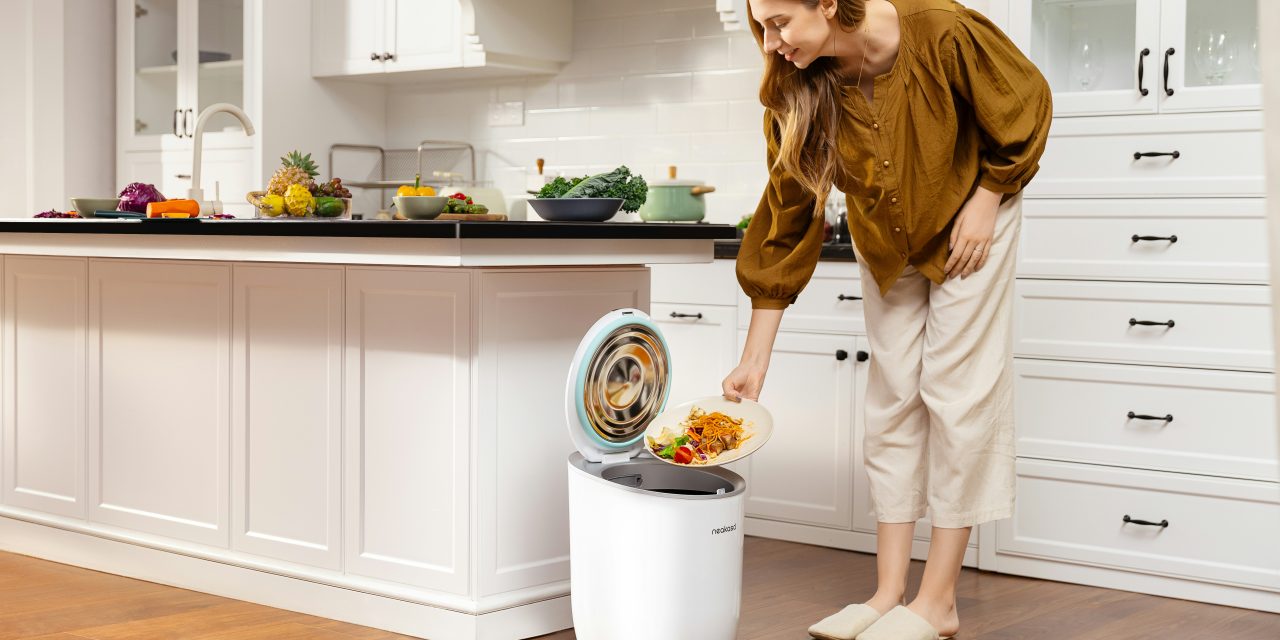
Yes, you can compost in an apartment or small space using methods such as vermicomposting (using worms) or bokashi composting (a fermentation process). There are also compact compost bins designed for small spaces that can help you manage kitchen scraps effectively.