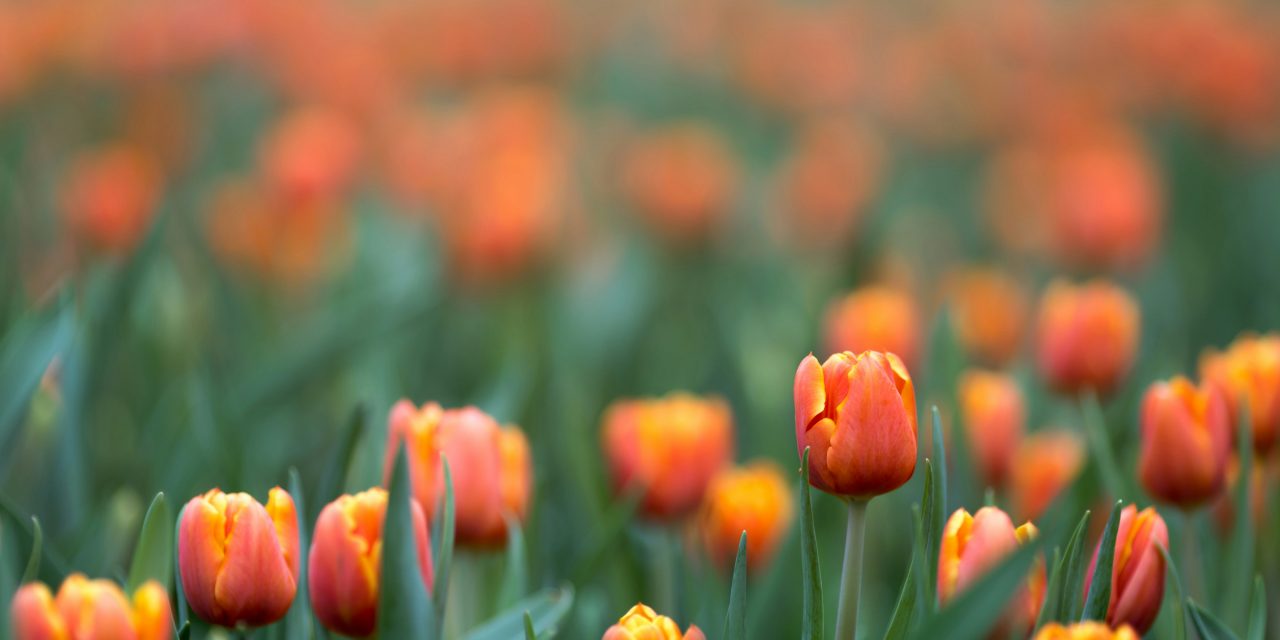
Selecting the appropriate tulip bulbs is paramount for achieving a vibrant and flourishing garden. Tulips are available in a myriad of varieties, each exhibiting unique colors, shapes, and blooming times. When choosing bulbs, consider factors such as climate, soil type, and the overall aesthetic you wish to create. For instance, Darwin Hybrid tulips are renowned for their robust nature and longevity, making them ideal for beginners. On the other hand, Triumph tulips offer a classic shape and are perfect for creating a traditional garden look.
Additionally, it is crucial to inspect the bulbs before purchasing. Healthy bulbs should be firm to the touch, free from mold or soft spots, and exhibit a rich color. Avoid bulbs that appear shriveled or have visible signs of damage. The size of the bulb also plays a significant role; larger bulbs typically yield more substantial flowers. Therefore, investing in high-quality bulbs will significantly enhance your garden’s visual appeal.
Selecting the Perfect Planting Location
The location where tulips are planted can greatly influence their growth and flowering potential. Tulips thrive in areas that receive full sunlight for at least six hours daily. A well-drained site is essential to prevent bulb rot, which can occur in overly saturated soil. Consider areas that are slightly elevated or have sandy loam soil, as these conditions promote optimal drainage.
Moreover, it is beneficial to assess the surrounding environment. Tulips can be susceptible to strong winds, which may damage their delicate stems. Planting them near a natural windbreak, such as a hedge or fence, can provide necessary protection. Additionally, consider companion planting; pairing tulips with perennials or annuals that bloom at different times can create a continuous display of color throughout the growing season.
Preparing the Soil for Tulip Bulbs

Soil preparation is a critical step in ensuring the successful growth of tulip bulbs. Begin by testing the soil pH; tulips prefer slightly acidic to neutral soil (pH 6.0 to 7.0). If necessary, amend the soil with lime to raise pH or sulfur to lower it. Furthermore, incorporating organic matter such as compost or well-rotted manure can enhance soil fertility and structure.
Once the pH is adjusted, it is essential to till the soil to a depth of at least 12 inches. This process aerates the soil and allows for better root penetration. Remove any weeds or debris that may compete with the tulips for nutrients and water. Additionally, consider adding a balanced fertilizer high in phosphorus to promote strong root development. This preparation will create an ideal environment for your tulip bulbs to thrive.
Timing Your Tulip Bulb Planting

Timing is crucial when it comes to planting tulip bulbs. Ideally, bulbs should be planted in the fall, approximately six to eight weeks before the ground freezes. This timing allows the bulbs to establish roots before winter sets in. In regions with milder winters, planting can occur as late as November; however, in colder climates, aim for early October.
Monitoring soil temperature is also essential; tulips prefer soil temperatures between 50°F and 60°F for optimal growth. If you live in an area with fluctuating temperatures, consider using a soil thermometer to ensure conditions are suitable for planting. Proper timing not only enhances bulb development but also ensures a stunning spring display.
Gathering Necessary Tools and Materials
Before embarking on your tulip planting journey, gather all necessary tools and materials to streamline the process. Essential tools include a trowel or bulb planter for digging holes, a garden fork for loosening soil, and a rake for leveling the planting area. Additionally, gloves are recommended to protect your hands while handling bulbs and soil.
In terms of materials, ensure you have high-quality tulip bulbs suited to your climate and aesthetic preferences. A balanced fertilizer specifically formulated for flowering plants will also be beneficial during planting. Lastly, mulch material such as straw or shredded leaves can help retain moisture and regulate soil temperature after planting.
Digging Proper Holes for Bulb Placement
Creating appropriate holes for tulip bulbs is vital for their successful growth. The general rule of thumb is to plant bulbs at a depth that is three times their height. For example, if a bulb measures two inches tall, it should be planted approximately six inches deep. This depth protects the bulbs from temperature fluctuations and provides adequate space for root development.
When digging holes, ensure they are spaced adequately apart—typically around 4 to 6 inches between each bulb—to allow for proper air circulation and growth. Use a trowel or bulb planter to create uniform holes, ensuring they are deep enough to accommodate the entire bulb without crowding. This attention to detail will foster healthy growth and vibrant blooms come springtime.
Planting Tulip Bulbs at the Correct Depth
Once holes have been dug, it is time to plant the tulip bulbs at the correct depth. Place each bulb in its hole with the pointed end facing upwards; this orientation encourages proper sprouting. Gently cover the bulb with soil, ensuring there are no air pockets that could hinder growth.
After covering the bulbs, lightly press down on the soil to secure them in place. This action helps eliminate any gaps that could lead to moisture loss or pest infiltration. It is essential not to compact the soil too tightly; doing so may restrict root expansion and water absorption.
Spacing Bulbs for Optimal Growth and Bloom
Proper spacing between tulip bulbs is crucial for achieving optimal growth and bloom quality. When planting, aim for a distance of 4 to 6 inches apart; this spacing allows each bulb sufficient room to develop without competing for nutrients or water. In larger beds or borders, consider grouping bulbs in clusters rather than planting them in straight lines; this technique creates a more natural appearance and enhances visual impact.
Additionally, consider varying the heights and colors of different tulip varieties within your planting scheme. This diversity not only adds interest but also ensures that as one variety fades, another may be coming into bloom, providing continuous color throughout the spring season.
Watering and Mulching After Planting
After planting tulip bulbs, proper watering is essential to encourage root establishment. Water thoroughly immediately after planting to ensure that moisture reaches the bulb’s base. However, avoid overwatering; excessive moisture can lead to bulb rot and fungal diseases. A general rule is to keep the soil consistently moist but not soggy during the initial growth phase.
Applying mulch after planting serves multiple purposes: it helps retain moisture, suppresses weed growth, and regulates soil temperature during fluctuating weather conditions. Organic mulches such as shredded leaves or straw are excellent choices as they break down over time and enrich the soil with nutrients.
Protecting Bulbs from Pests and Harsh Weather
Tulips can be vulnerable to various pests and harsh weather conditions that may threaten their growth and blooming potential. Common pests include aphids, slugs, and squirrels that may dig up or consume bulbs before they have a chance to sprout. Implementing protective measures such as using physical barriers like mesh netting can deter these pests effectively.
In addition to pest control, consider environmental factors such as frost or heavy rainfall that may damage emerging shoots. Using frost cloths during unexpected cold snaps can provide necessary protection while allowing light and moisture penetration. Furthermore, ensuring proper drainage will help mitigate issues related to heavy rainfall.
Tips for Maintaining Tulip Beds Through Winter
Maintaining tulip beds during winter is essential for ensuring healthy blooms come springtime. After the foliage has died back post-blooming season, refrain from cutting it back immediately; this green matter continues photosynthesis and nourishes the bulb for next year’s growth.
Consider applying a layer of mulch over your tulip beds during winter months; this practice insulates the soil against extreme temperature fluctuations while preventing weed growth. Regularly check for signs of pests or disease throughout winter months; early intervention can prevent significant damage when spring arrives.
In summary, cultivating tulips requires careful planning and execution from selecting quality bulbs to maintaining them through winter months. By following these guidelines—choosing suitable varieties, preparing soil adequately, timing planting correctly, and protecting against pests—you can create a stunning display of color in your garden each spring season. With attention to detail and proper care, your tulip beds will flourish year after year.
### FAQ Section
1. **When should I plant tulip bulbs?**
– Tulip bulbs should ideally be planted in fall, about six to eight weeks before the ground freezes.
2. **How deep should I plant tulip bulbs?**
– Plant bulbs at a depth approximately three times their height; typically around 6-8 inches deep.
3. **What type of soil do tulips prefer?**
– Tulips thrive in well-drained soil with a slightly acidic to neutral pH (6.0-7.0).
4. **How much sunlight do tulips need?**
– Tulips require full sunlight for at least six hours daily for optimal growth.
5. **What should I do if my tulips don’t bloom?**
– Ensure they receive adequate sunlight and water; check for pests or diseases that may hinder growth.
6. **Can I plant tulips in pots?**
– Yes! Tulips can be successfully grown in pots as long as they have sufficient drainage.
7. **How do I protect my tulips from pests?**
– Use physical barriers like mesh netting or apply organic pest deterrents as needed.
8. **Should I fertilize my tulips?**
– Yes! A balanced fertilizer high in phosphorus can promote strong root development when planting.
9. **What do I do with tulip foliage after blooming?**
– Allow foliage to die back naturally before cutting it back; this nourishes the bulb for next year’s growth.
10. **How can I ensure my tulips come back year after year?**
– Proper care including watering during dry spells and mulching during winter will help ensure perennial blooms.
In conclusion, by adhering to these comprehensive guidelines on selecting bulbs, preparing soil, timing planting accurately, and maintaining care throughout winter months, you can cultivate an enchanting display of tulips that will enhance your garden’s beauty year after year.
FAQs
When is the best time to plant tulip bulbs in the fall?
The best time to plant tulip bulbs in the fall is typically between mid-September and mid-November, depending on your climate. It’s important to plant them before the ground freezes, allowing the bulbs to establish roots before winter.
How deep should tulip bulbs be planted?
Tulip bulbs should be planted at a depth of about 6 to 8 inches. A general rule of thumb is to plant them three times as deep as the bulb’s height. This depth helps protect the bulbs from extreme temperatures and ensures proper growth.
What type of soil is best for planting tulip bulbs?
Tulips prefer well-draining soil that is rich in organic matter. A sandy or loamy soil is ideal, as it prevents water from pooling around the bulbs, which can lead to rot. Adding compost can improve soil quality and drainage.
How should tulip bulbs be spaced when planting?
When planting tulip bulbs, they should be spaced about 4 to 6 inches apart. This spacing allows for adequate air circulation and room for the bulbs to grow without overcrowding, which can lead to disease and poor flowering.
Should tulip bulbs be fertilized when planted in the fall?
Yes, it is beneficial to fertilize tulip bulbs at the time of planting. Using a balanced, slow-release fertilizer can provide essential nutrients that promote healthy root development. However, avoid over-fertilizing, as this can harm the bulbs.