Most of the swirl marks you see on a dark car in direct sun were not put there by the road. They were put there by a wash, usually one done with good intentions: a dirty sponge, a bucket of gritty water, a dry towel dragged across a panel that still had a film of dust on it. Paint is tougher than it looks, but the clear coat on top is only a couple of thousandths of an inch thick, and every grain of sand you grind across it leaves a tiny scratch behind.
The good news is that washing a car safely does not take special gear or a whole Saturday. It takes the right order of operations, clean water, soft materials, and a little patience in the places where dirt hides. This guide walks through the whole process from choosing a spot to drying the last drop, explains why each step matters, and covers the mistakes that cause most paint damage at home.
Key takeaways
- Wash in the shade on a cool panel, and rinse thoroughly before anything touches the paint.
- Use two buckets, one for soapy water and one for rinsing your mitt, so grit never goes back onto the car.
- Work top to bottom and wash wheels first with their own tools.
- Use a car wash soap made for automotive paint, never dish soap as a routine wash.
- Dry with plush microfiber, blotting or gently dragging, and swap towels as they get damp.
- Drop a mitt or towel on the ground and it is finished for that wash until it has been laundered.
Why washing causes scratches in the first place
How a clear coat gets marred
Modern paint is layered. There is primer, a color coat, and a transparent clear coat on top that gives gloss and protects the color. When people talk about swirls, they mean thousands of hairline scratches in that clear coat. Each one is invisible alone, but together they scatter light in circles around a bright source such as the sun or a streetlight.
Scratches happen when a hard particle is trapped between the paint and whatever is moving across it. Road film, brake dust, sand, and dried mud all qualify. If the wash media pushes those particles around instead of lifting them away, the paint takes the damage.
Where the grit actually comes from
The dirtiest areas of a car are the lower third of the doors, the rocker panels, the bumpers, and the wheels. Water and a mitt that touches those spots will pick up the most abrasive material. If that same mitt then goes back up to the hood, you have just carried the worst of the car onto the best of the paint. Nearly every safe-wash technique exists to prevent exactly that.
Why hand washing still beats a lot of shortcuts
A careful hand wash lets you control contact, water, and material. Many drive-through washes with spinning brushes reuse the same media on hundreds of cars, and old, gritty brushes are a common source of fine scratches. Touchless washes avoid contact but often rely on stronger chemicals and leave film behind. Neither is a disaster for an occasional rinse in winter, but for regular care, washing by hand is gentler when it is done properly.
What you need before you start
The basic kit
You do not need a garage full of products. A modest, sensible setup looks like this:
- Two 5-gallon (19 L) buckets, ideally one marked for soap and one for rinse.
- A grit guard or simple insert for the bottom of each bucket, which keeps settled dirt from being stirred back up.
- A pH-balanced car wash soap made for automotive finishes.
- One or two wash mitts in microfiber or chenille, plus a separate cheaper mitt or brush for wheels and lower panels.
- A garden hose with a spray nozzle that has gentle flat and shower settings.
- Several large, soft microfiber drying towels, or a dedicated drying towel plus extras.
- A soft brush for wheel faces and tire sidewalls, and a narrow brush for lug nut recesses and barrels.
- Clean, dry microfiber cloths for door jambs and glass.
Why not dish soap
Dish soap is designed to strip grease from plates, and it does the same to wax and sealant on paint. An occasional dish soap wash is sometimes used on purpose when someone wants to remove old protection before polishing, but as a regular wash product it shortens the life of whatever is protecting your finish. Automotive soap is formulated to lubricate the surface so the mitt glides, and to rinse cleanly without leaving residue.
What to avoid in your supplies
- Old bath towels, T-shirts, and kitchen sponges. Their fibers are coarse, and sponges trap grit against the paint rather than pulling it inside.
- Chamois leather or squeegee blades for drying. A trapped particle drags straight across the finish.
- Any towel that has been used on wheels, tailpipes, or engine parts. Keep those in a separate bin.
- Household glass cleaners with ammonia on tinted windows. Check what your tint and your car manufacturer say before using them.
Choosing the right time and place
Shade and temperature
Wash in the shade, early in the morning or in the evening if you can. Sun and heat dry soap and water onto the paint in seconds, which causes spots and makes the mitt drag. Panels that are hot to the touch should cool before you wash. If you can comfortably leave your hand on the hood for ten seconds, it is cool enough.
Where the runoff goes
Wash water carries soap, oil, heavy metals from brake dust, and road grime. In the United States, water that runs into a storm drain generally goes straight to local streams without treatment. If you can, wash on a lawn or gravel area so the soil can filter it, or use a commercial car wash that recycles and treats its water. Check any local rules about washing on the street or driveway, since some communities restrict it.
Surface and safety
Park on level ground, set the parking brake, and keep the doors, trunk, and windows fully closed. Keep keys and electronics out of your pockets. If you will be washing near power lines, outdoor outlets, or an extension cord, keep the cord and any plugged-in equipment away from standing water.
Step-by-step: the two-bucket wash
Step 1: Wheels and tires first
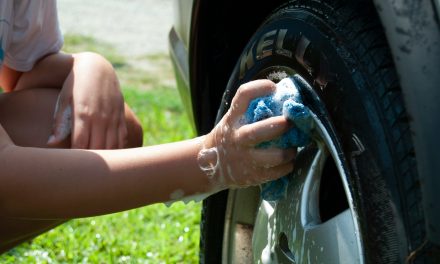
Wheels are the dirtiest part of the car, and they throw splash back onto clean paint. So clean them first, with their own mitt or brushes and a separate small bucket if you have one. Rinse the wheel well, spray a wheel-safe cleaner according to the label, agitate with a soft brush, and rinse thoroughly. Check your wheel finish first, because polished aluminum, chrome, and some painted wheels can be damaged by harsh or acidic cleaners.
Work on one wheel at a time and only when the wheel is cool. Brake components can get extremely hot, and cold water on hot rotors is not good for them. After a drive, give the car at least 20 to 30 minutes before you start on the wheels.
Step 2: Pre-rinse from the top down
Before any contact, rinse the whole car. Start at the roof and work downward, letting gravity pull loose dirt off the body. Pay extra attention to the lower panels, bumpers, wheel arches, and the seams around mirrors and trim. The goal is to knock off as much sand and grit as possible so the mitt never has to deal with it.
A garden hose with a firm shower setting is enough. A pressure washer helps, but keep the nozzle at least 12 inches (30 cm) from paint and use a wide fan tip, never a pinpoint. Be careful around chipped paint, peeling clear coat, window seals, and badges, because a strong jet can lift them. If the car is heavily soiled, rinse twice, with a minute between passes, so the water has time to soften the dirt.
Step 3: Set up the buckets
Fill one bucket with clean water and the soap amount listed on the bottle. Fill the second with plain clean water for rinsing. Put a grit guard in each bucket if you have them. A strong stream into the soap bucket will build suds, which is helpful but not required. Slippery water matters more than foam.
Step 4: Wash one panel at a time, top to bottom
Dunk the mitt in the soap bucket, then wash a single panel with light pressure. Use straight lines, front to back on the hood and roof and side to side on doors, rather than circles. Straight passes make any scratches that do occur less visible than circular swirls. Let the mitt and the soap do the work. If you are pressing hard, there is probably dried-on dirt that needs another soak instead of more force.
After each panel, and before returning to the soap, rinse the mitt in the clean water bucket. Rub it against the grit guard, wring it gently, then go back to the soap bucket. This one habit is the single biggest difference between a safe wash and a risky one. The rinse bucket will look gray by the end, which is how you know it is working.
Step 5: Work in a sensible order
A good sequence runs from least dirty to most dirty:
- Roof
- Glass and upper pillars
- Hood and trunk
- Upper half of doors and fenders
- Lower half of doors and fenders
- Front and rear bumpers
- Rocker panels and lower trim
Swap to a fresh mitt, or at least rinse the one you have very thoroughly, before you reach the lowest parts. If the mitt touches the ground at any time, set it aside. Tiny stones embed in the fibers, and washing it later in the laundry is the only safe reset.
Step 6: Keep the car wet
Do not let soap dry on the paint. If you are washing a large vehicle or the weather is warm, rinse each section after washing it, rather than waiting until the end. If you notice soap starting to dry, spray it off at once and continue.
Step 7: Final rinse
Rinse from the top down, until no suds remain anywhere. Check around mirrors, badges, door handles, fuel door, and trim edges, where soap likes to hide and later runs down in streaks. For the last pass, some people remove the nozzle and let water flow in a sheet over the panels. This helps most of the water run off in one layer, which leaves less to dry by hand.
Drying without adding scratches
Choose the right towel
A plush microfiber drying towel absorbs a lot of water and has deep fibers where stray particles can settle instead of dragging on the paint. Use a large towel for big panels and smaller ones for detail areas. Fold the towel into quarters so you have several clean faces to rotate through.
Blot, glide, and never scrub
Lay the towel flat on the panel and pull it gently toward you, or pat it down and lift. Do not rub in circles and do not press down. If the towel feels draggy, it is saturated, so grab a fresh one. Two or three damp towels are far better than one soaked towel pushing grit around.
Dry the roof and glass first, then hood and trunk, then the sides. Dry lower panels with a separate, older towel, since they carry the most residue. Open the doors, hood, and trunk and wipe the jambs, sills, and edges with a dedicated cloth so water does not drip out on your clean paint after you finish.
Other ways to dry
A leaf blower or an air blower with a clean nozzle is a gentle, touch-free way to push water out of mirrors, grilles, emblems, wheel lug holes, and fuel doors. If the hose water in your area is very hard, drying promptly matters more, because mineral spots form as droplets evaporate. Some people finish with a spray designed for use on a damp car, which adds lubrication and makes towel drying gentler. Follow the label directions and use it on a clean car only.
Wheels, glass, and trim
Glass
Clean windows after you wash the paint, with a clean microfiber cloth and an automotive glass cleaner that is safe for tint if your car has aftermarket film. Wipe in one direction on the outside and the perpendicular direction on the inside, so you can tell which side a streak is on. Do not let cleaner run onto dashboards or leather.
Tires and rubber trim
Scrub tire sidewalls with a soft brush and a tire-safe cleaner or the same soap. Rinse well. If you like a dressing, apply a thin coat to an applicator, not the tire, to avoid sling onto paint. Skip dressings on the tread, and keep them off brake parts. Slippery tires are a hazard.
Door jambs and fuel door
Wipe these with a damp microfiber cloth. Little details like clean jambs make the entire car feel finished, and the dirt in them is exactly the dirt that ends up on your sleeves.
How often to wash
For most drivers, every two weeks is a sensible baseline. Wash more often when the car faces corrosive or sticky contaminants: winter road salt, tree sap, bird droppings, and bug splatter, as well as coastal salt air. In snow country, rinse the undercarriage whenever temperatures rise above freezing, because salt left in place speeds up rust. If the car sits outdoors under a tree, a quick rinse once a week prevents the worst buildup.
| Situation | Suggested frequency | Why |
|---|---|---|
| Garaged, light driving | Every 3 to 4 weeks | Mostly dust, easy to remove |
| Daily commuter | Every 2 weeks | Road film builds steadily |
| Winter with road salt | Every 1 to 2 weeks when possible | Salt promotes corrosion |
| Parked under trees or near water | Rinse weekly, wash as needed | Sap, pollen, and droppings etch paint |
| Coastal climate | Every 1 to 2 weeks | Salt air settles on every surface |
Protecting the finish after a wash
Why protection matters
A wash removes dirt but it does not add protection. A layer of wax, sealant, or coating on top of the clear coat gives dirt a slick surface to slide off and makes the next wash easier. It also takes the brunt of UV light and contaminants so the paint underneath does not have to.
How to think about the options
- Natural waxes give a warm gloss and are easy to apply, but last a few weeks to a few months.
- Synthetic sealants typically last longer, often several months, and are simple to use.
- Ceramic-type coatings can last much longer but need careful surface prep, and results depend heavily on application. If you are unsure, a professional installer may be a better choice than a first try.
Whatever you choose, apply it to a clean, dry, cool panel, in thin coats, and follow the label for cure time and removal. Thick layers are harder to buff off and do not add protection.
What about clay and polish
If the paint feels rough after washing, run your fingertips over it inside a thin plastic sandwich bag. Gritty texture usually means bonded contamination that a normal wash will not remove. A clay bar or clay mitt with plenty of lubricant can lift it, and polish can reduce light swirls. These steps are optional and require care. If you have deep scratches that catch a fingernail, a body shop can advise you, because polishing will not fix damage that has gone through the clear coat.
Washing in special situations
Very dirty or muddy cars
Start with a long, patient rinse, and be prepared to rinse the wheel wells and underbody several times. If a heavy layer of mud is baked on, soften it with water first and give it a few minutes. Do not wipe dry mud with a mitt. Many people use a foam pre-soak that clings to the surface and loosens grit before any contact, which is helpful but not required.
Matte and satin finishes
Matte paint and wrapped finishes should not be waxed or polished, since that adds gloss and uneven shine. Use products labeled for matte finishes, avoid friction, and follow the manufacturer’s care guide. Dry gently with blotting only.
Convertible tops and soft fabric roofs
Use a soft brush, mild soap, and plenty of water, then follow the top manufacturer’s instructions on protectants. Avoid pressure washers on seams, and never use harsh cleaners that could degrade stitching or window film.
Trucks, vans, and tall vehicles
Use a stable step stool rather than a ladder when possible, keep your feet dry, and avoid leaning over the roof. If you must climb on anything to reach a roof, make sure the surface is dry and stable, and ask someone to spot you. A long-handled soft brush can save you a fall.
Engine bay
Skip a casual spray down. Water can damage electrical connectors, alternators, air intakes, and sensors. If your owner’s manual allows cleaning, do it with the engine cold, cover sensitive parts, use low pressure, and let everything dry thoroughly before starting. When in doubt, have a technician clean it.
Electric and hybrid vehicles
Exterior washing is generally the same, but check the owner’s manual for any special instructions, such as putting the car into a car wash mode, disabling auto wipers, or keeping the charge port closed. Do not spray high-pressure water directly into charge ports, vents, or underbody battery areas.
Common mistakes
- Washing in direct sun or on a hot panel, which dries soap into spots.
- Skipping the pre-rinse and putting a mitt straight onto a sandy car.
- Using one bucket, so the same dirty water goes back on the paint every time.
- Using the same mitt on wheels and paint.
- Washing in circles instead of straight lines.
- Pressing hard on stubborn spots instead of soaking them.
- Using a dropped mitt or towel without cleaning it.
- Drying with a coarse towel, a squeegee, or a dry chamois on a gritty surface.
- Letting a wet car air dry in the sun, which leaves mineral spots.
- Pointing a pressure washer at close range at trim, seals, or chipped paint.
- Using household cleaners with strong solvents or ammonia on paint, glass, or plastics.
- Putting tire dressing on the tread or brake components.
A realistic example
Picture a gray crossover that commutes daily and parks outside. It has two weeks of road film, a few bug marks on the bumper, and a light layer of pollen. A good wash looks like this: park in the shade at 7:30 in the morning, rinse the wheels and clean them with the dedicated brush, then pre-rinse the body from the roof down for a couple of minutes. Fill two buckets, wash the roof, glass, hood, and upper doors, rinse the mitt after each panel, and finish with the lower panels and bumpers using a second mitt. Rinse until the water sheets off, then blot dry with two microfiber towels, wipe the jambs, and clean the glass.
That whole process takes roughly 45 minutes to an hour for a sedan or crossover, and most of the paint damage you would otherwise cause is avoided in the first three minutes of rinsing.
When to call a professional
- You see peeling, flaking, or bubbling clear coat or paint, which can spread if left alone.
- Scratches are deep enough that your fingernail catches, or you can see primer or bare metal. Rust can start quickly.
- Stains or etched marks from sap, droppings, or chemicals do not come off after careful washing and a gentle treatment.
- You want paint correction, ceramic coating, or paint protection film, where technique and prep matter a lot.
- Water gets inside the cabin or you notice warning lights, electrical faults, or odd noises after washing. Have a certified mechanic or technician check it, and never ignore a red warning light.
- You are unsure how to wash a specialty finish, a wrapped car, an exotic vehicle, or an electric vehicle’s underbody area.
Also remember that your owner’s manual is the final word on wash procedures for your specific vehicle, especially for sensors, cameras, and charge ports.
Frequently asked questions
Is it okay to wash a car in the rain or just after rain?
Rain does not clean a car. It spreads dust and pollutants, and drying raindrops leave spots. A light rain is not a problem for washing, but avoid washing with a hot engine or hot panels. Always rinse well first.
How long should I wait to wash a car after waxing or painting?
For wax and sealants, follow the product label, which often says to avoid harsh washing for a day or so. For fresh paint, body shops usually advise waiting weeks before waxing and being gentle with washing. Ask your shop for exact timing.
Can I wash my car with just water?
Plain water removes loose dust, but it will not lift road film. A quick rinse is better than nothing between washes, but do not wipe a dry or dusty car with a towel.
Are automatic car washes safe for paint?
Many are fine for occasional use, especially touchless ones. Older brush washes can leave fine scratches if the brushes are dirty. If you use one, check that equipment looks clean and well maintained, and fold in mirrors if the manual says so.
How do I avoid water spots?
Wash in the shade, rinse completely, and dry promptly with clean microfiber. If your water is hard, an air blower and a final towel pass will help.
Do I need a pressure washer?
No. A garden hose with a good nozzle does the job. A pressure washer can speed up rinsing, but it must be used carefully, with a wide fan and distance.
What should I do if I drop my wash mitt?
Stop using it on the paint. Rinse it, and put it in the laundry or swap to a clean mitt. A single stone caught in the fibers can cut a long scratch.
How often should I wax or seal my car?
It depends on the product and climate. Water that no longer beads on the surface is a good sign that protection is wearing thin. Many people reapply every few months.
A good wash is mostly about restraint: gentle contact, clean water, and plenty of rinsing before you touch anything. Do it that way a few times and it becomes a relaxed routine, one that keeps your paint looking sharp for years and leaves you with a car you are glad to walk up to.